


Josephine
Newborn Photography
July 2025
BLOG
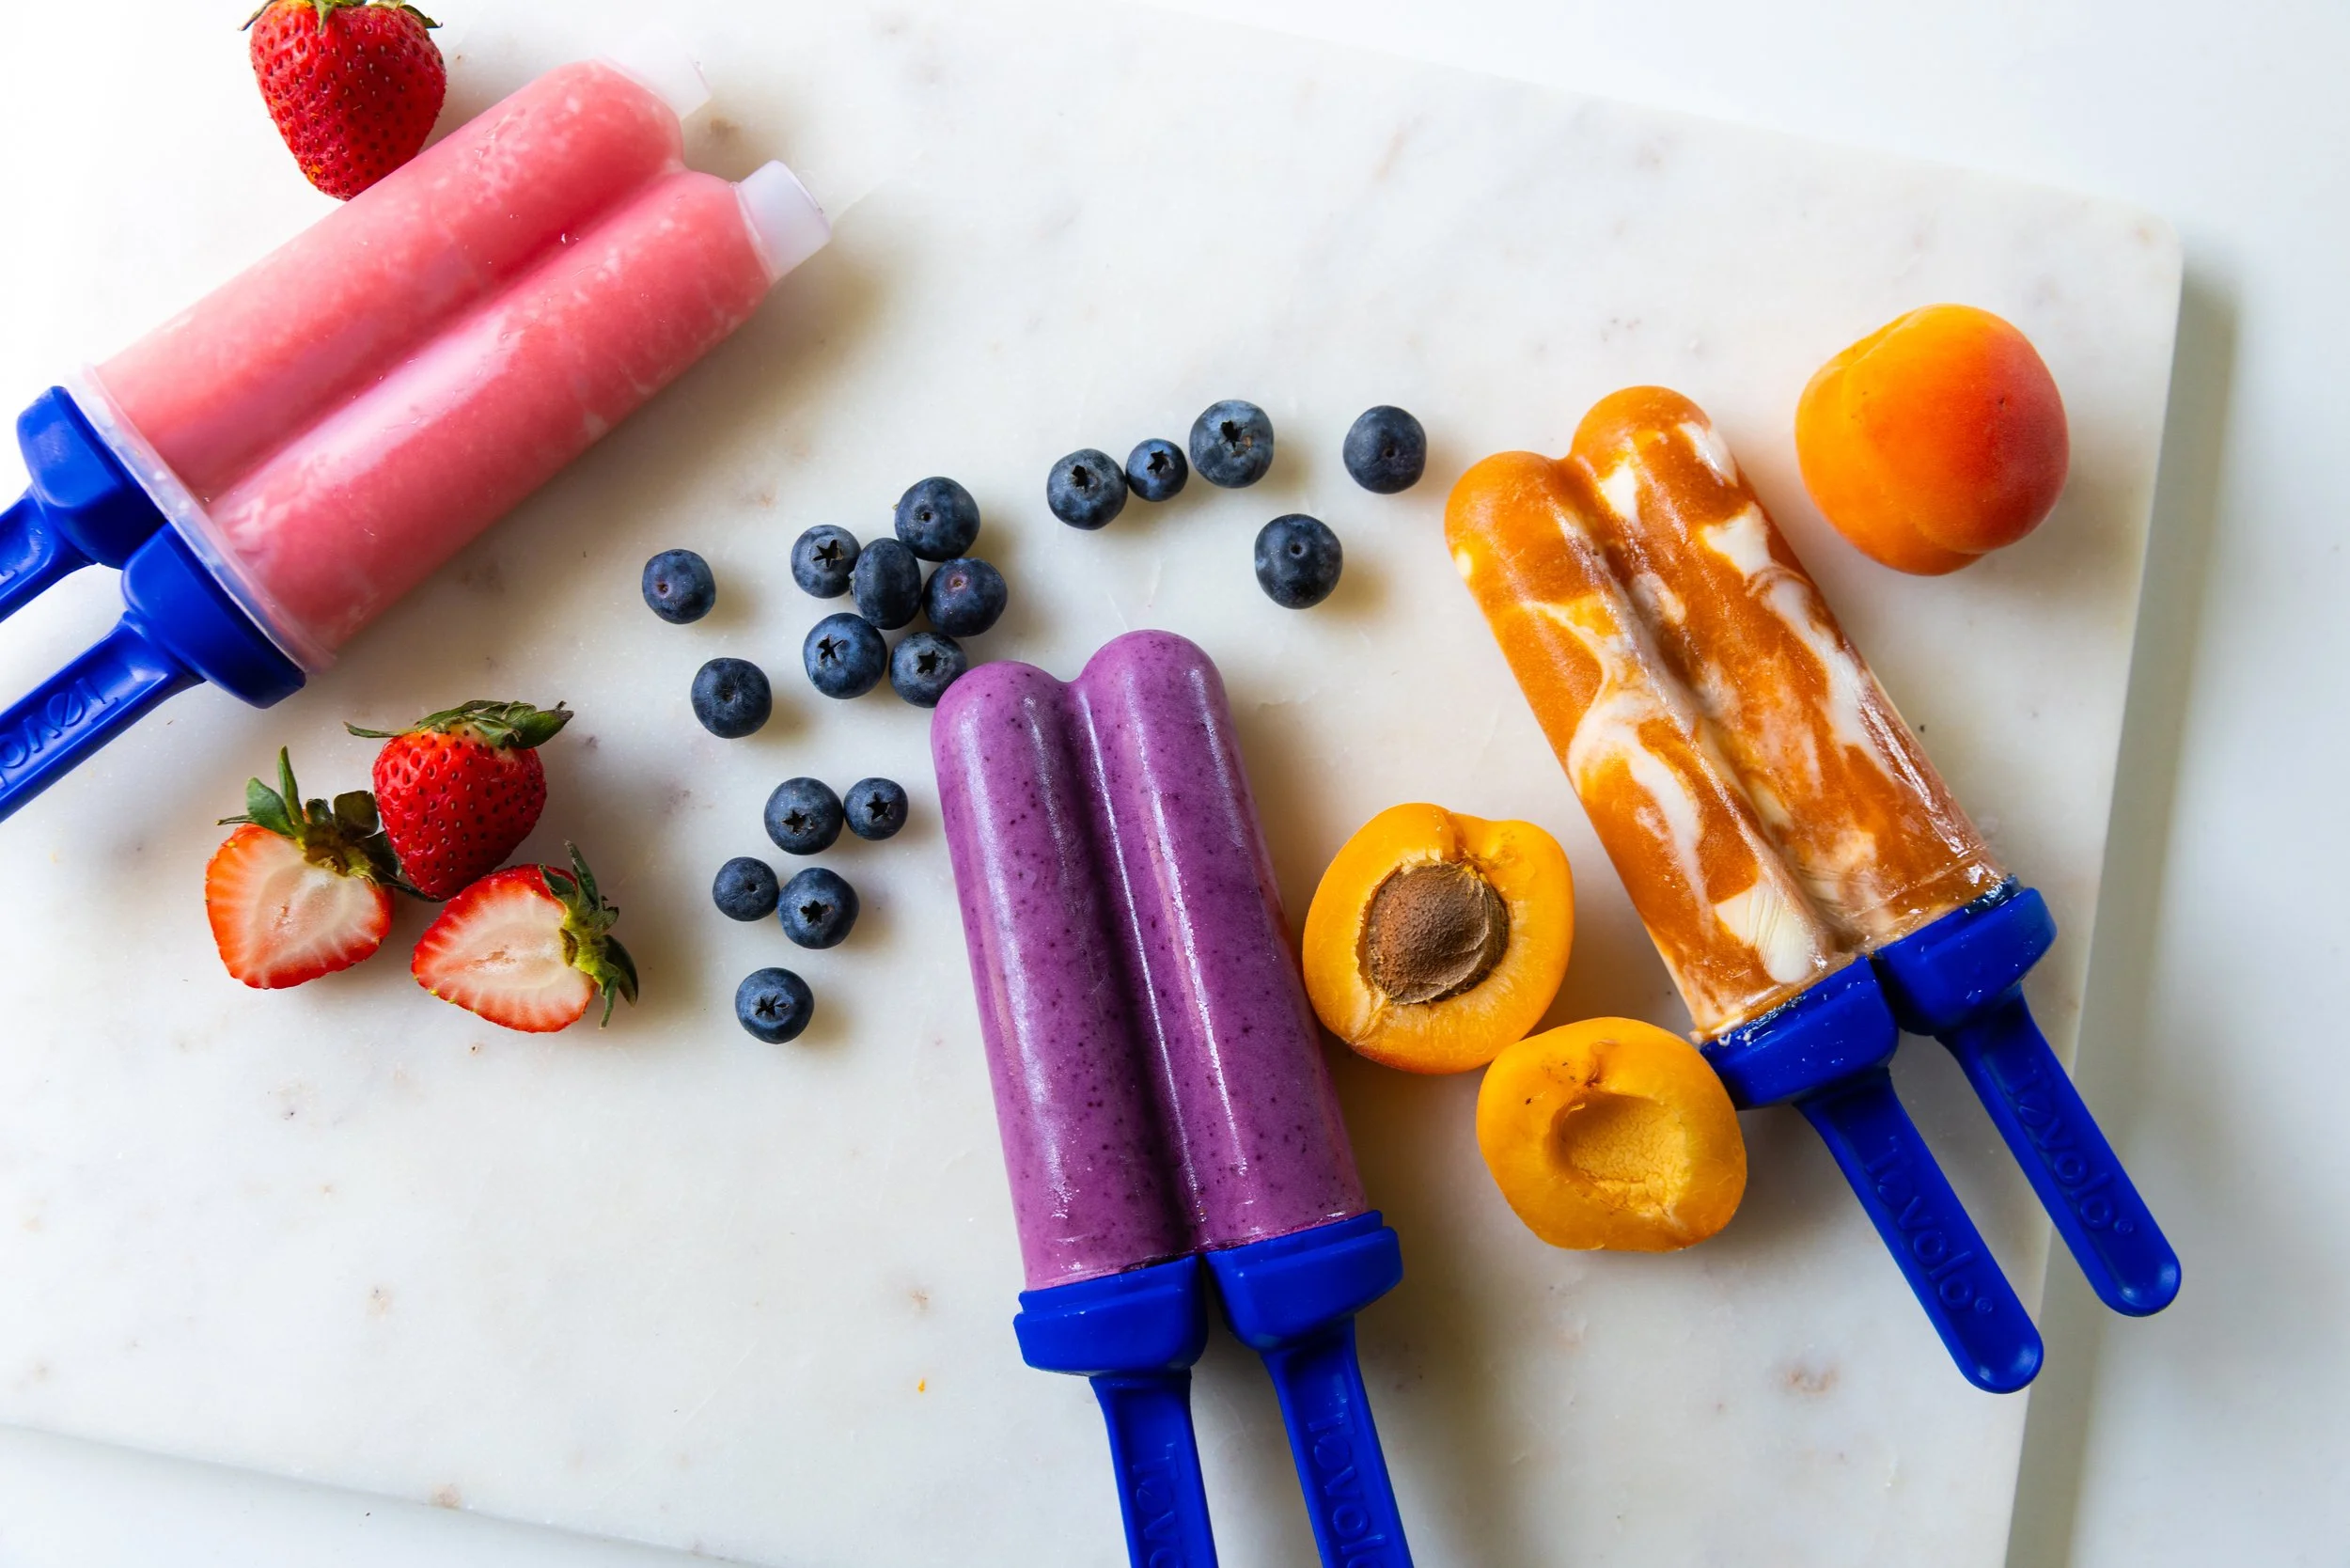
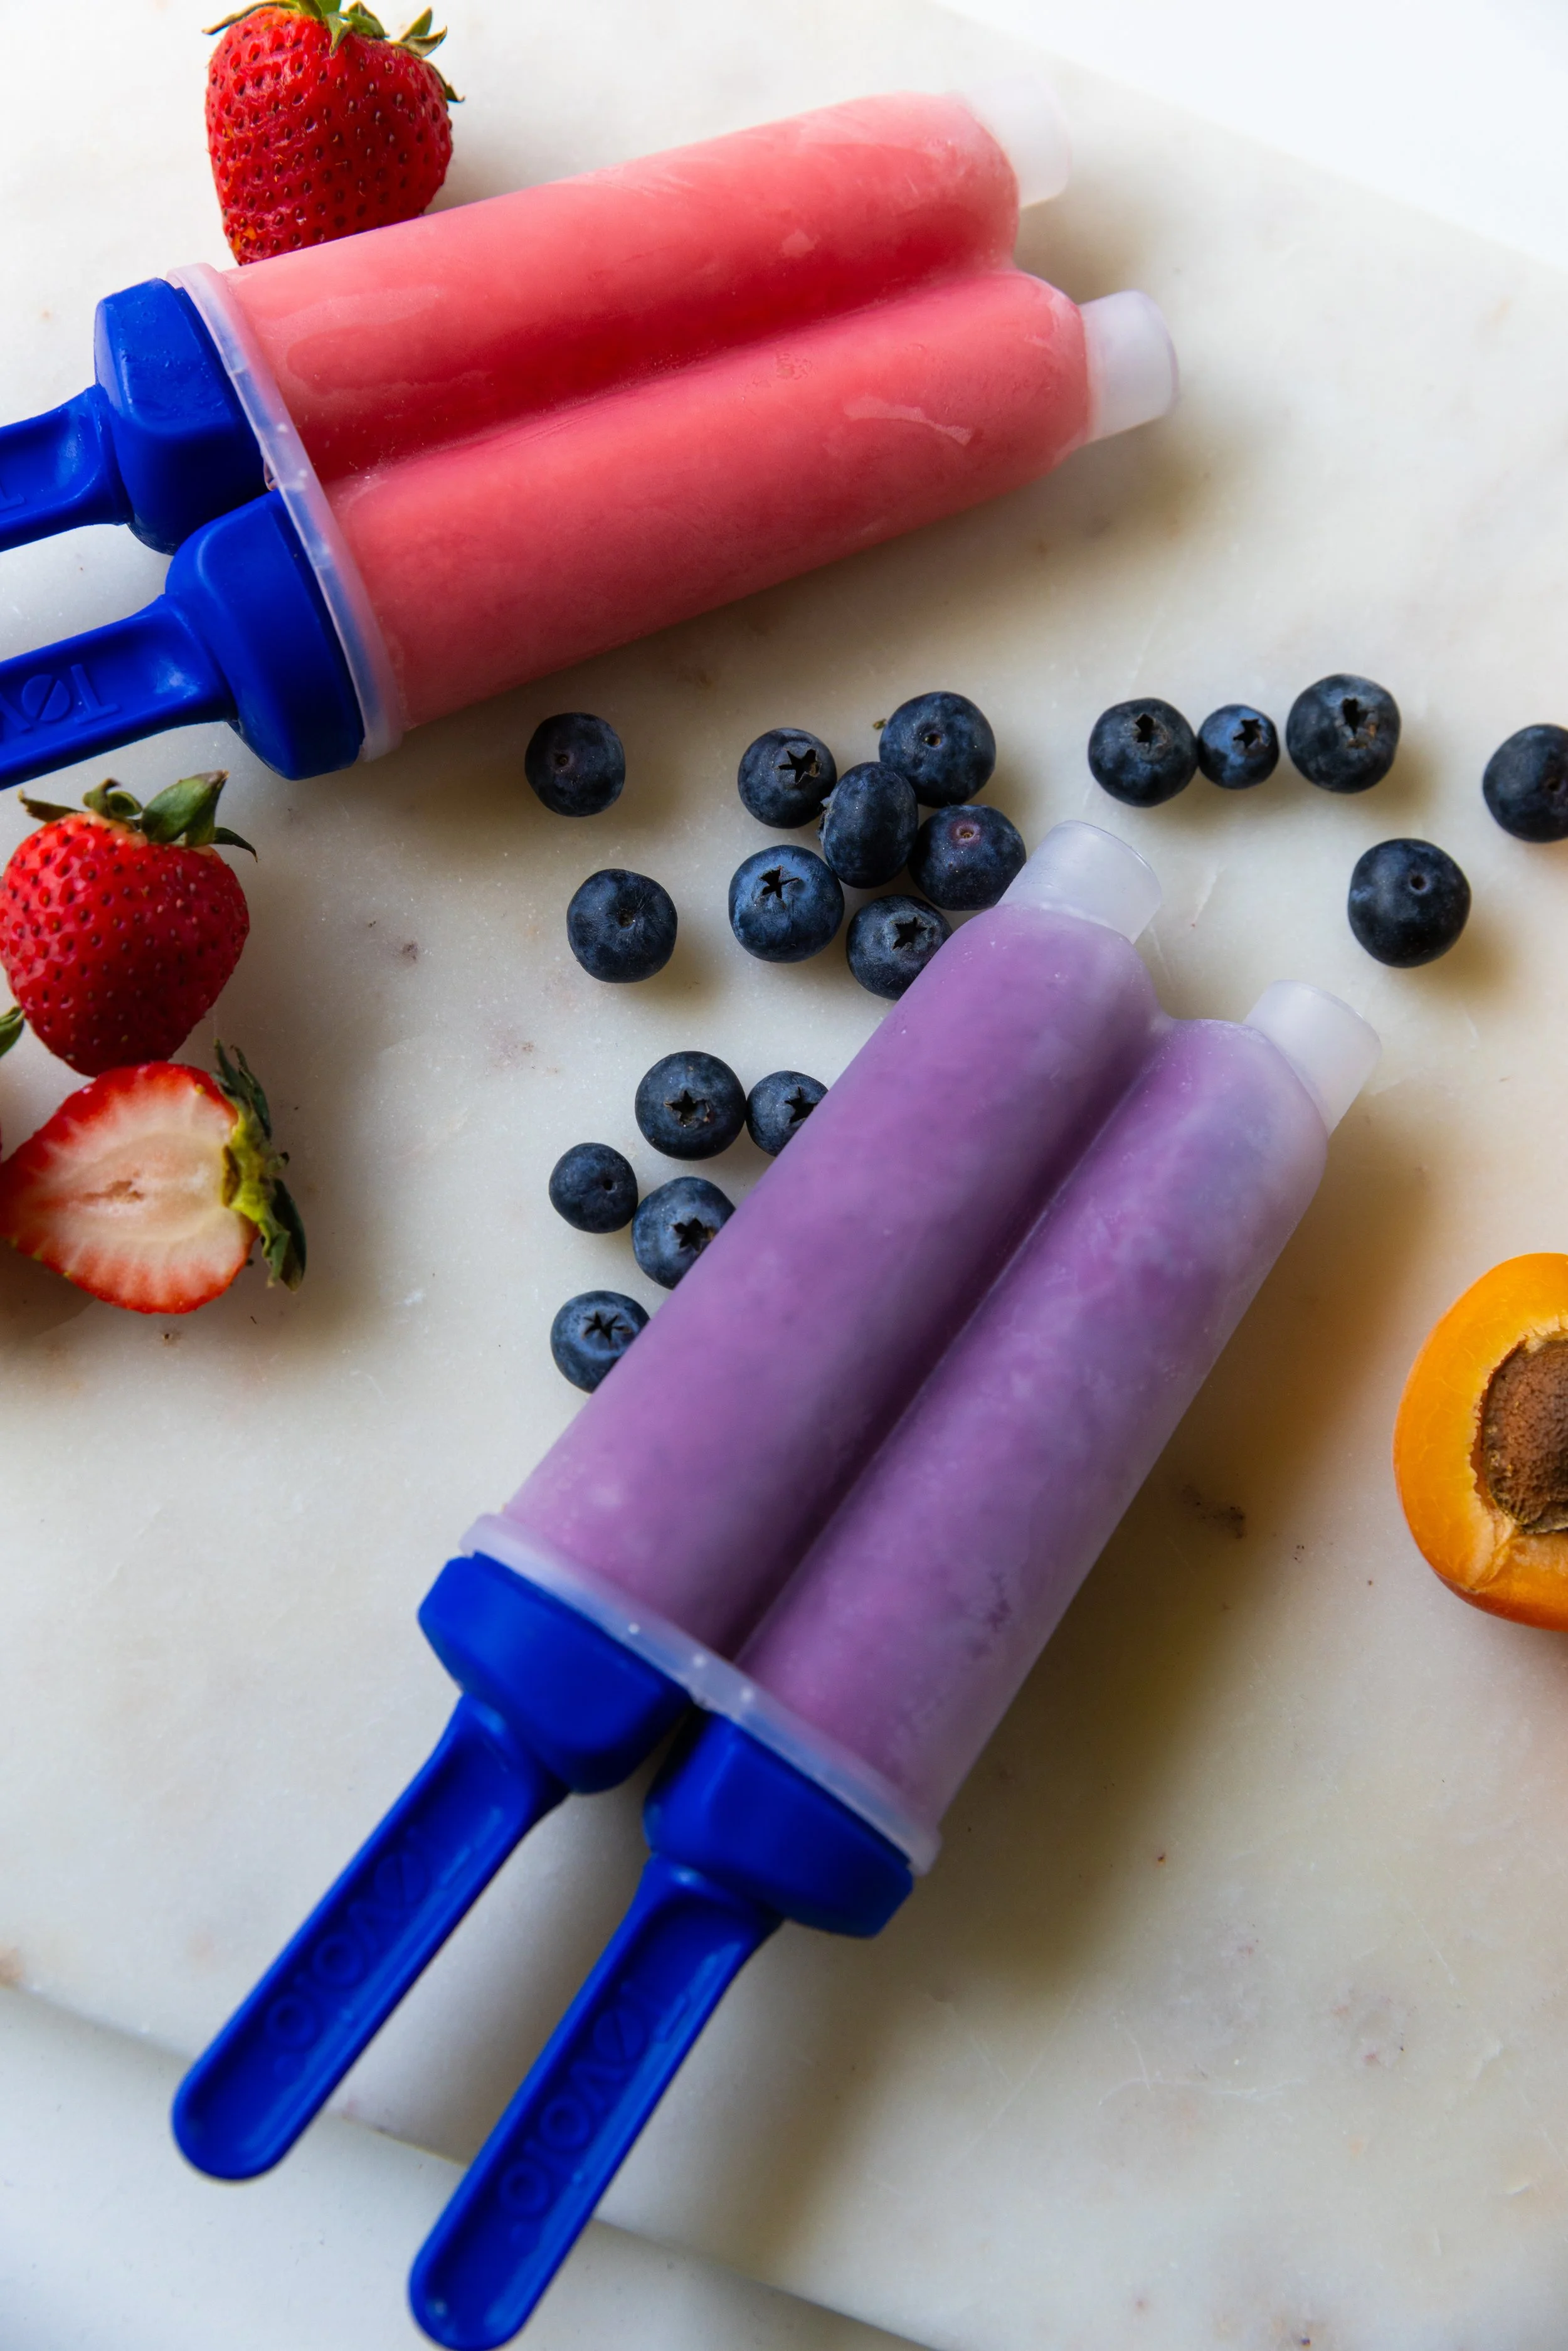
Popsicles
for BC Living - “From Scratch”
July 2025
The heat is on, so why not try your hand at making some popsicles from scratch! The main thing you need is a mold and there are plenty of styles to choose from, so pick the one that’s best for your freezer’s shape and size.
When making your popsicles, the sugar in fruit will be diminished a little in the freezer, so if you want a little bit more sweetness, add some sugar, honey, or maple syrup into the mix.
If you’re using something like strawberries, you might prefer to strain the little seeds out after you blend the mixture together.
Fresh fruit is the best to use (especially while it’s in season!), but you could use frozen fruit if you’d like. The main thing is to have fun with it and play around with the ingredients.
GENERAL INGREDIENTS
- 2 cups of fruit
- 1 cup juice, or yogurt (or other liquid like coconut water)
- 2 tbsp sweetener (honey, maple syrup, sugar)
- optional ingredients: vanilla extract
GENERAL INSTRUCTIONS
Blend the fruit, juice or yogurt, any sweetener or other flavors together, pour into the molds and freeze for a minimum of 3-4 hours.
For Strawberry Popsicles
- 2 cups strawberry with the stem removed
- 1 cup coconut water (or fruit juice)
- 2 tbsp sugar (or honey)
Blend all ingredients together, then pour through a fine sieve to remove the seeds (optional step).
Pour into molds and add the sticks, then freeze for a minimum of three hours.
Running a mold under warm water will help loosen the popsicle when removing.
For Blueberry Popsicles
- 2 cups blueberries
- 1 cup Greek yogurt
- 2 tbsp of honey (or maple syrup)
- 1 to 2 tsp of vanilla extract
Mix the vanilla into the yogurt and taste to see if you’d like more.
Blend the blueberries, yogurt, and honey together in a blender, then pour into the molds.
Freeze for a minimum of three hours.
Running a mold under warm water will help loosen the popsicle when removing it.
For Creamsicle
- 2 cups apricot flesh (see below), alternatively peaches, oranges, mangos also work
- 1 cup fruit juice (apricot, peach, mango etc.)
- 2 tbsp of honey
- 1.5 to 2 cups Greek yogurt
- 1 to 2 tsp of vanilla extract
In a bowl, mix the vanilla extract with the yogurt and taste to see if you’d like more.
Remove the skin or peel from your desired fruit (blanching briefly is best for apricots and peaches) and remove any seeds.
In a high-speed blender, add the fruit, the juice, and the honey and taste sweetness (you want it on the higher side).
In the molds, add a tablespoon of the fruit mixture, and then a tablespoon of vanilla yogurt, alternating until the mold is filled, and the two are slightly blended.
Freeze for a minimum of three hours (these may need more with the two separate fillings)
Running a mold under warm water will help loosen the popsicle when removing.
Sheringham Beacon Gin and Steller’s Jay Mountain Jay Brut
with lemon and cherry blossom simple syrup, and garnished with lemon twist and candied magnolia leaves
April 2025
Beet Salad
for BC Living
June 2025
Farmers markets are back, local produce is growing, and summer is on the horizon! I grabbed my tote bag and headed to the market in Kits to see what I could find for a summer picnic. The stalls were brimming with the first strawberries of the year, foraged mushrooms, and peppers galore, but my eyes landed on the beets. Both the red and golden ones looked amazing, and I knew a salad with some local goat cheese and greens was what I was looking for.
The only tricky part about (red) beets is that they’ll stain your hands (and the golden beets, AND the cheese), so use gloves if you can and don’t mix everything together when you plate it, to keep it nice and clean.
One of the best parts is that you can make a variety of dressings for this. I went with citrus, but a Dijon mustard dressing, or even just a balsamic glaze would be delicious.
Bring this to your next beach picnic or backyard BBQ as a cold side salad or enjoy it in the sunshine for a healthy lunch.
---
Makes approximately 4 small servings, or 1 large serving
INGREDIENTS
- 1 large red beet
- 1 large golden beet (or even a Chioggia beet if you can find it!)
- extra virgin olive oil (for roasting)
- ¼ cup crumbled goat cheese (adjust to taste)
- 1-2 tbsp crushed pistachios (or other nuts, like walnuts)
- 1 cup arugula (optional, for serving base)
For The Dressing:
- 1 tbsp extra virgin olive oil
- 1 tbsp apple cider vinegar
- 1 tbsp freshly squeezed juice of: a lemon, or an orange
- ¼ tsp salt
INSTRUCTIONS
Preheat oven to 400 degrees Fahrenheit.
Scrub the beets clean (do not peel yet) and remove any excess roots.
Place each beet on a sheet of tin foil, drizzle with olive oil, and rub to coat. Then wrap each beet completely in the foil.
When the oven is preheated, place the foil-wrapped beets on a baking sheet or directly on the oven rack, and cook for 45 minutes.
Stick a fork in the beet to see if it penetrates easily - the larger the beet, the longer it will take to cook through, possibly up to an hour or more. Continue to monitor them until the fork easily pierces the beet and then remove from oven and set aside to cool.
Once cool, the skin should easily fall off the beet, though you may need to peel some back with a peeler and cut off any root leftover.
I do this step with the red beet using gloves as it will stain your hands.
Once the beets are peeled, chop them into bite-sized pieces and keep in separate bowls to avoid the red bleeding onto the golden. I like to chill them (covered) in the fridge for a while, as I prefer chilled.
While they are chilling, whisk together the dressing ingredients in a small bowl, or shake them in a jar with a lid. Set aside.
When the beets are at the preferred temperature, pour some of the dressing over each bowl and stir with a spoon.
To plate, lay a bed of arugula on a serving tray. Using gloves or tongs, arrange the red and golden beets in alternating colors to avoid color bleeding. Sprinkle the dish with goat cheese, and then the crushed pistachios.
You can also add fresh herbs at this stage if you have them on hand – I added some basil from my garden.
Add some extra dressing over top of the salad and serve.
NOTES:
Leftover salad should keep in the fridge in a sealed container for a few days – it just might need some extra dressing.
You can make this vegan by swapping goat cheese for nut-based cheese, or another vegan alternative.
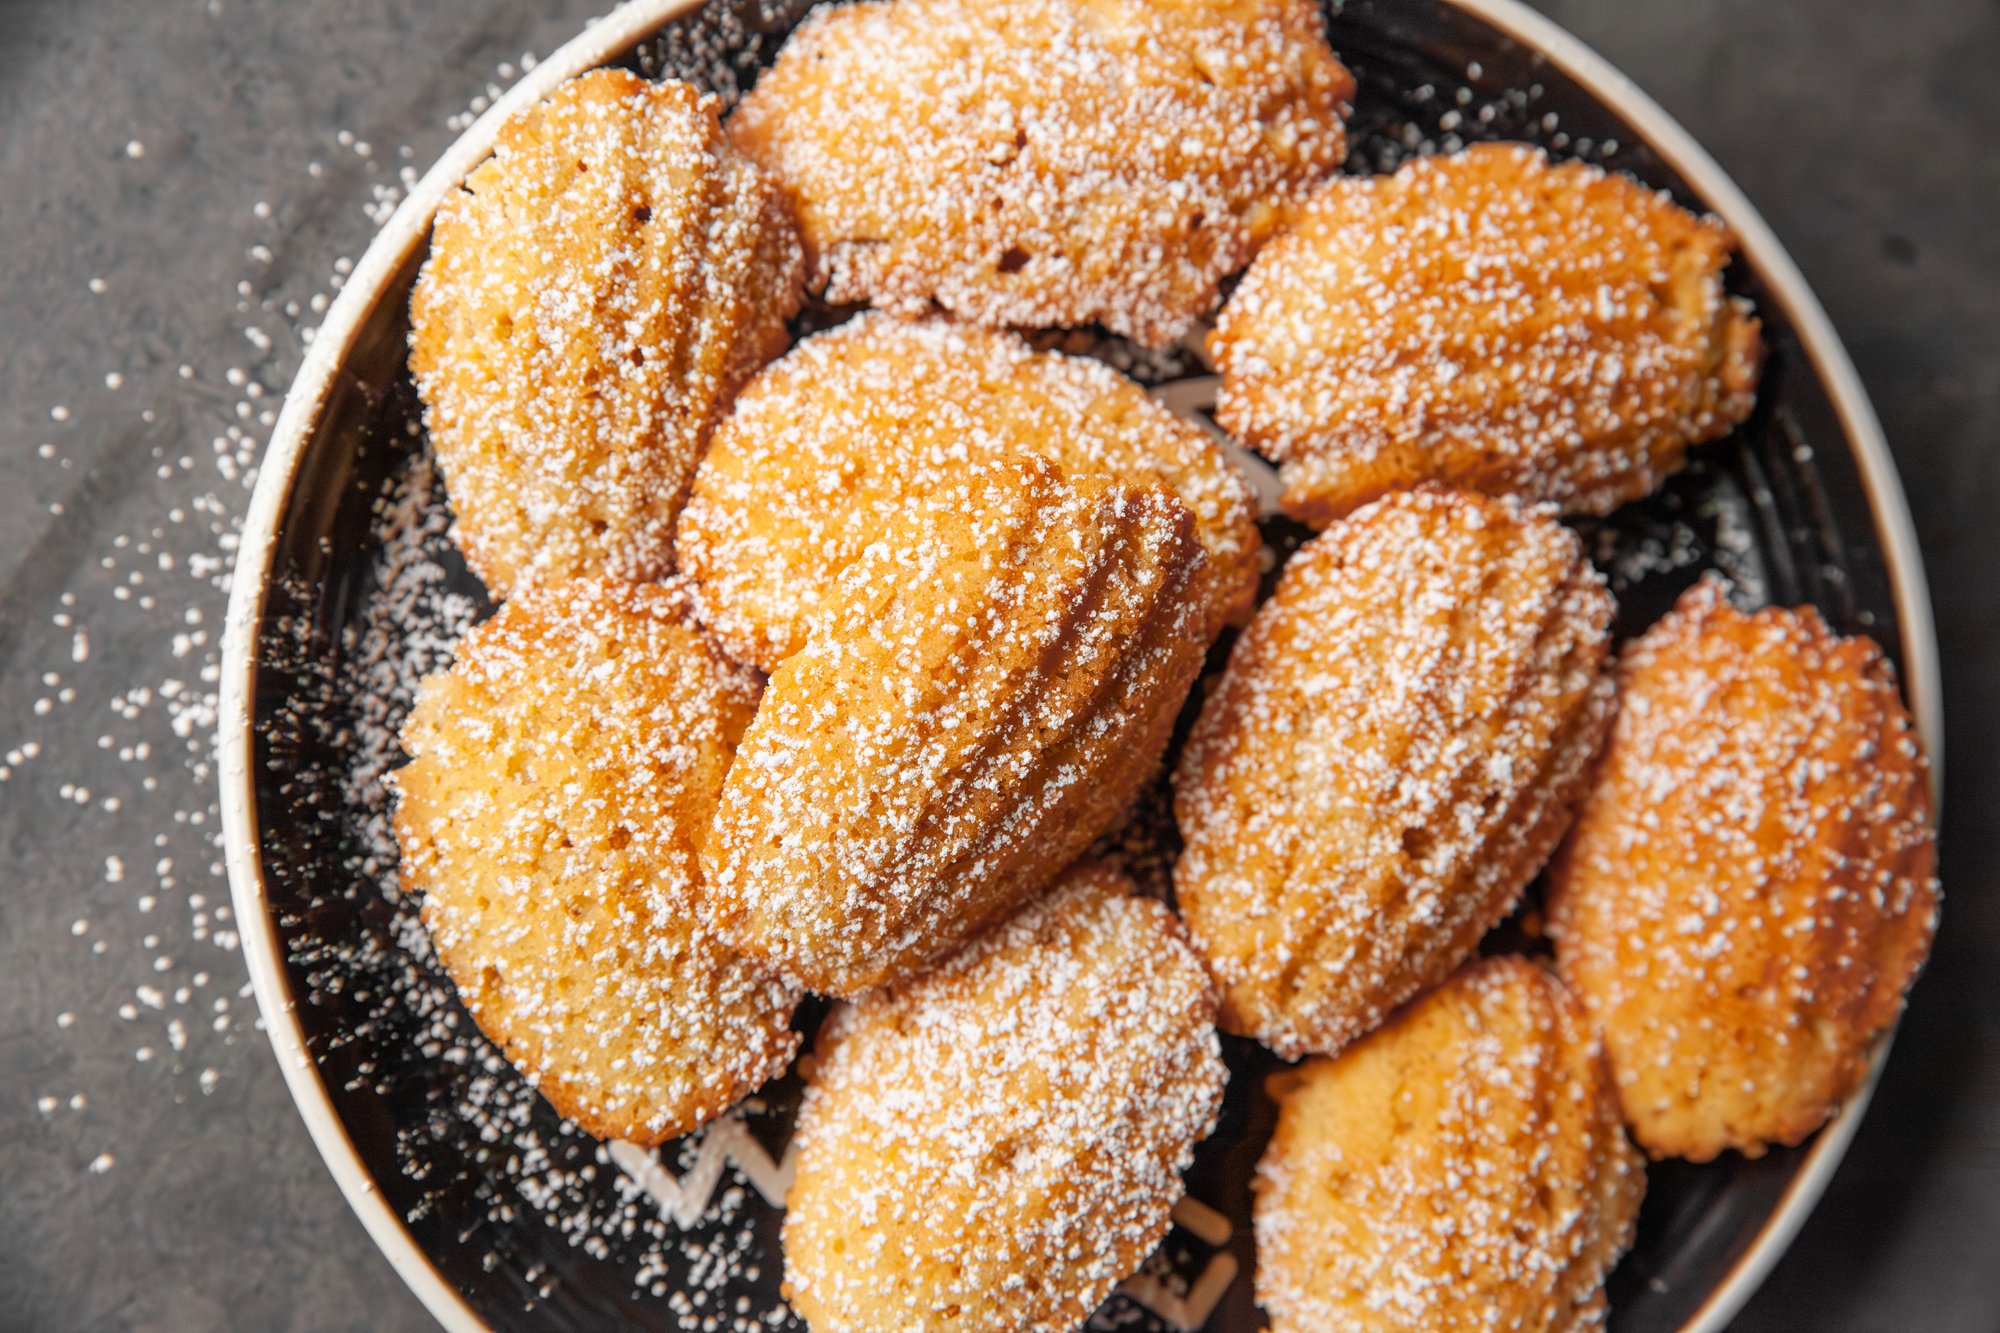
Madeleines
for BC Living “From Scratch” Column
May 2025
I did a big spring clean of my oven and rediscovered my madeleine pan and immediately got the hankering for some sweet golden lemon cookies! These French treats can be a little finicky to make as the batter is very delicate and airy, but they’re completely worth the work when you pop one in your mouth still warm from the oven.
You can also play around with the ingredients – instead of lemon zest (or in addition to) add lavender, or orange and chocolate. The possibilities are endless and delicious.
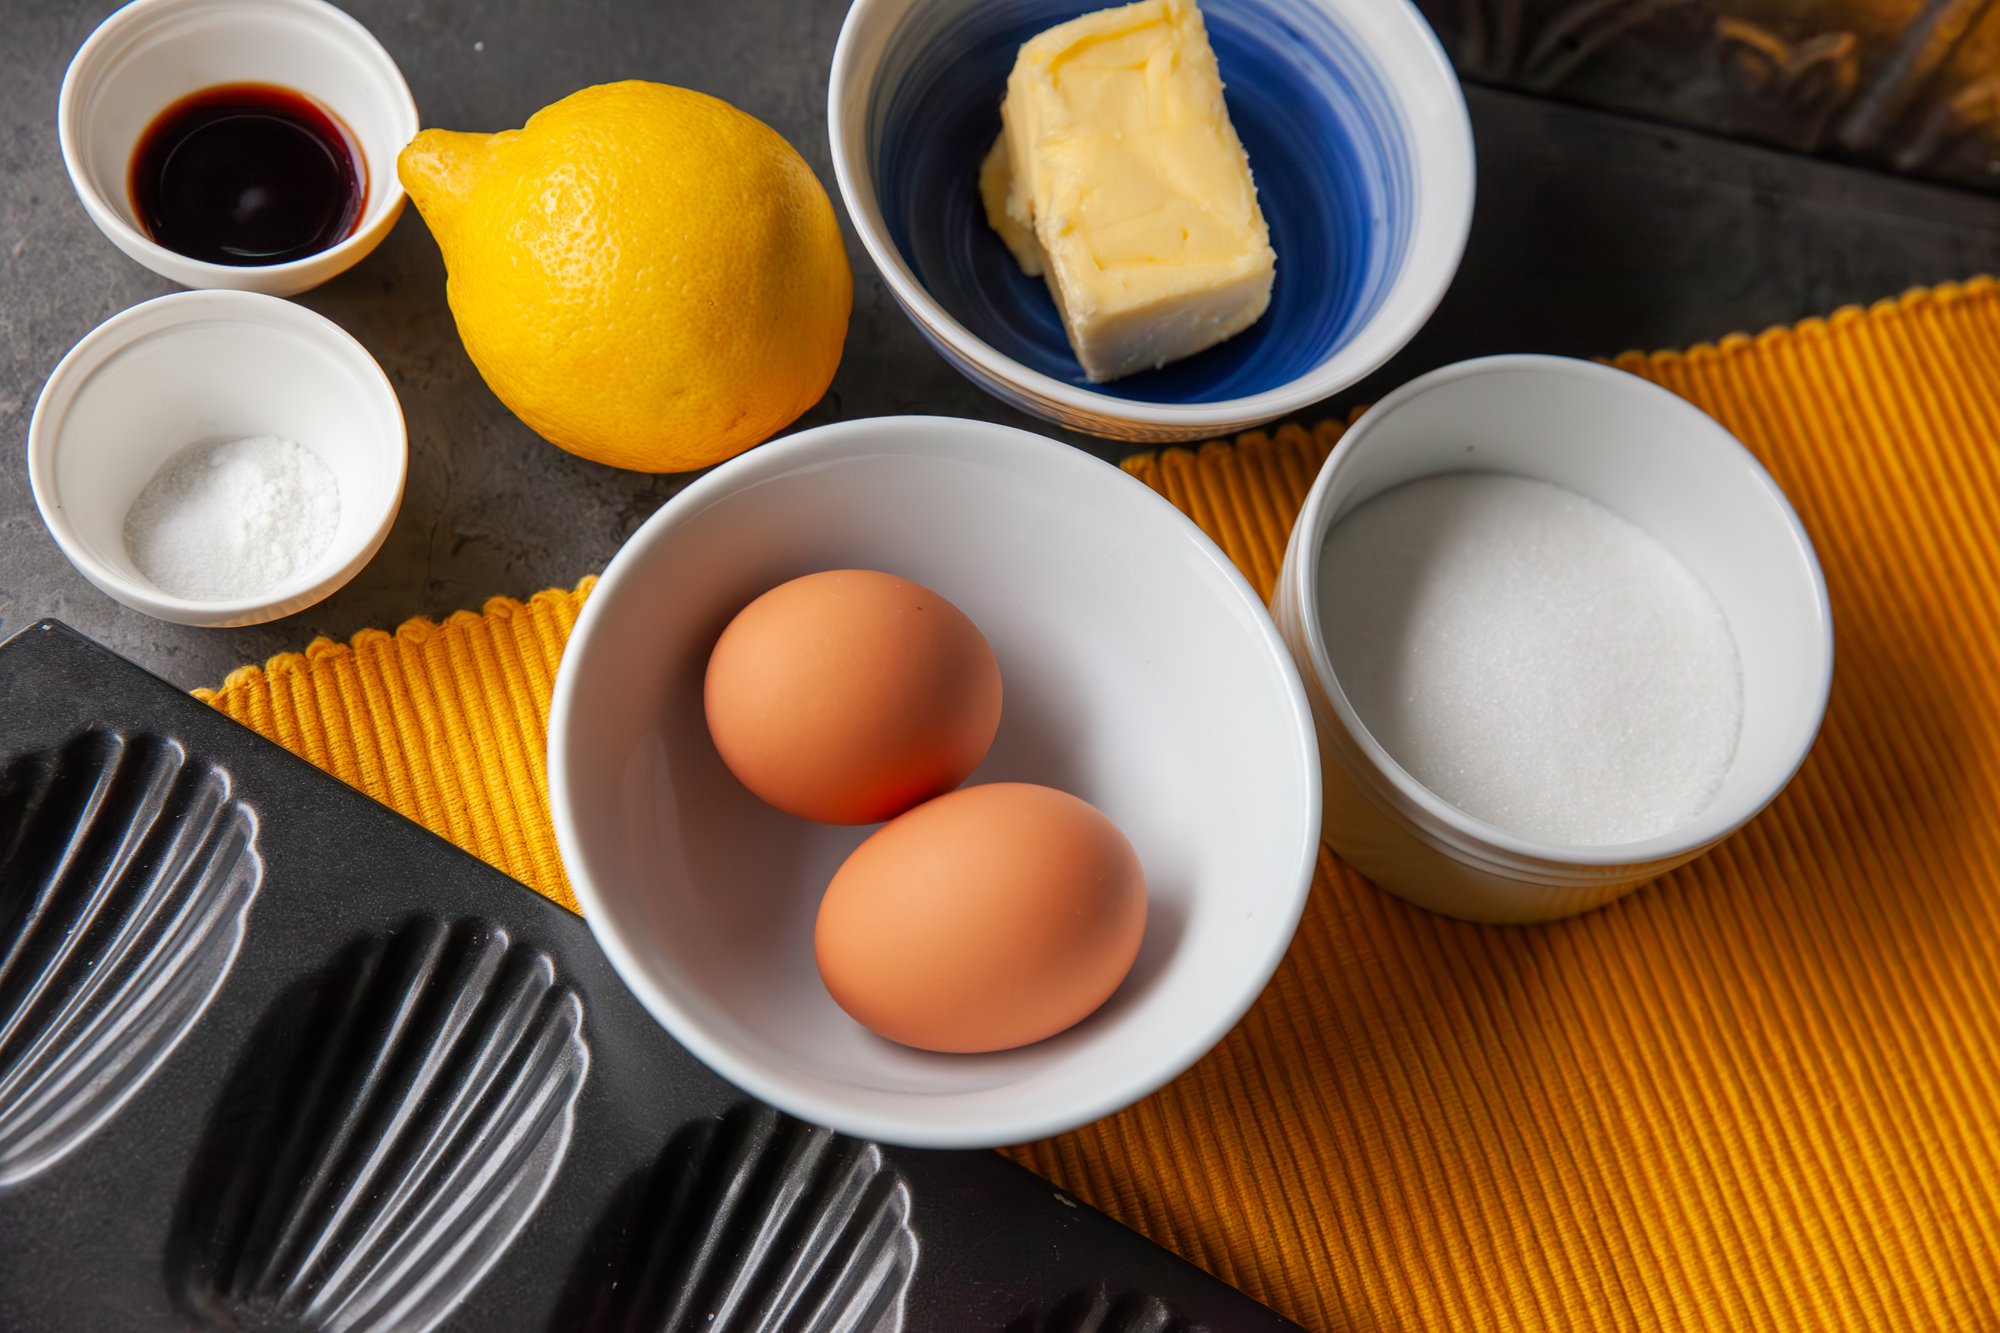
INGREDIENTS
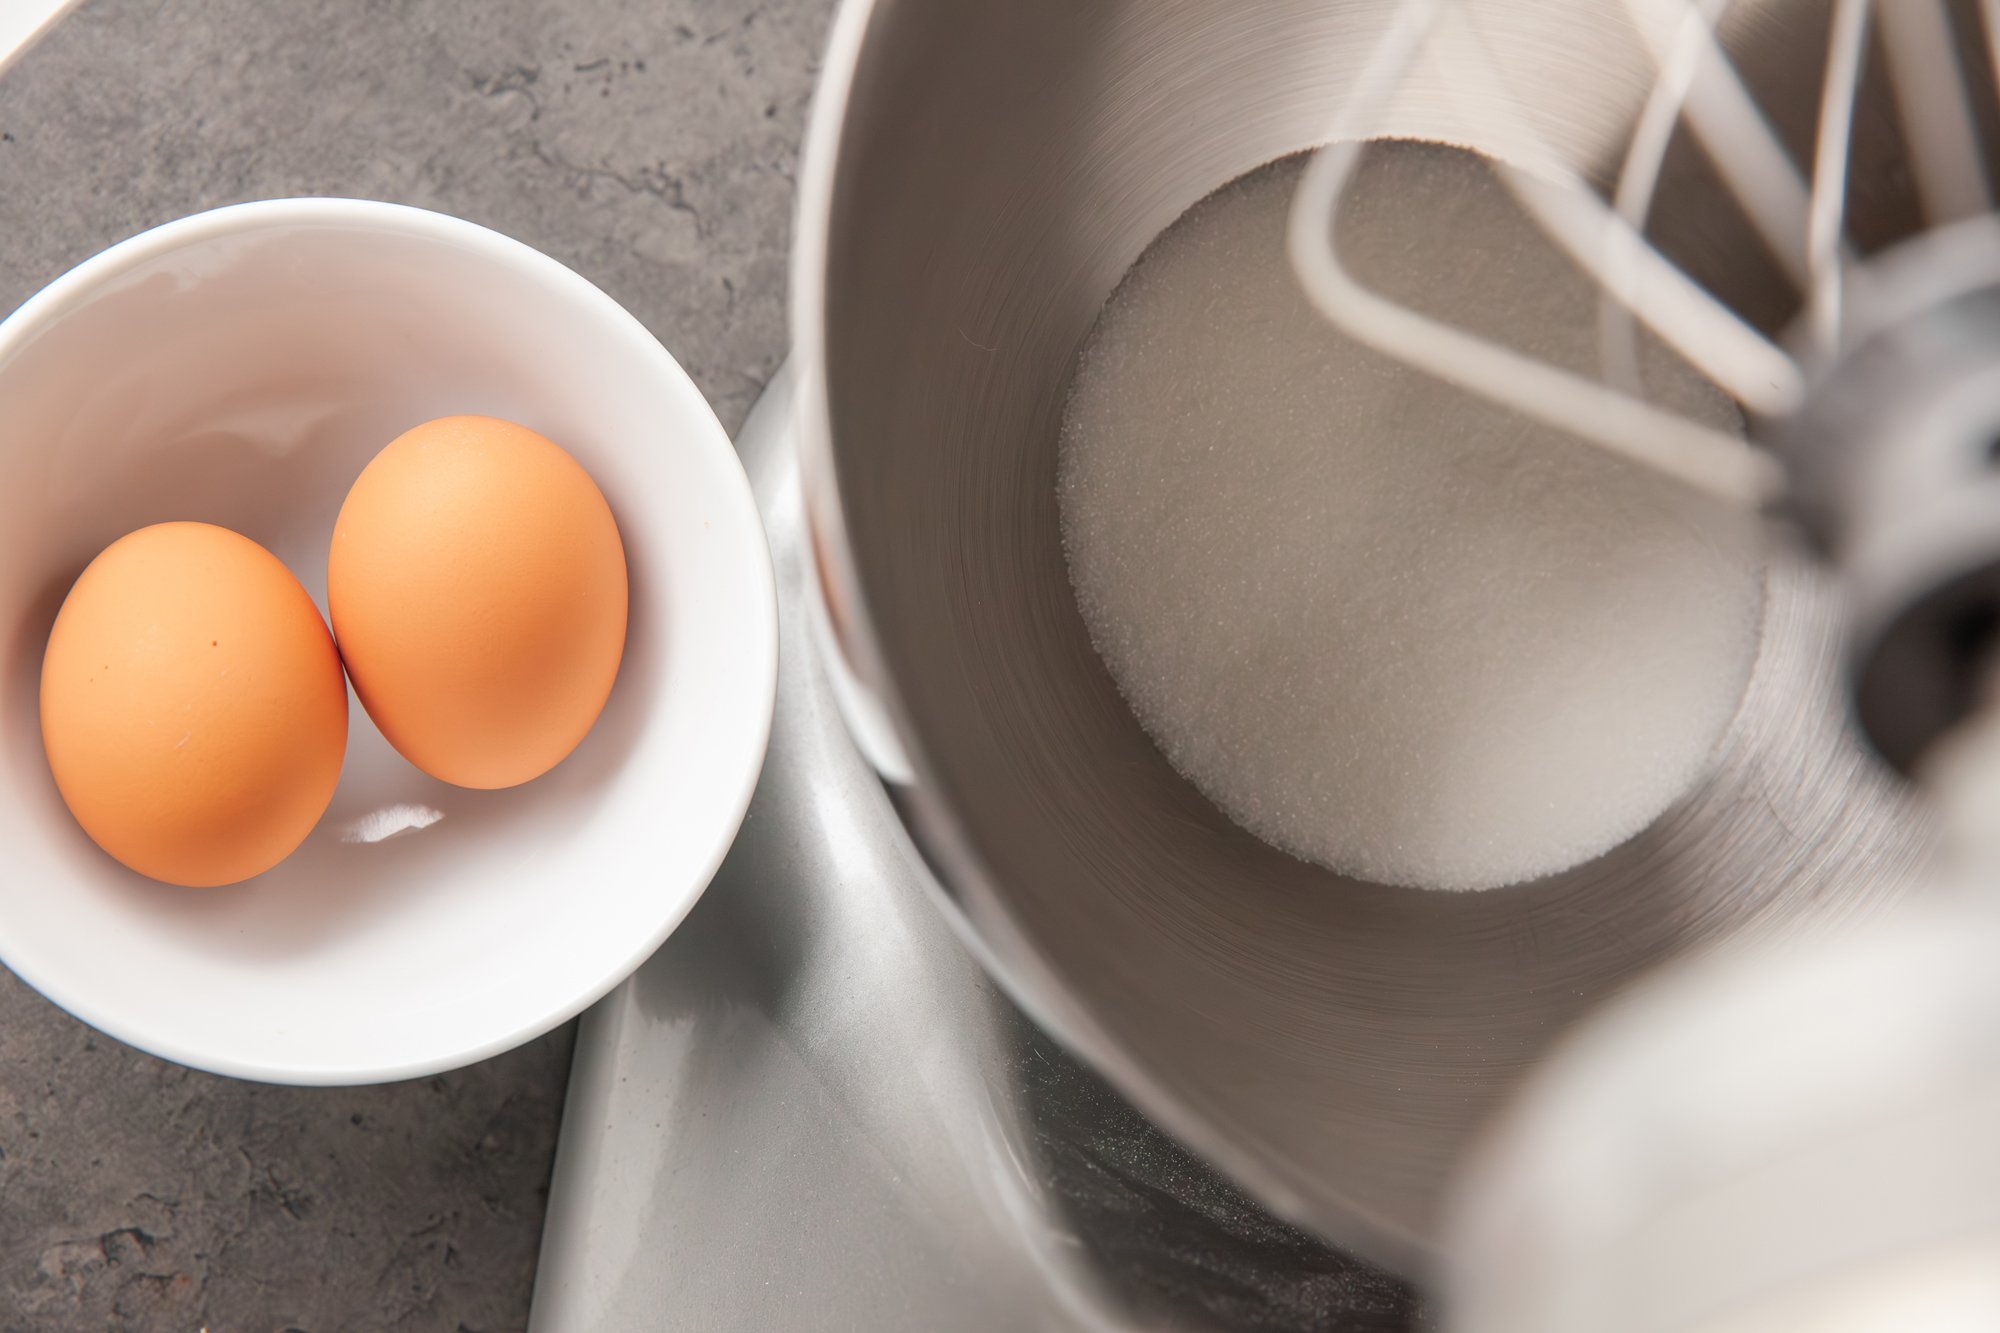
- ½ cup (unsalted) butter
- 2 eggs – room temp
- ½ cup sugar
- 2 tsp lemon zest
- 1 cup AP flour
- ½ tsp baking powder
- 1 tsp vanilla extract
- pinch of salt
- powdered sugar for sprinkling (optional)
*You will need a madeleine pan for this recipe
INSTRUCTIONS
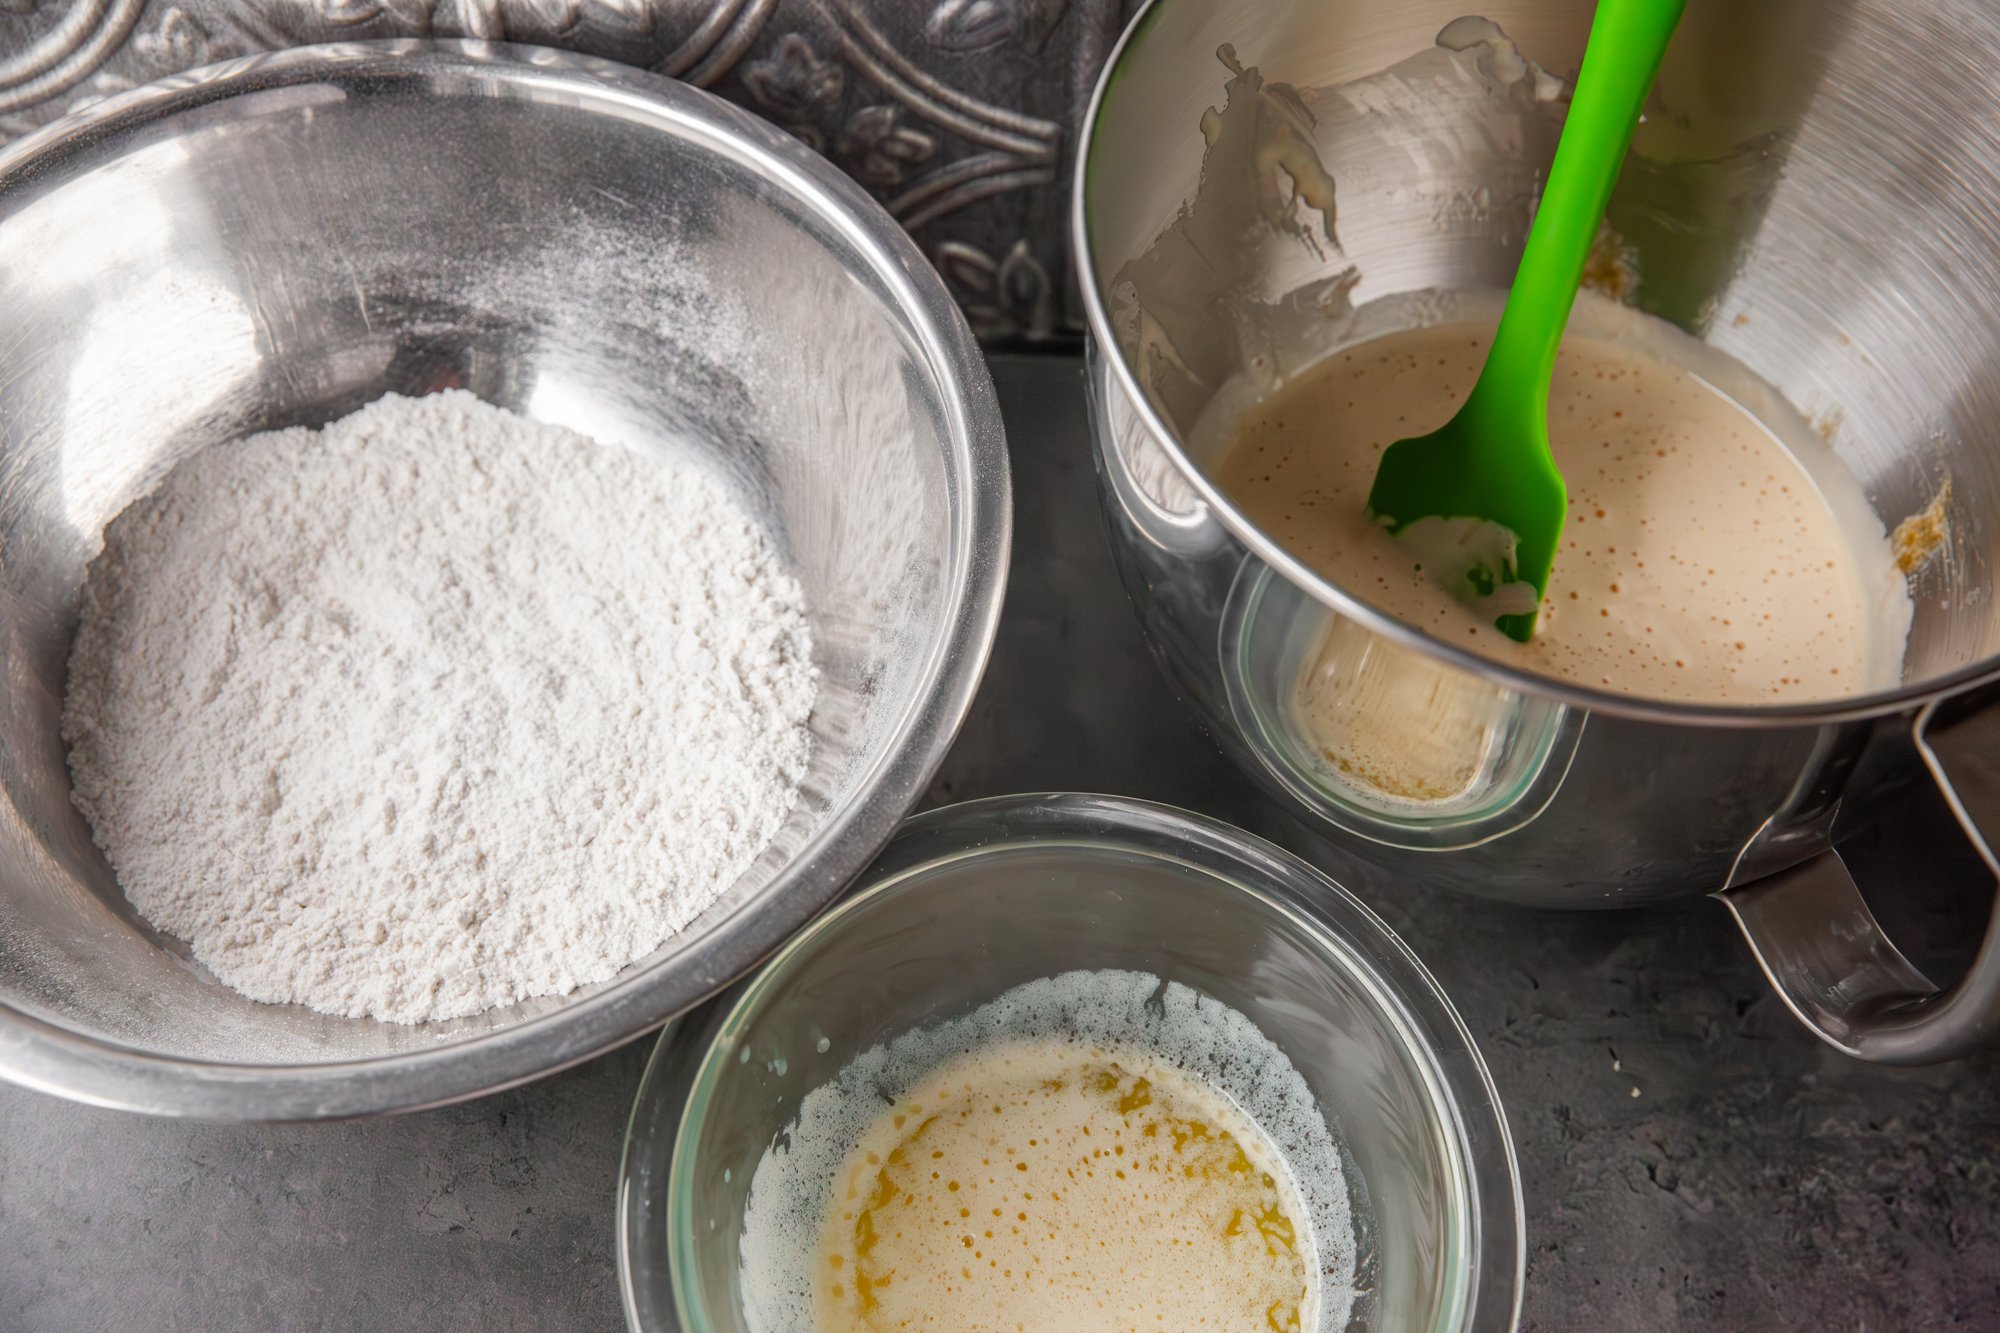
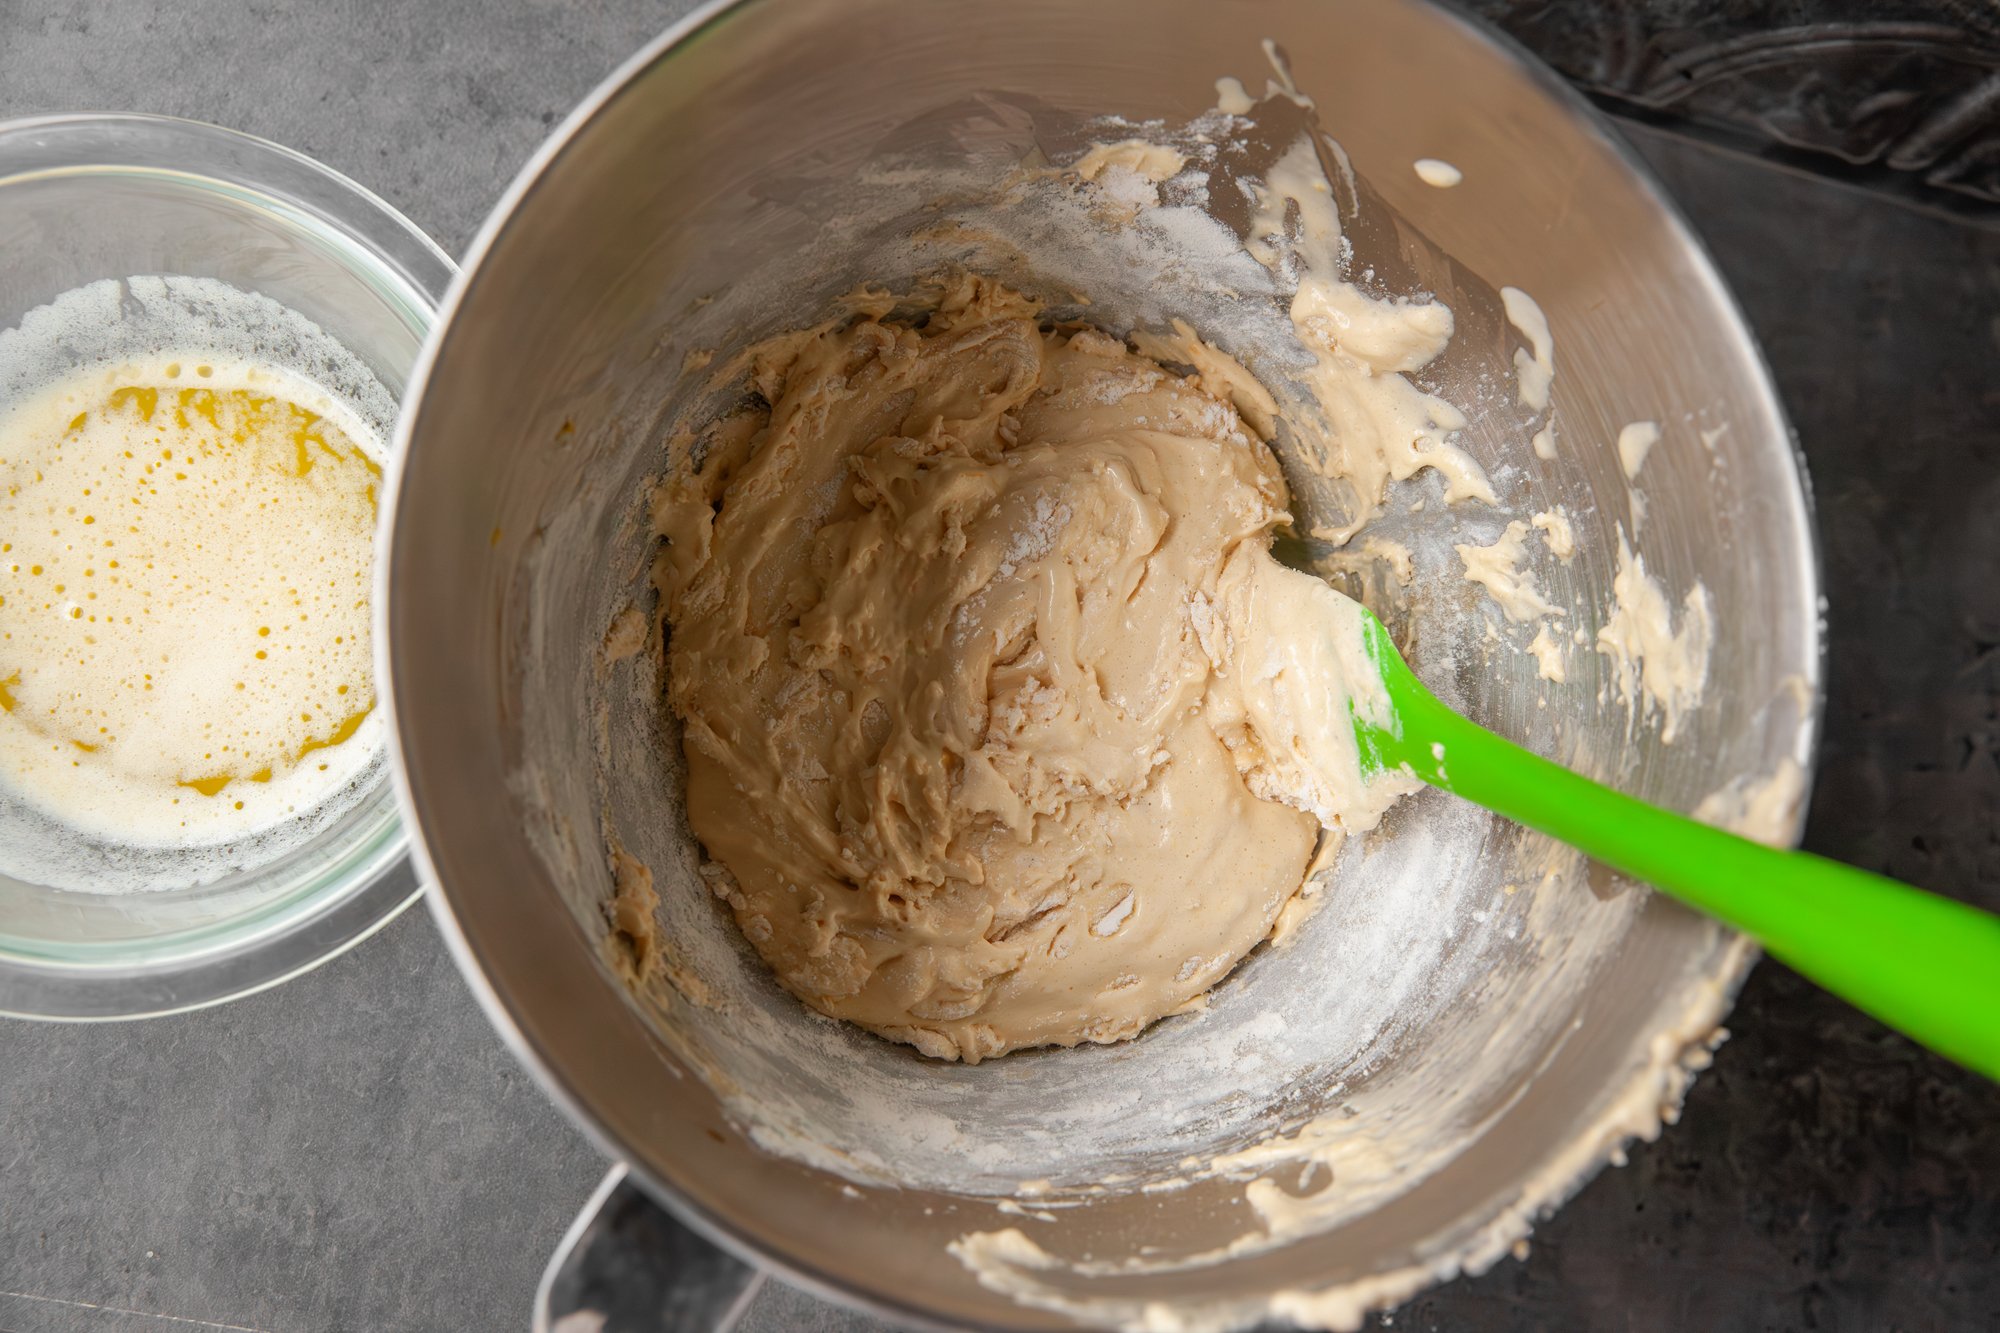
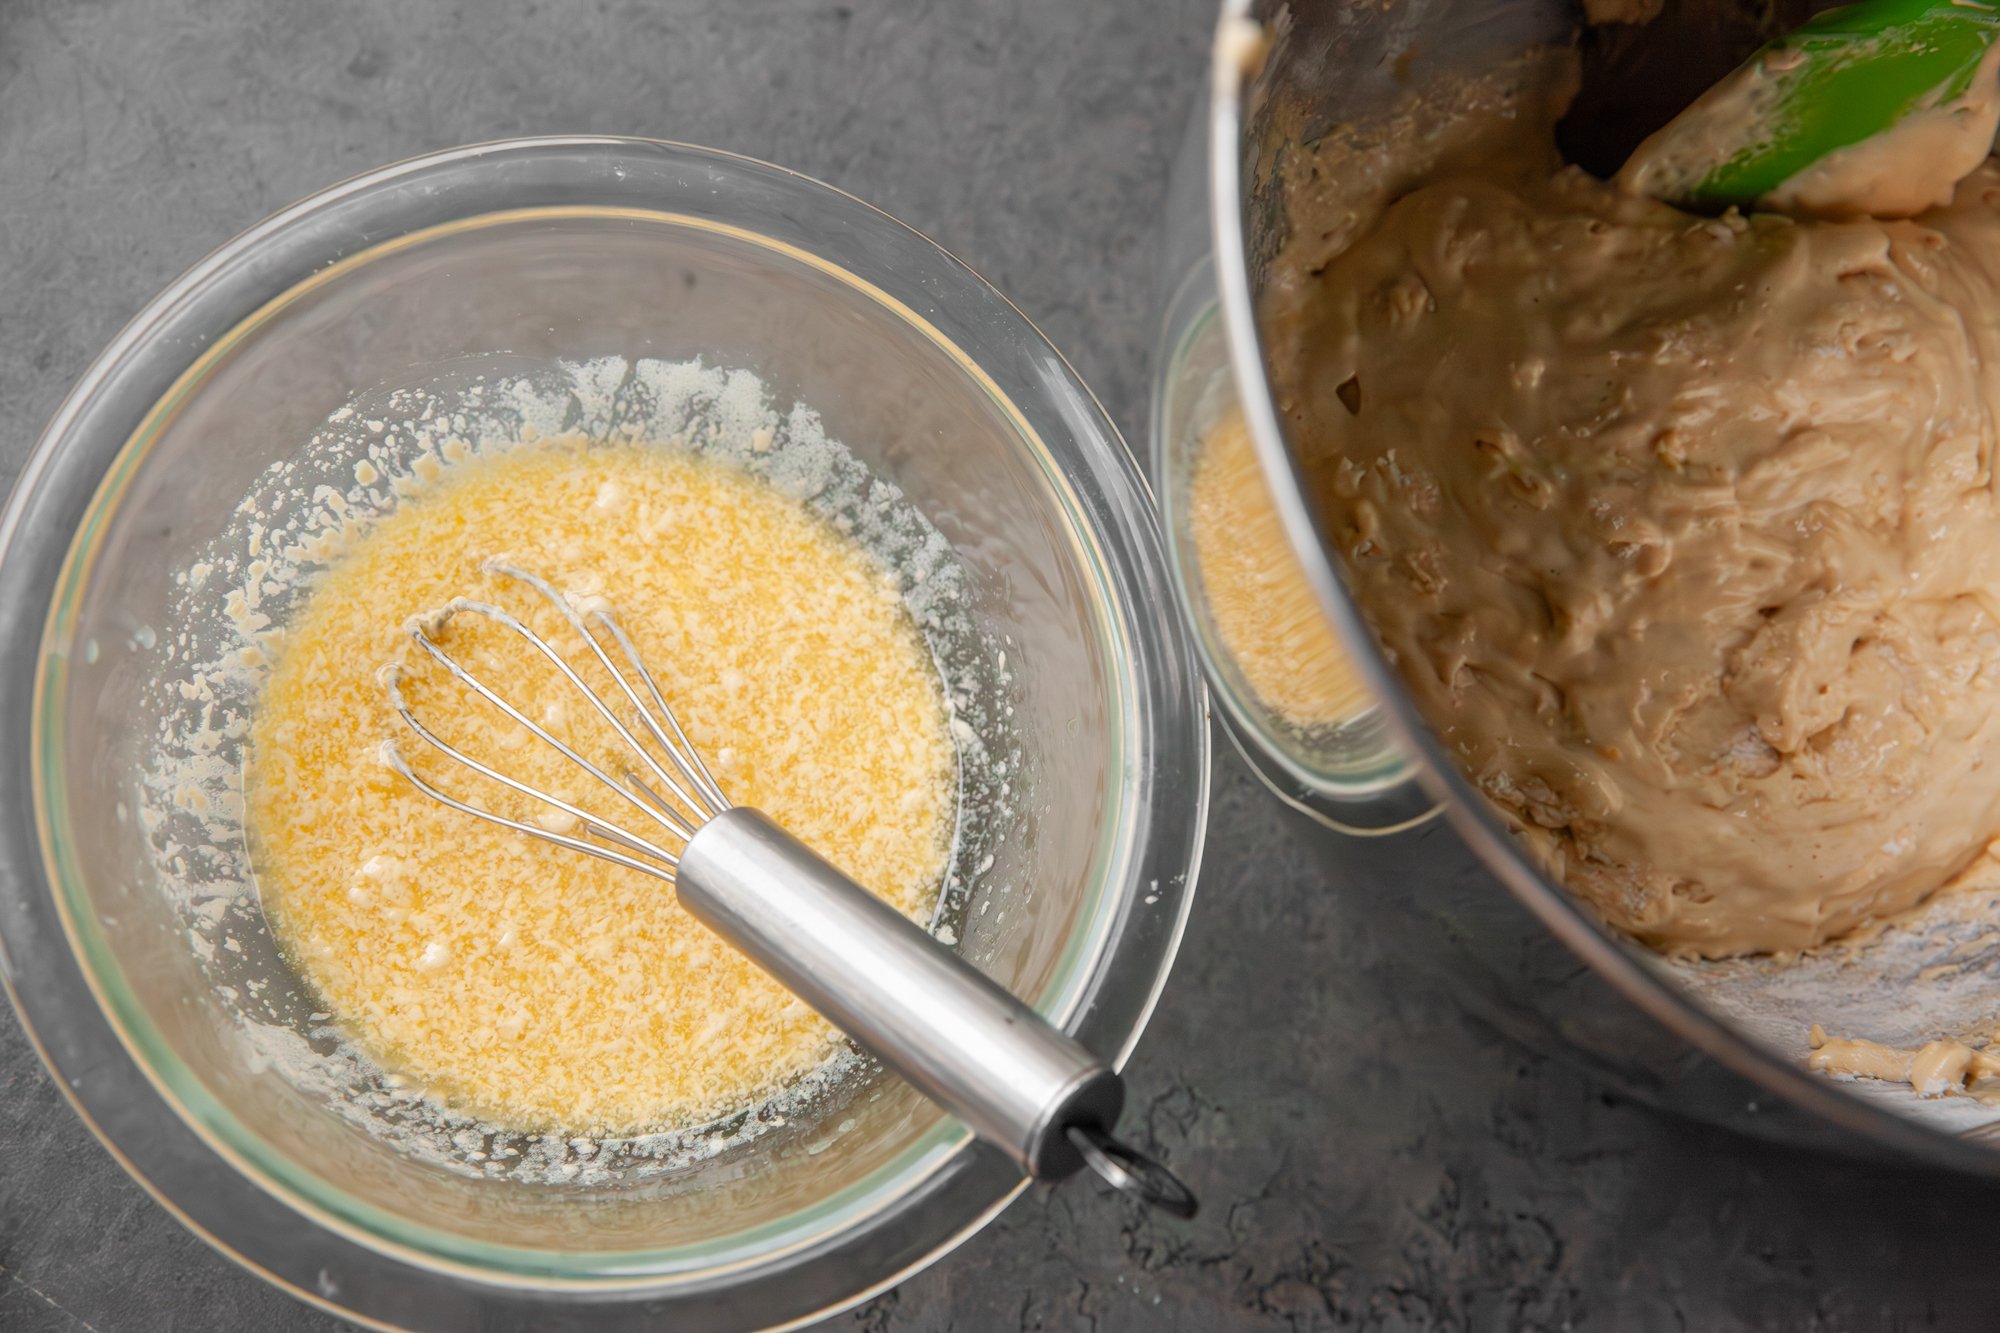
In a small pan, melt the butter and then set aside to cool while you prep the rest of the ingredients.
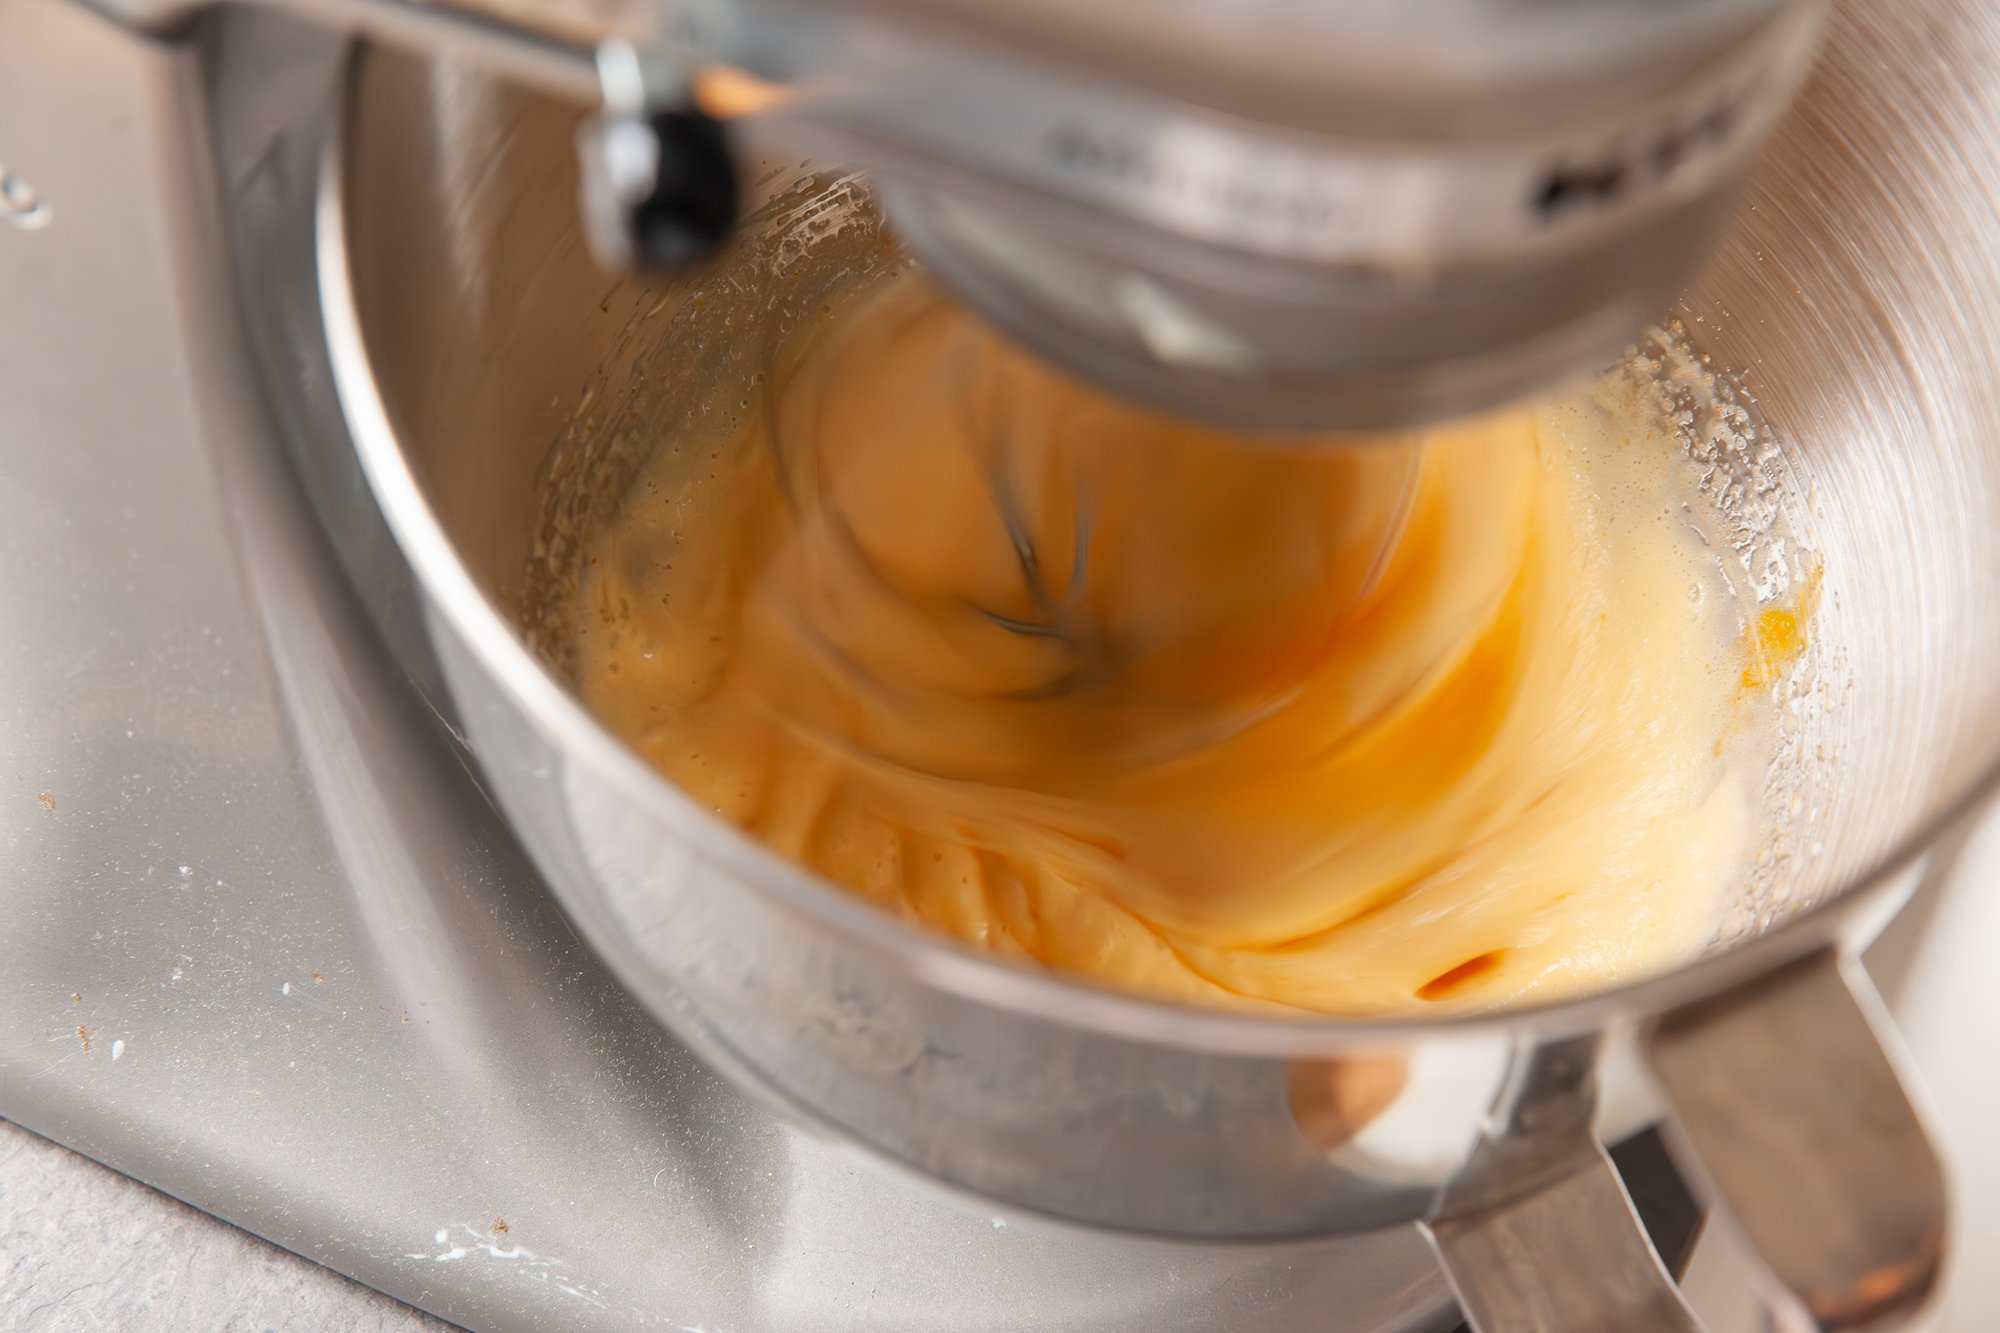
In a large bowl, or in a stand mixer with the whisk attachment, beat the eggs and sugar at high speed for about 10 minutes. You want to mixture to be pale and when the beaters/whisk is lifted it should form ribbons. Add in the lemon zest and vanilla and beat to combine.
In a separate bowl, whisk the flour, salt and baking powder until combined then, with a spatula, fold the flour mixture into the egg mixture a small bit at a time. You want to be gentle so as to not over mix. Keep it light!
Finally fold in the melted butter until it is incorporated.
Cover with plastic wrap and chill in the fridge for a maximum of one hour.
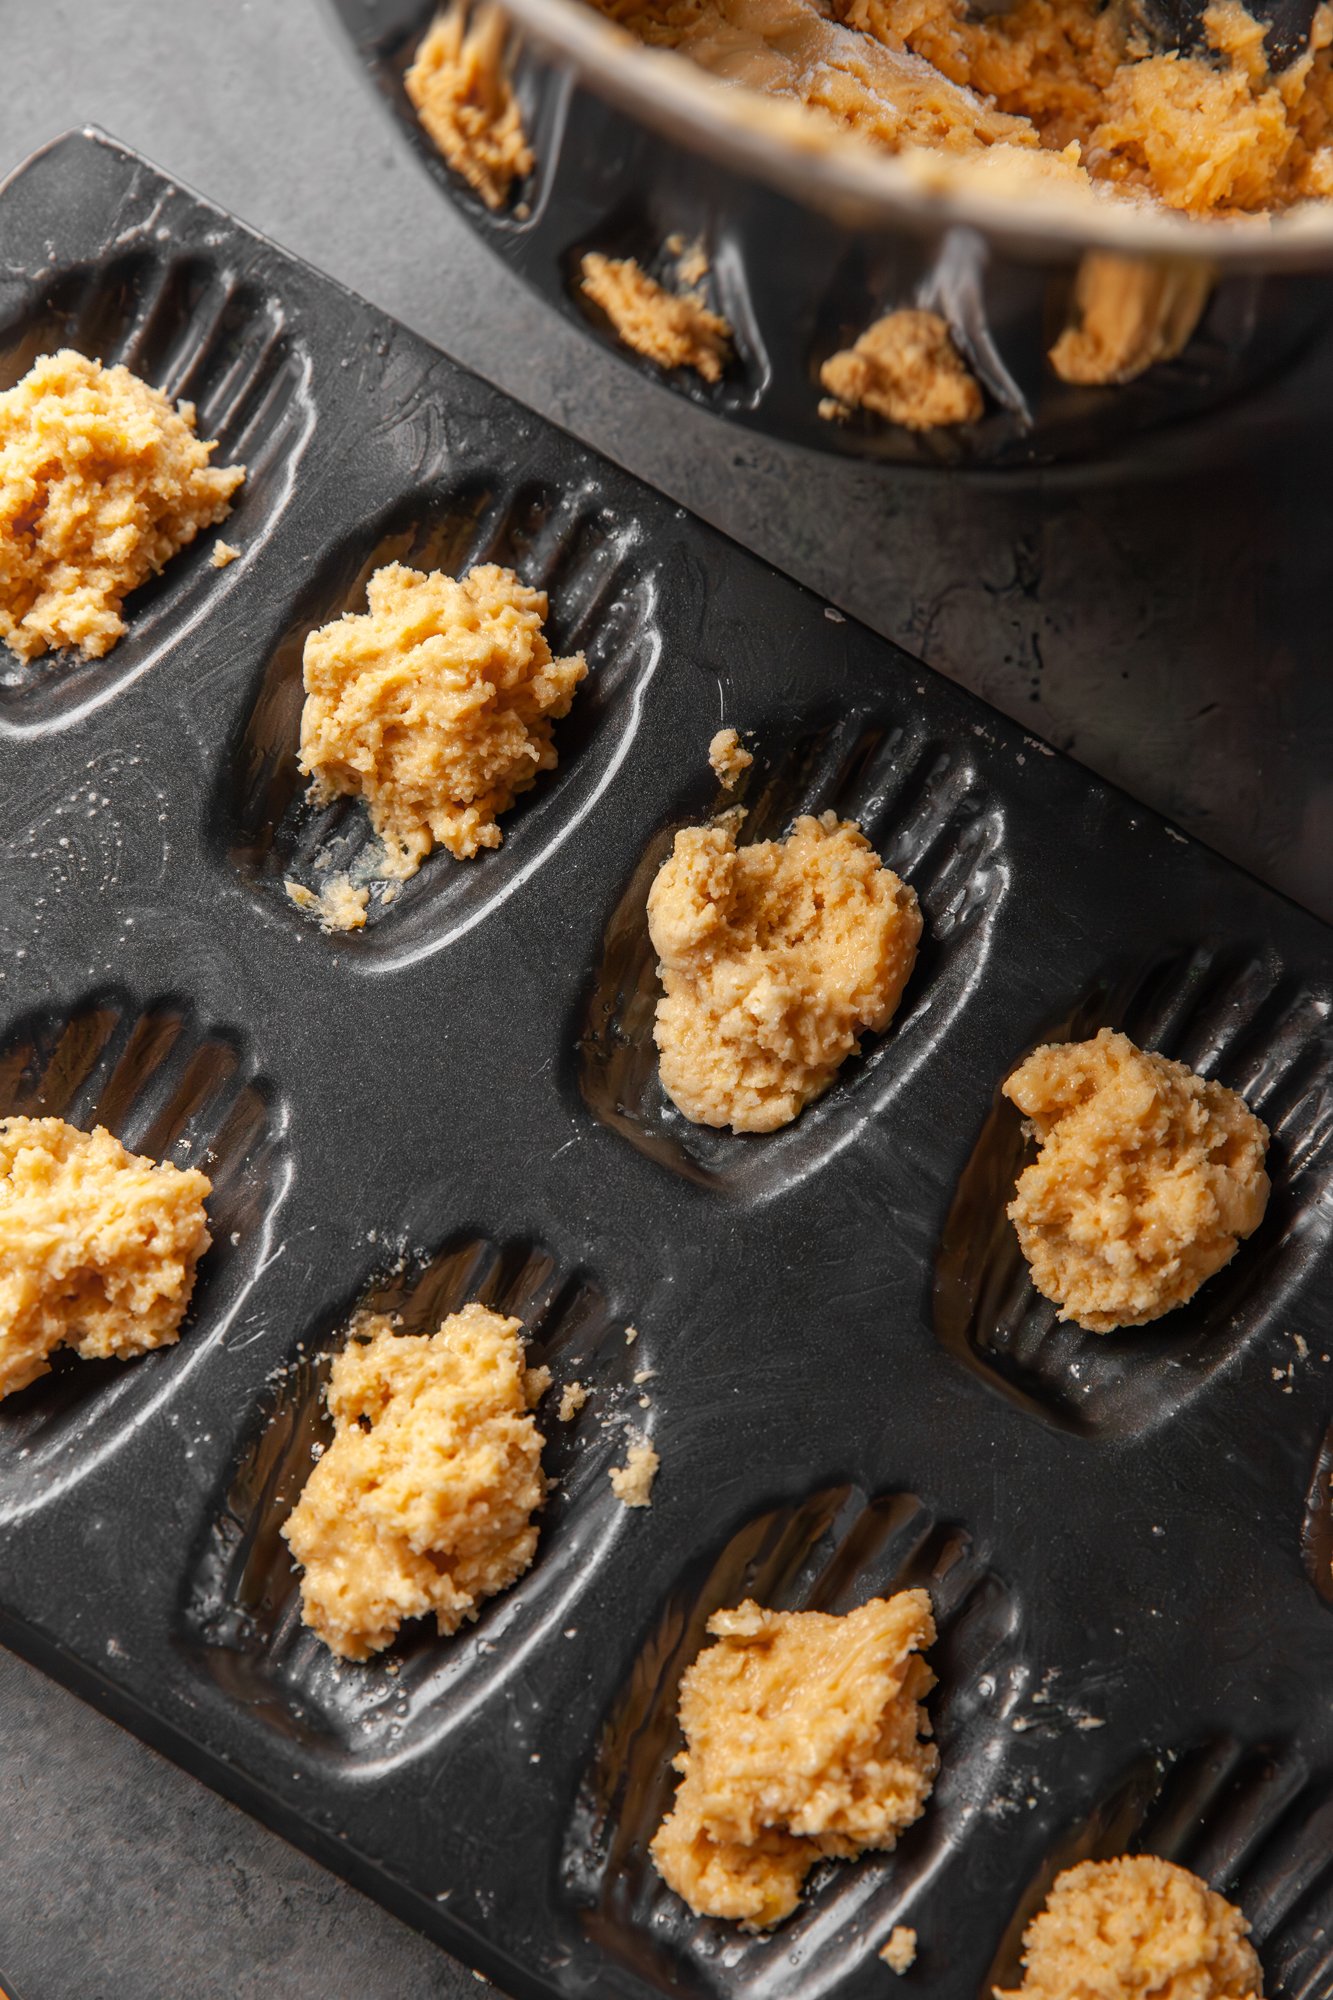
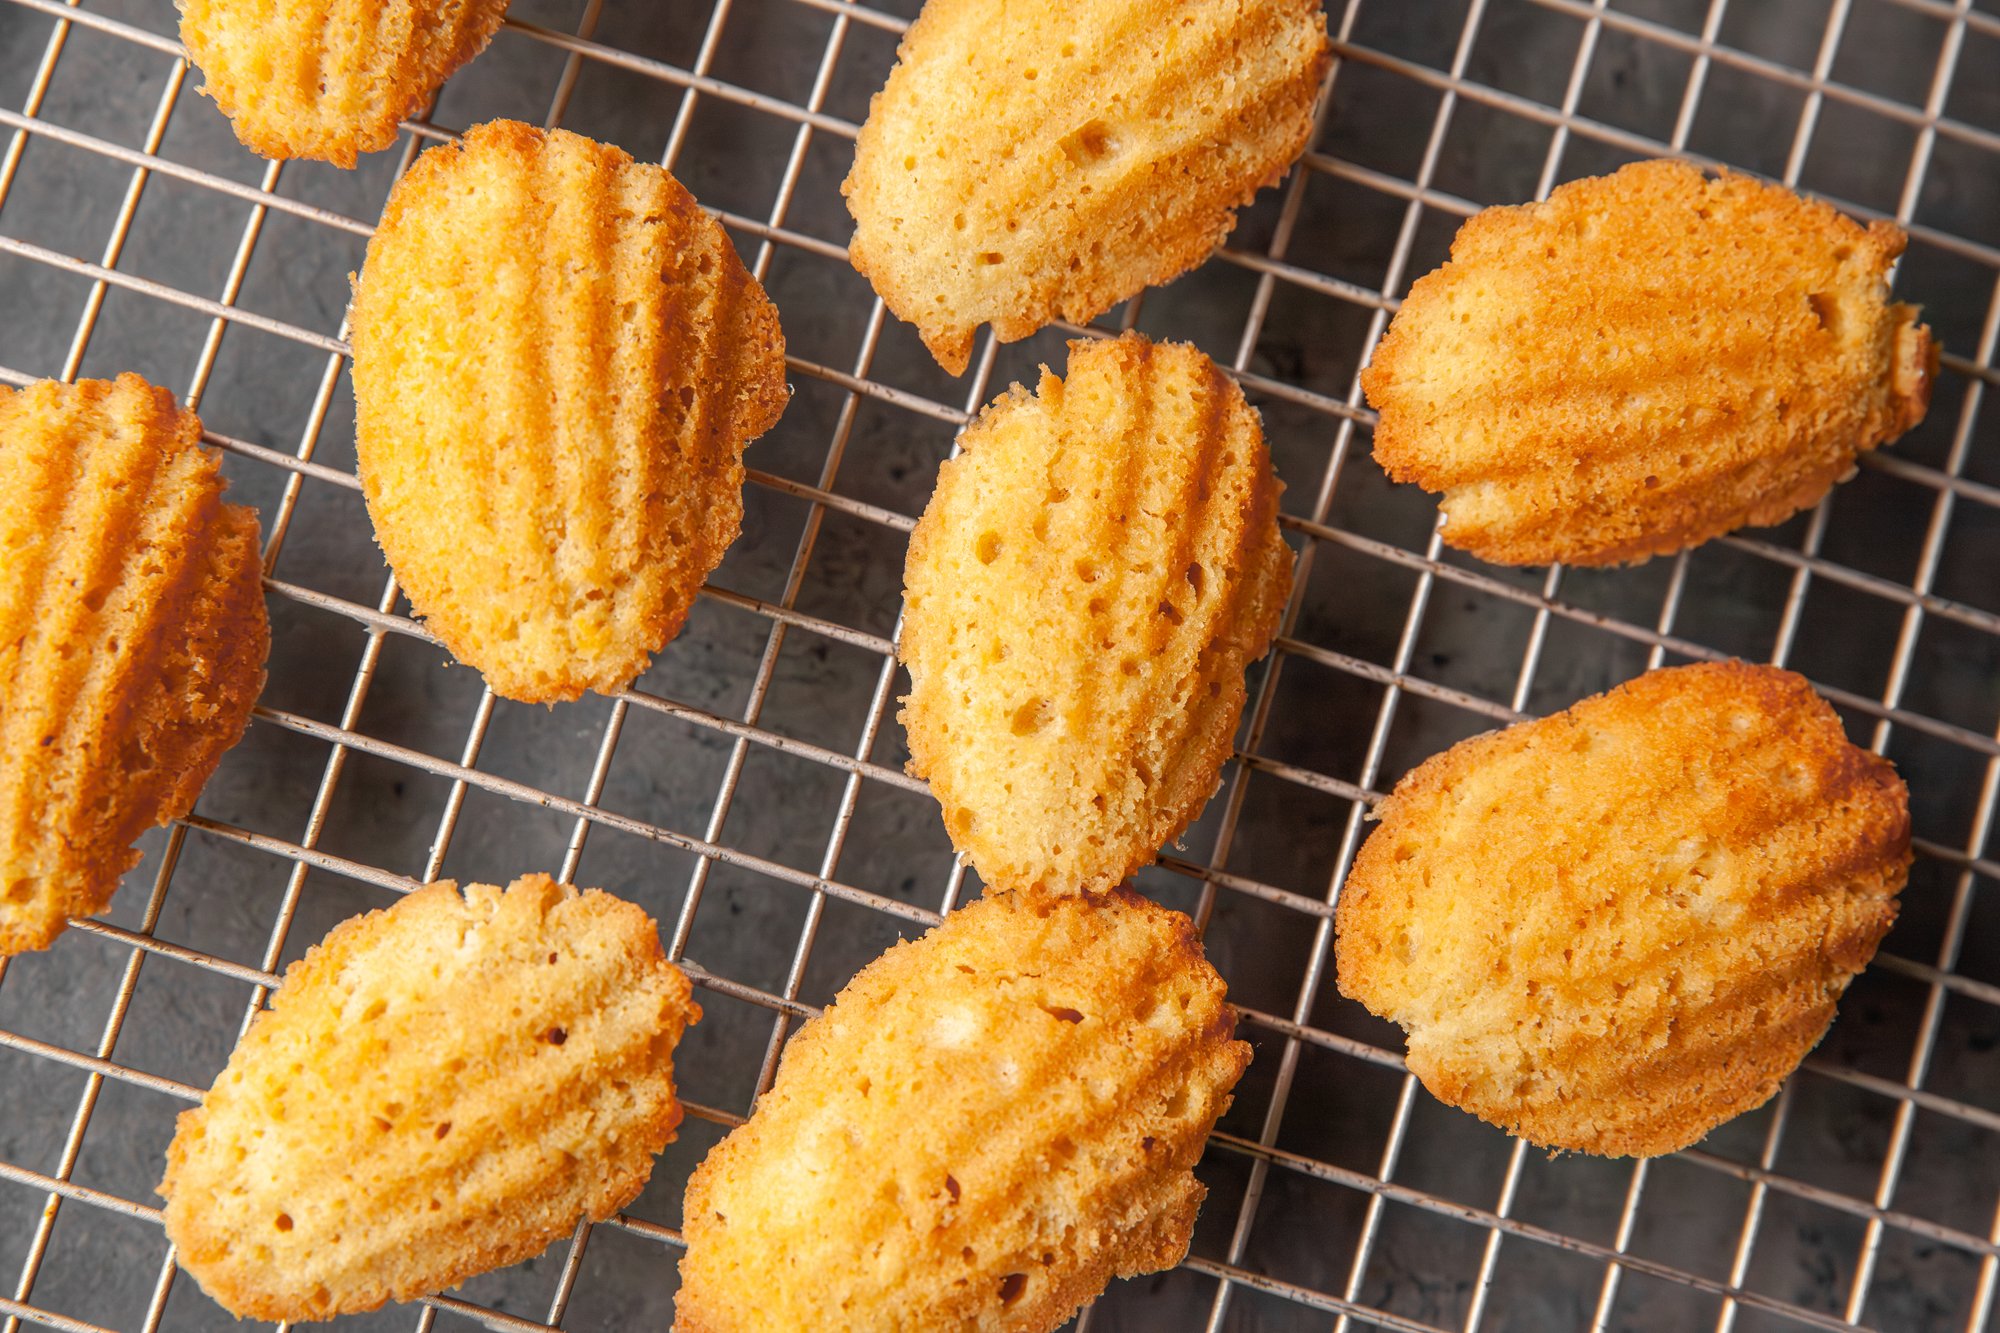
Preheat the oven to 350F and prep the madeleine pan by brushing it with melted butter. You can also flour the pan to help keep the madeleines from sticking but I was able to remove them without doing so.
When the batter has finished chilling, scoop about 1 tbsp into the center of each of the cookie wells – you don’t need to spread it around, it will expand while baking.
Bake for 10-12 minutes until the cookies spring back and are nicely browned. Transfer the cookies to a wire rack right away to let them cool.
If you want to (I definitely did) you can sprinkle with powdered sugar to serve.
The cookies are best the same day (and warm), but I found putting them in a paper bag let them stay moist overnight for breakfast the next morning.
ENJOY!
Follow me on Social Media