Blogging

RECIPE: Tortillas From Scratch for BC Living

Tortillas
for “From Scratch” for BC Living
April 2023 
 
I’d been wanting to try making my own tortillas for a while now. I always find when I get a pack from the store, I cannot finish them before they go stale (esp. the fresh corn ones in the HUGE packages). 
 
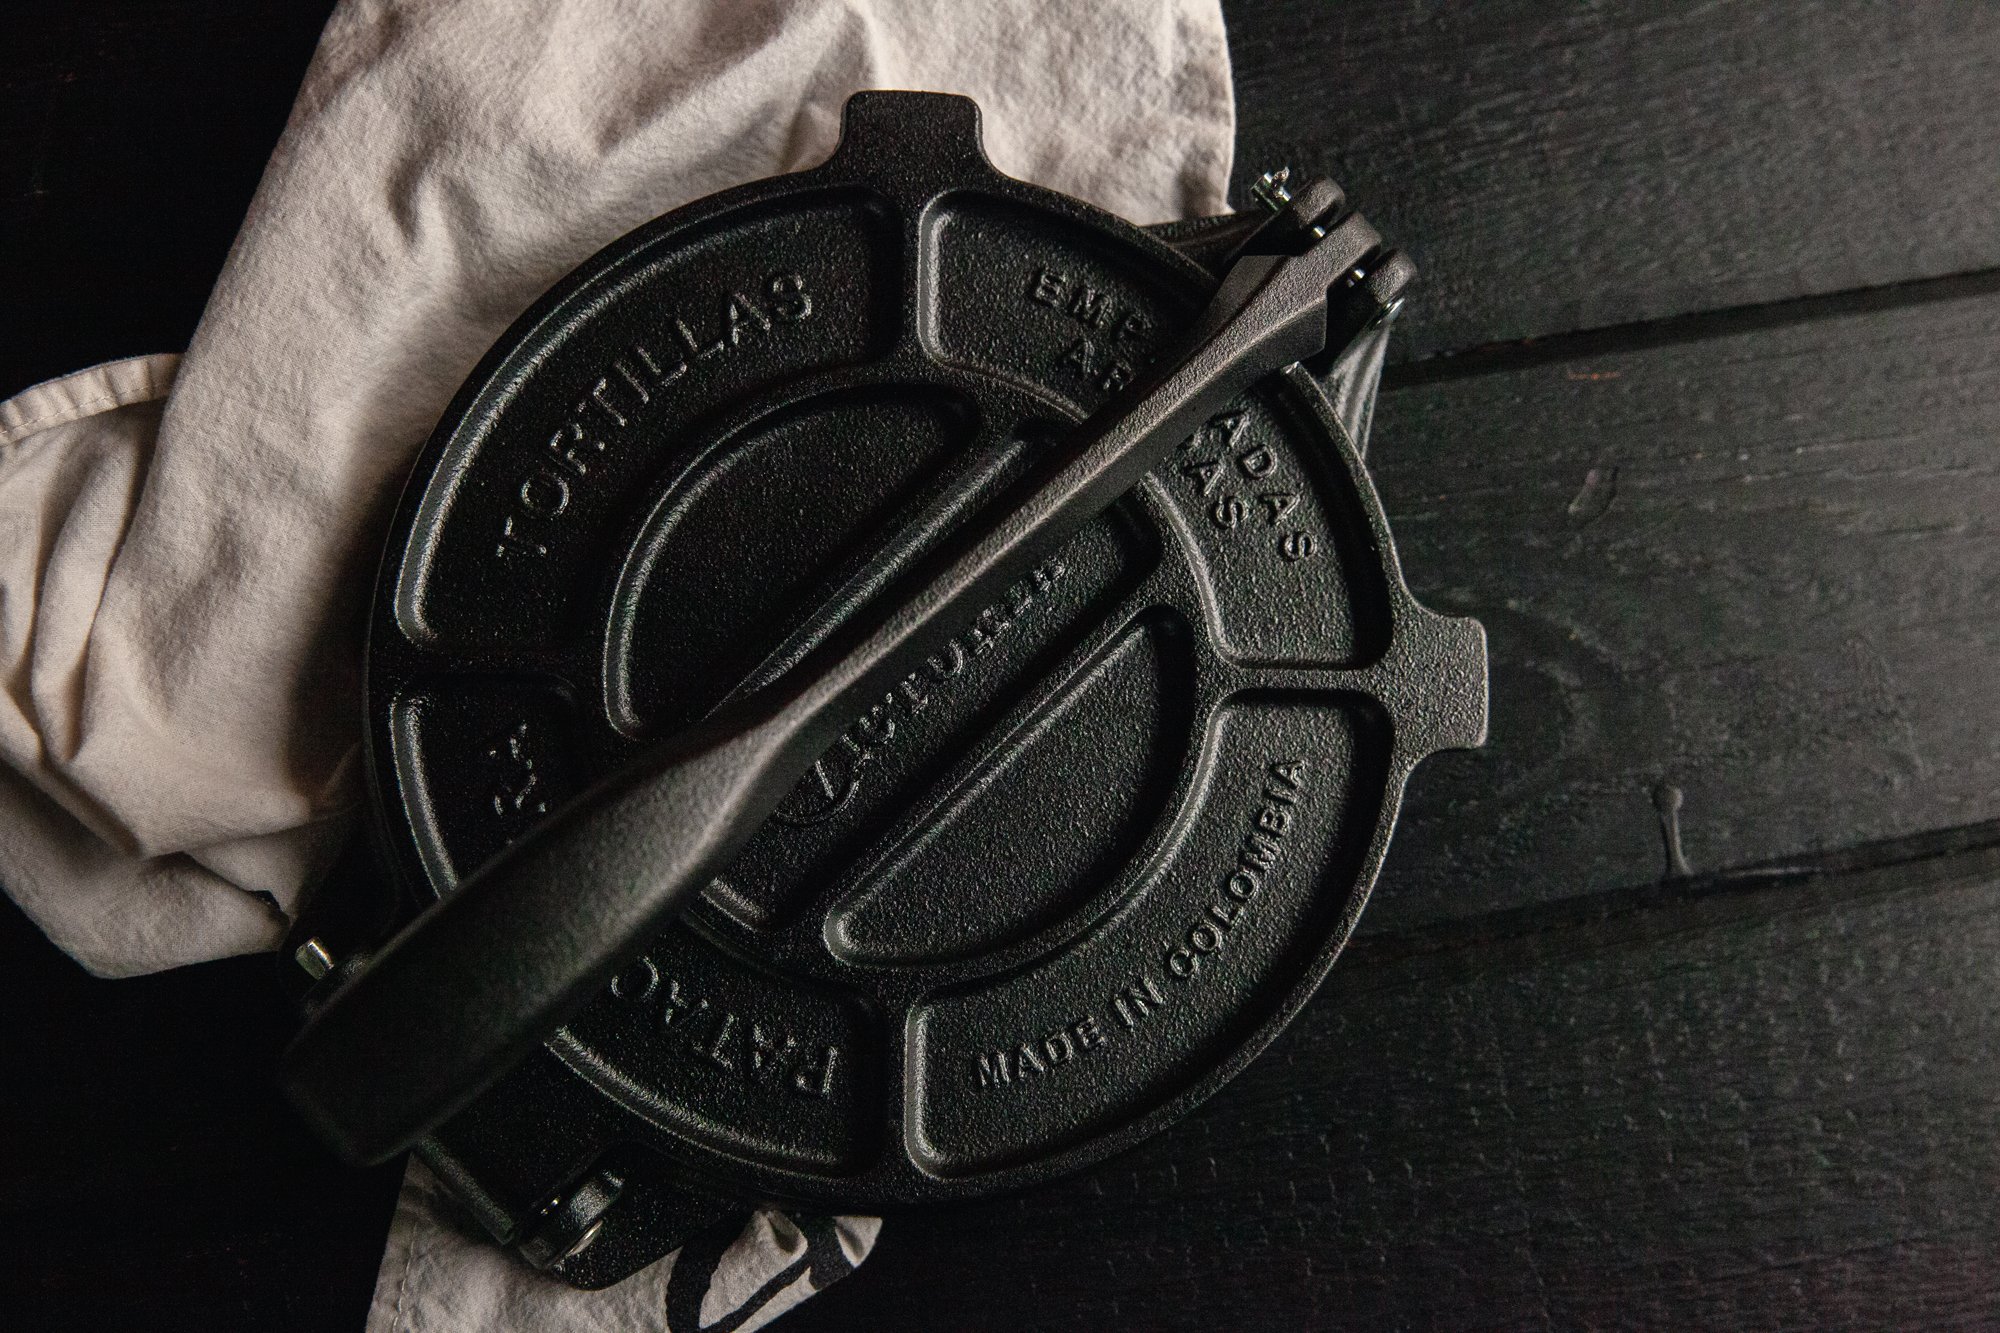
I got myself a press but you can do the same with a heavy pot, and it will take some practice not to rip them or make sure they’re even, but when you get going, you REALLY get going. 
 
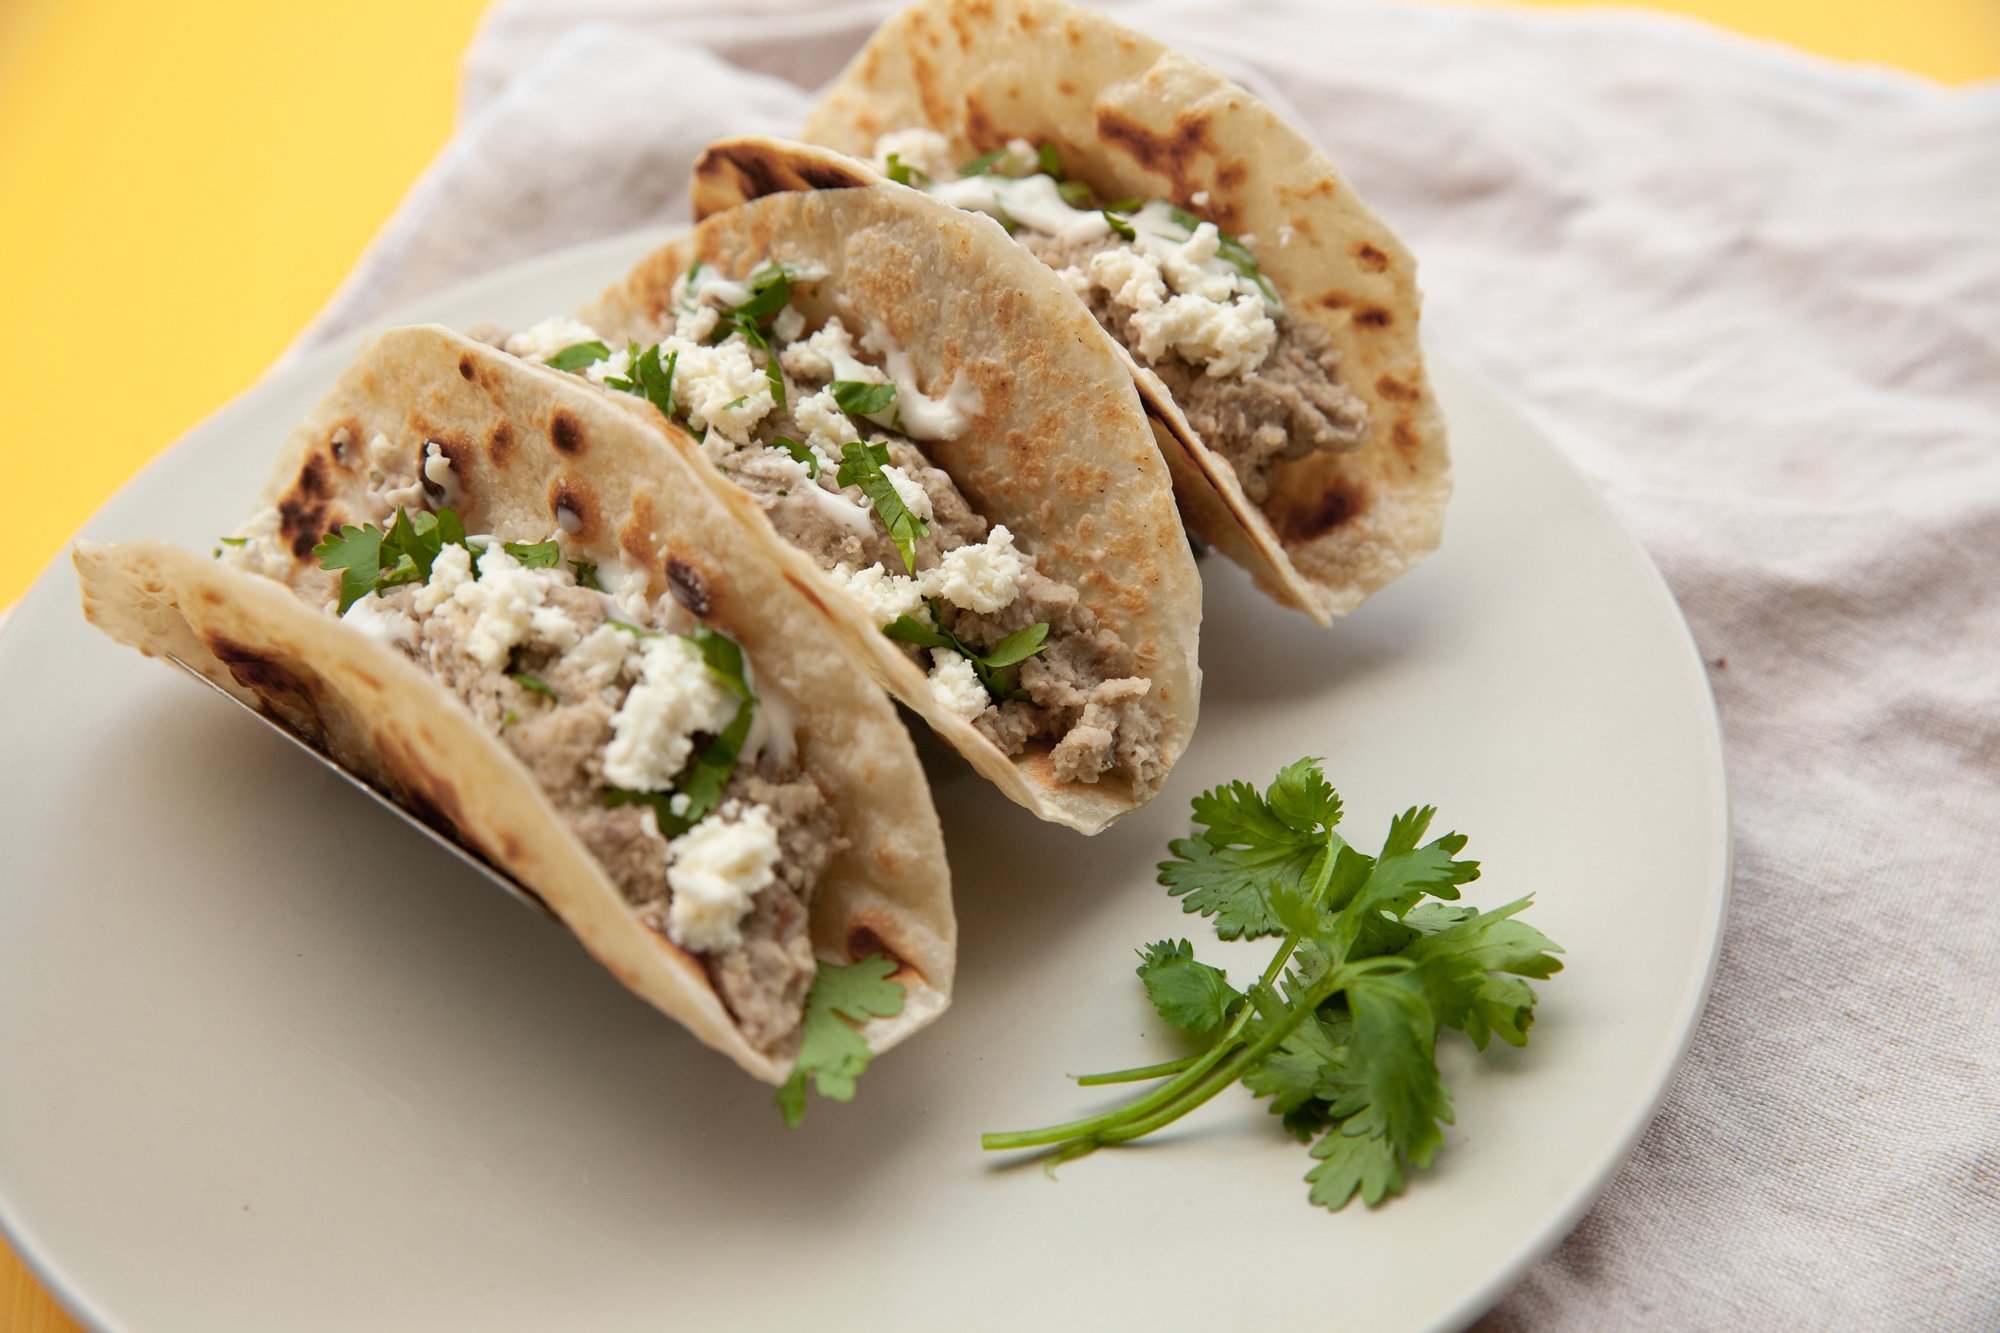
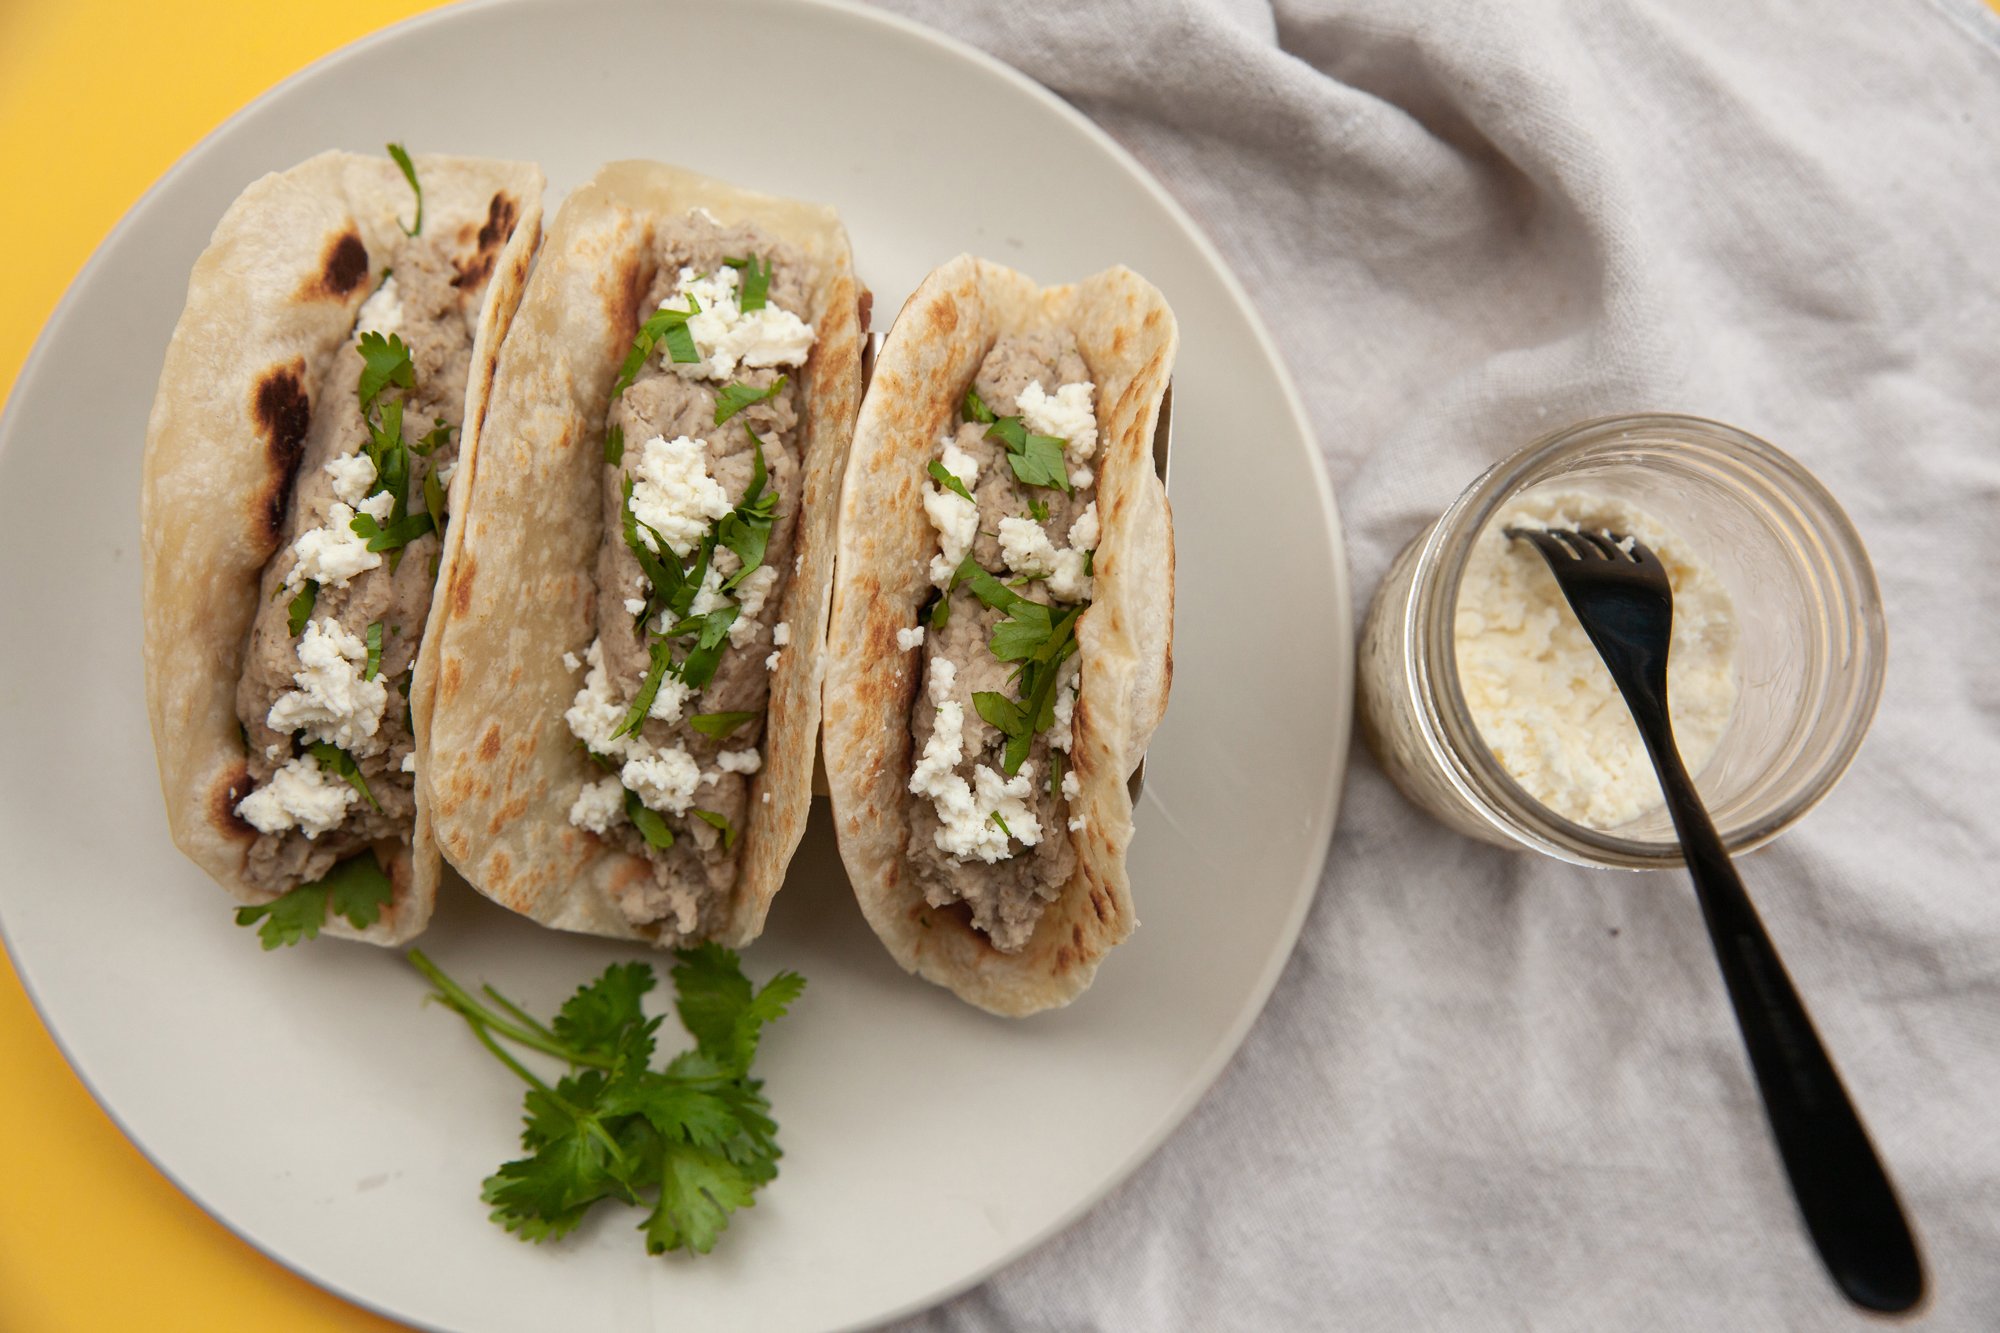
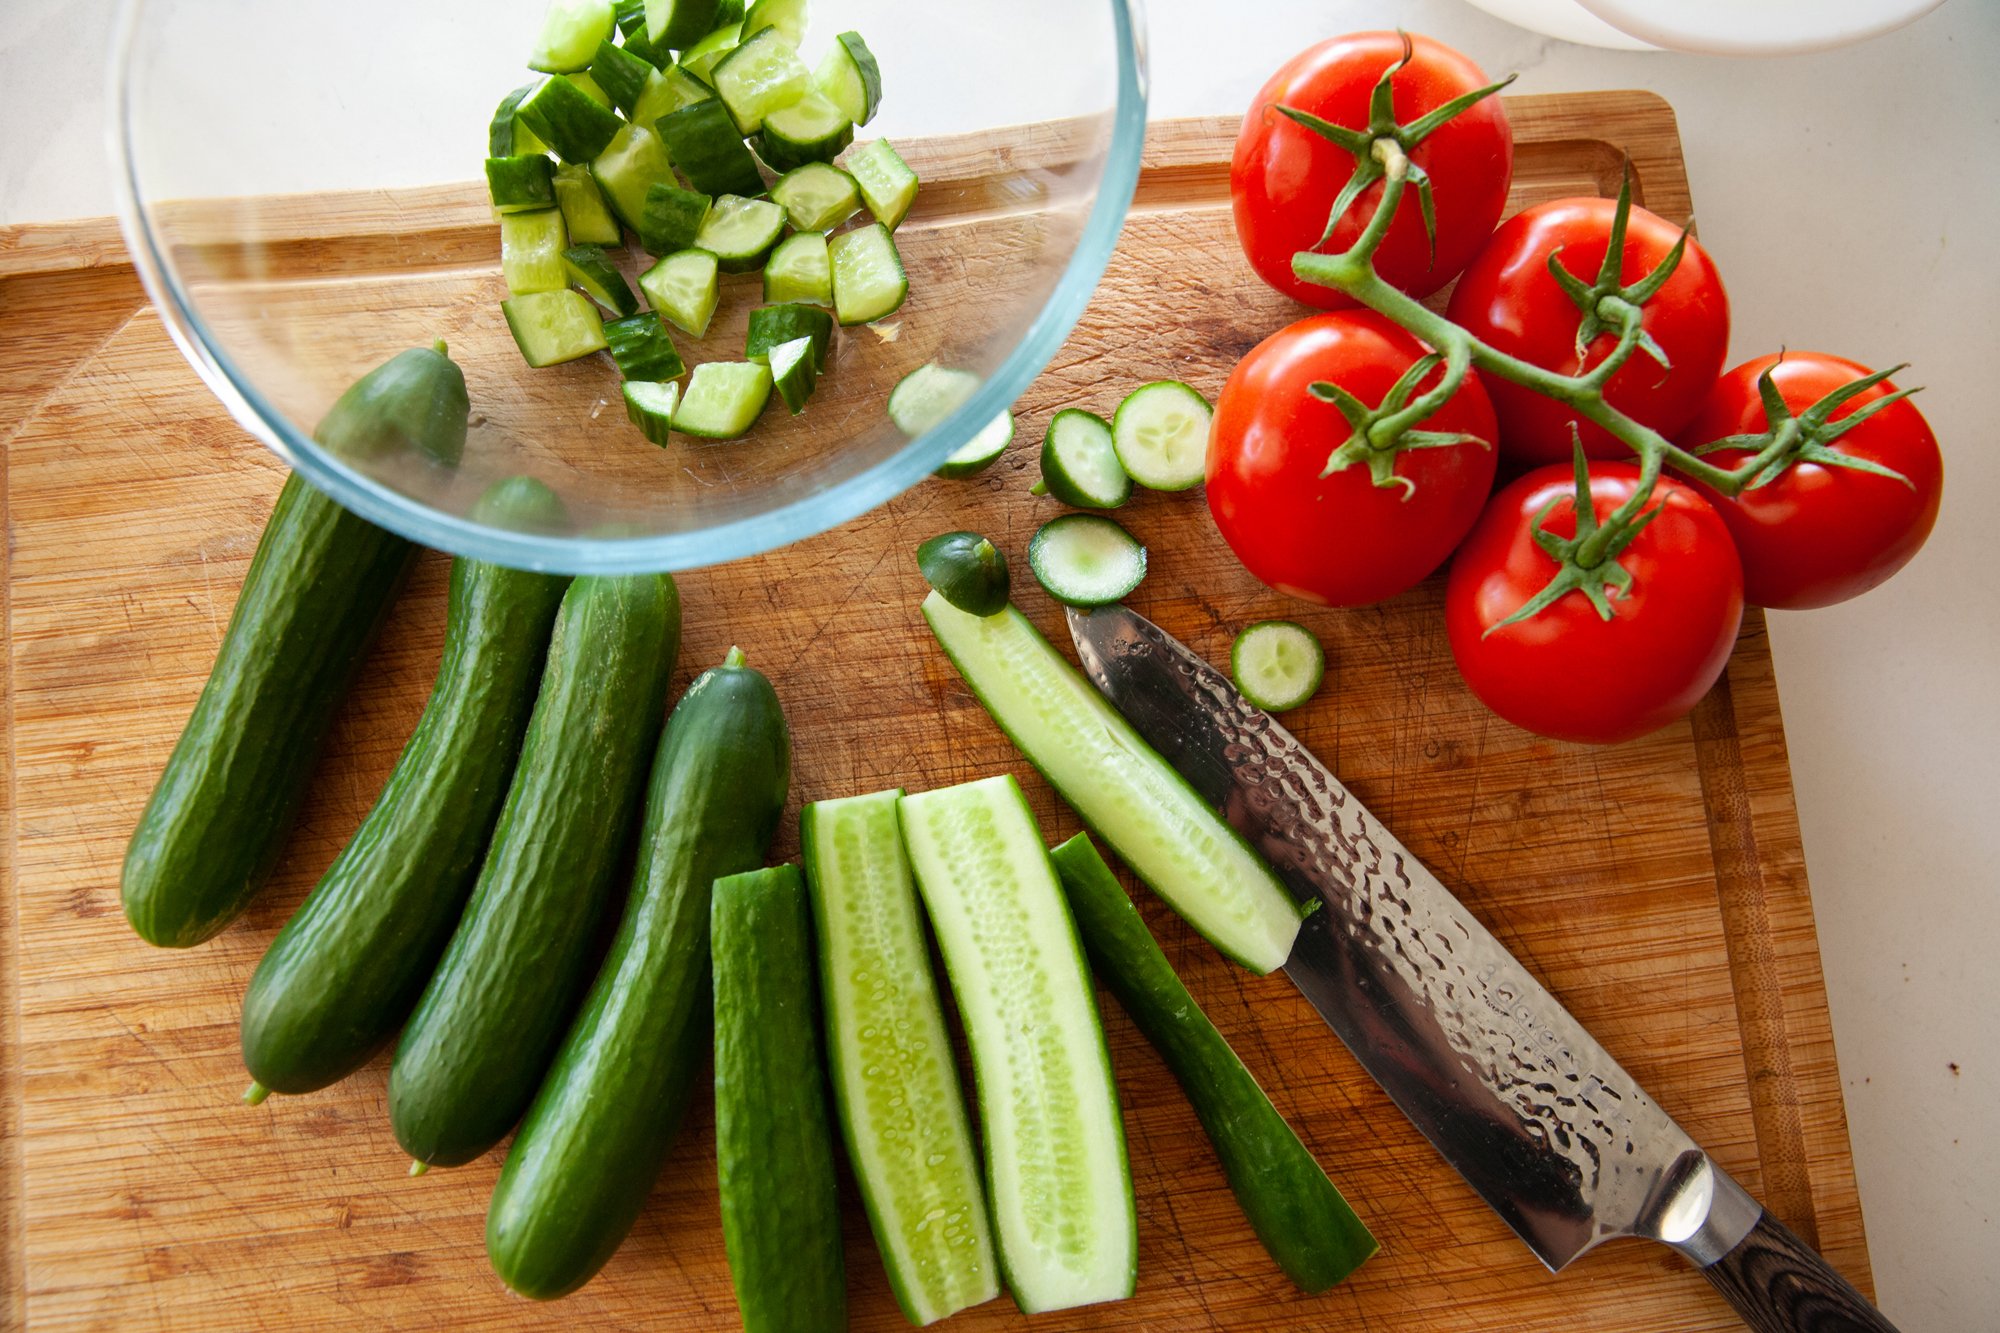
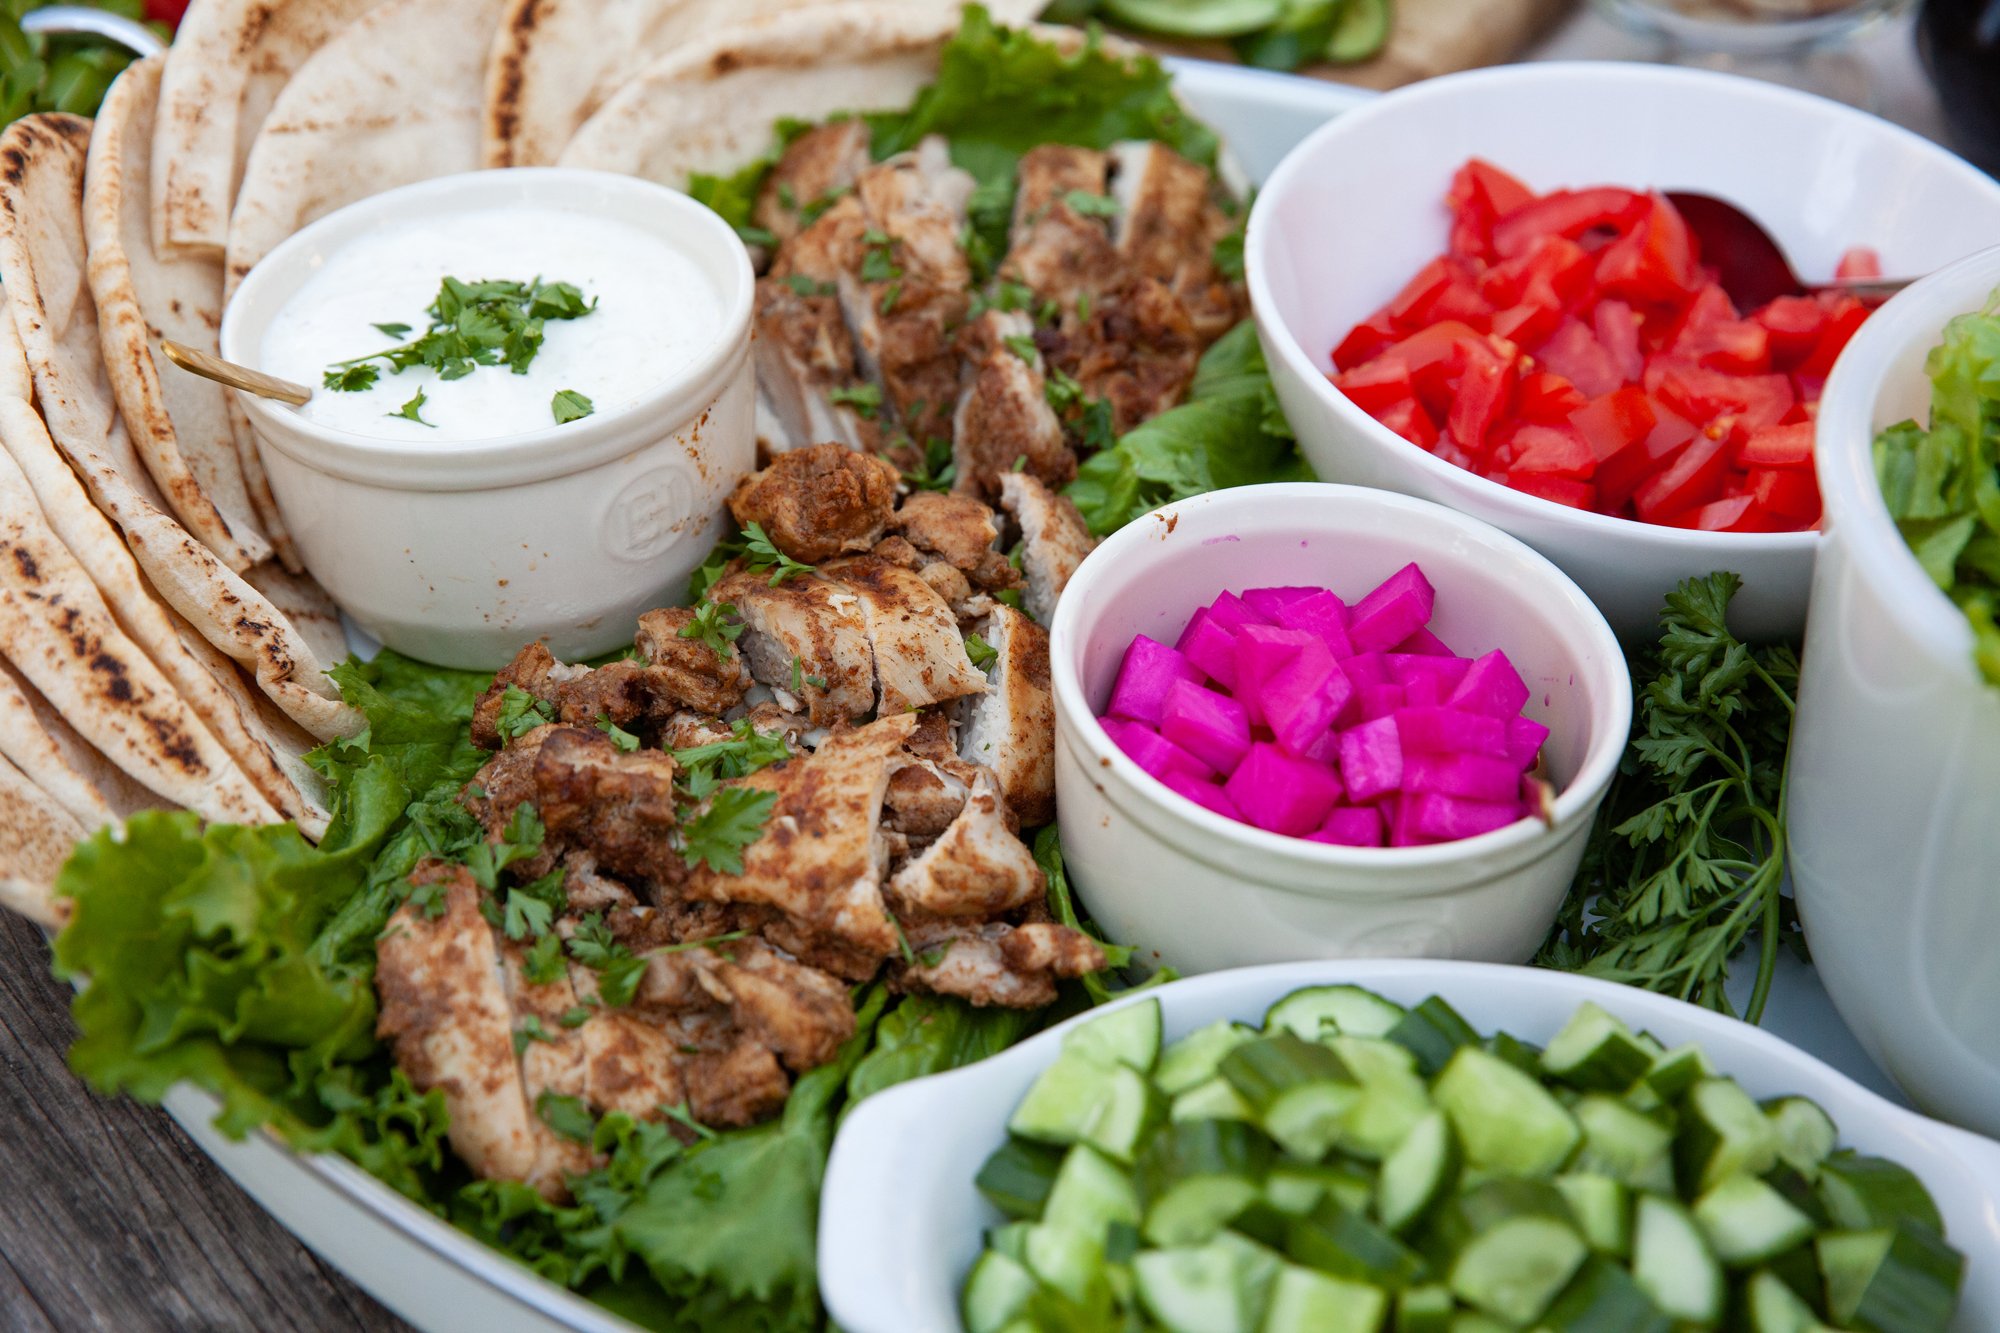
Taco parties just got a whole lot better! 
 

INGREDIENTS 

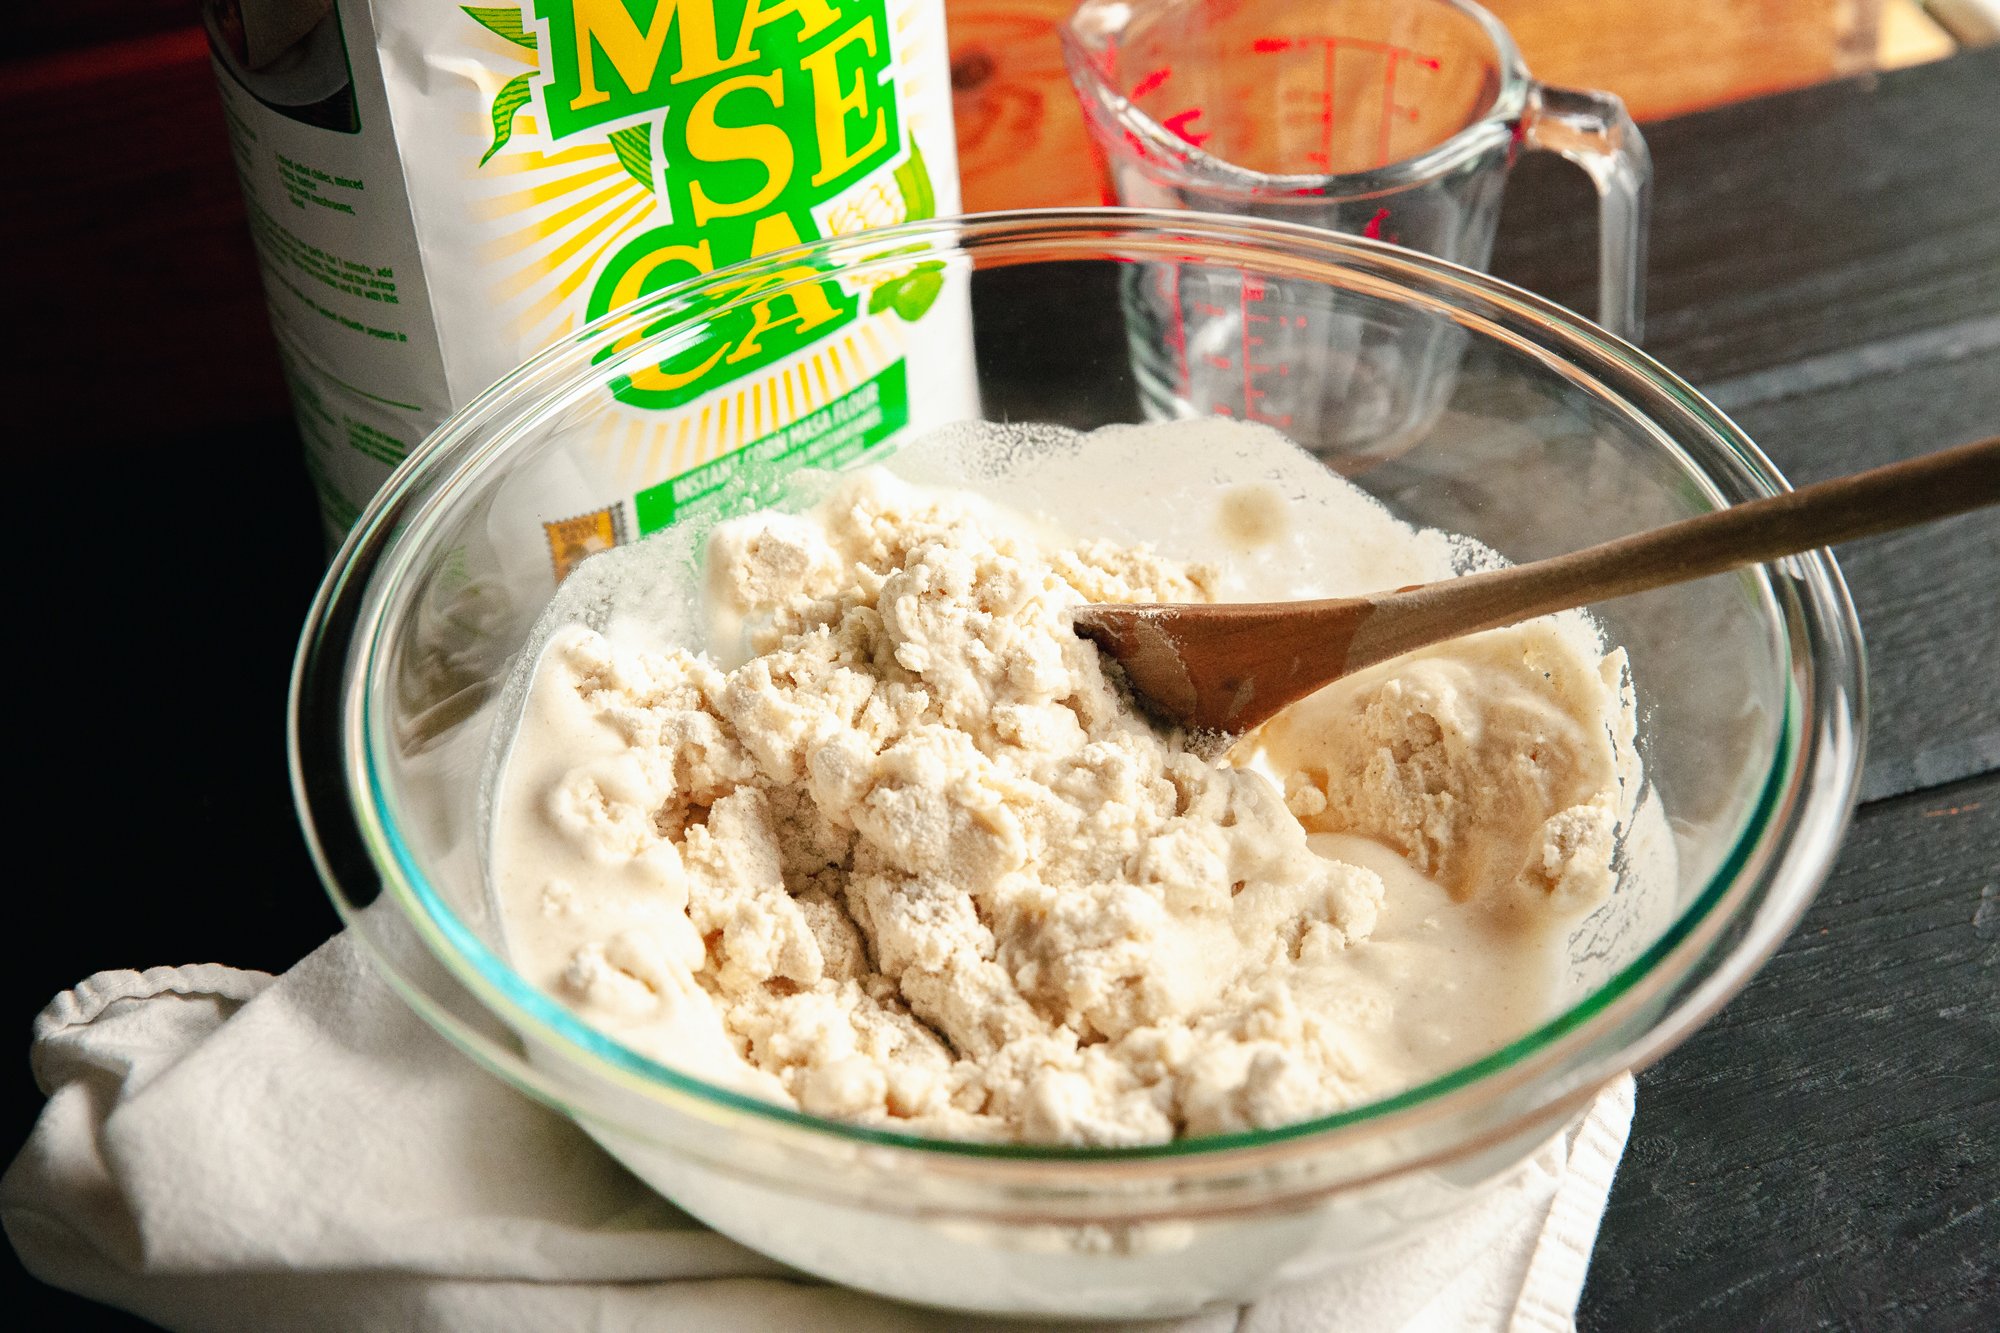
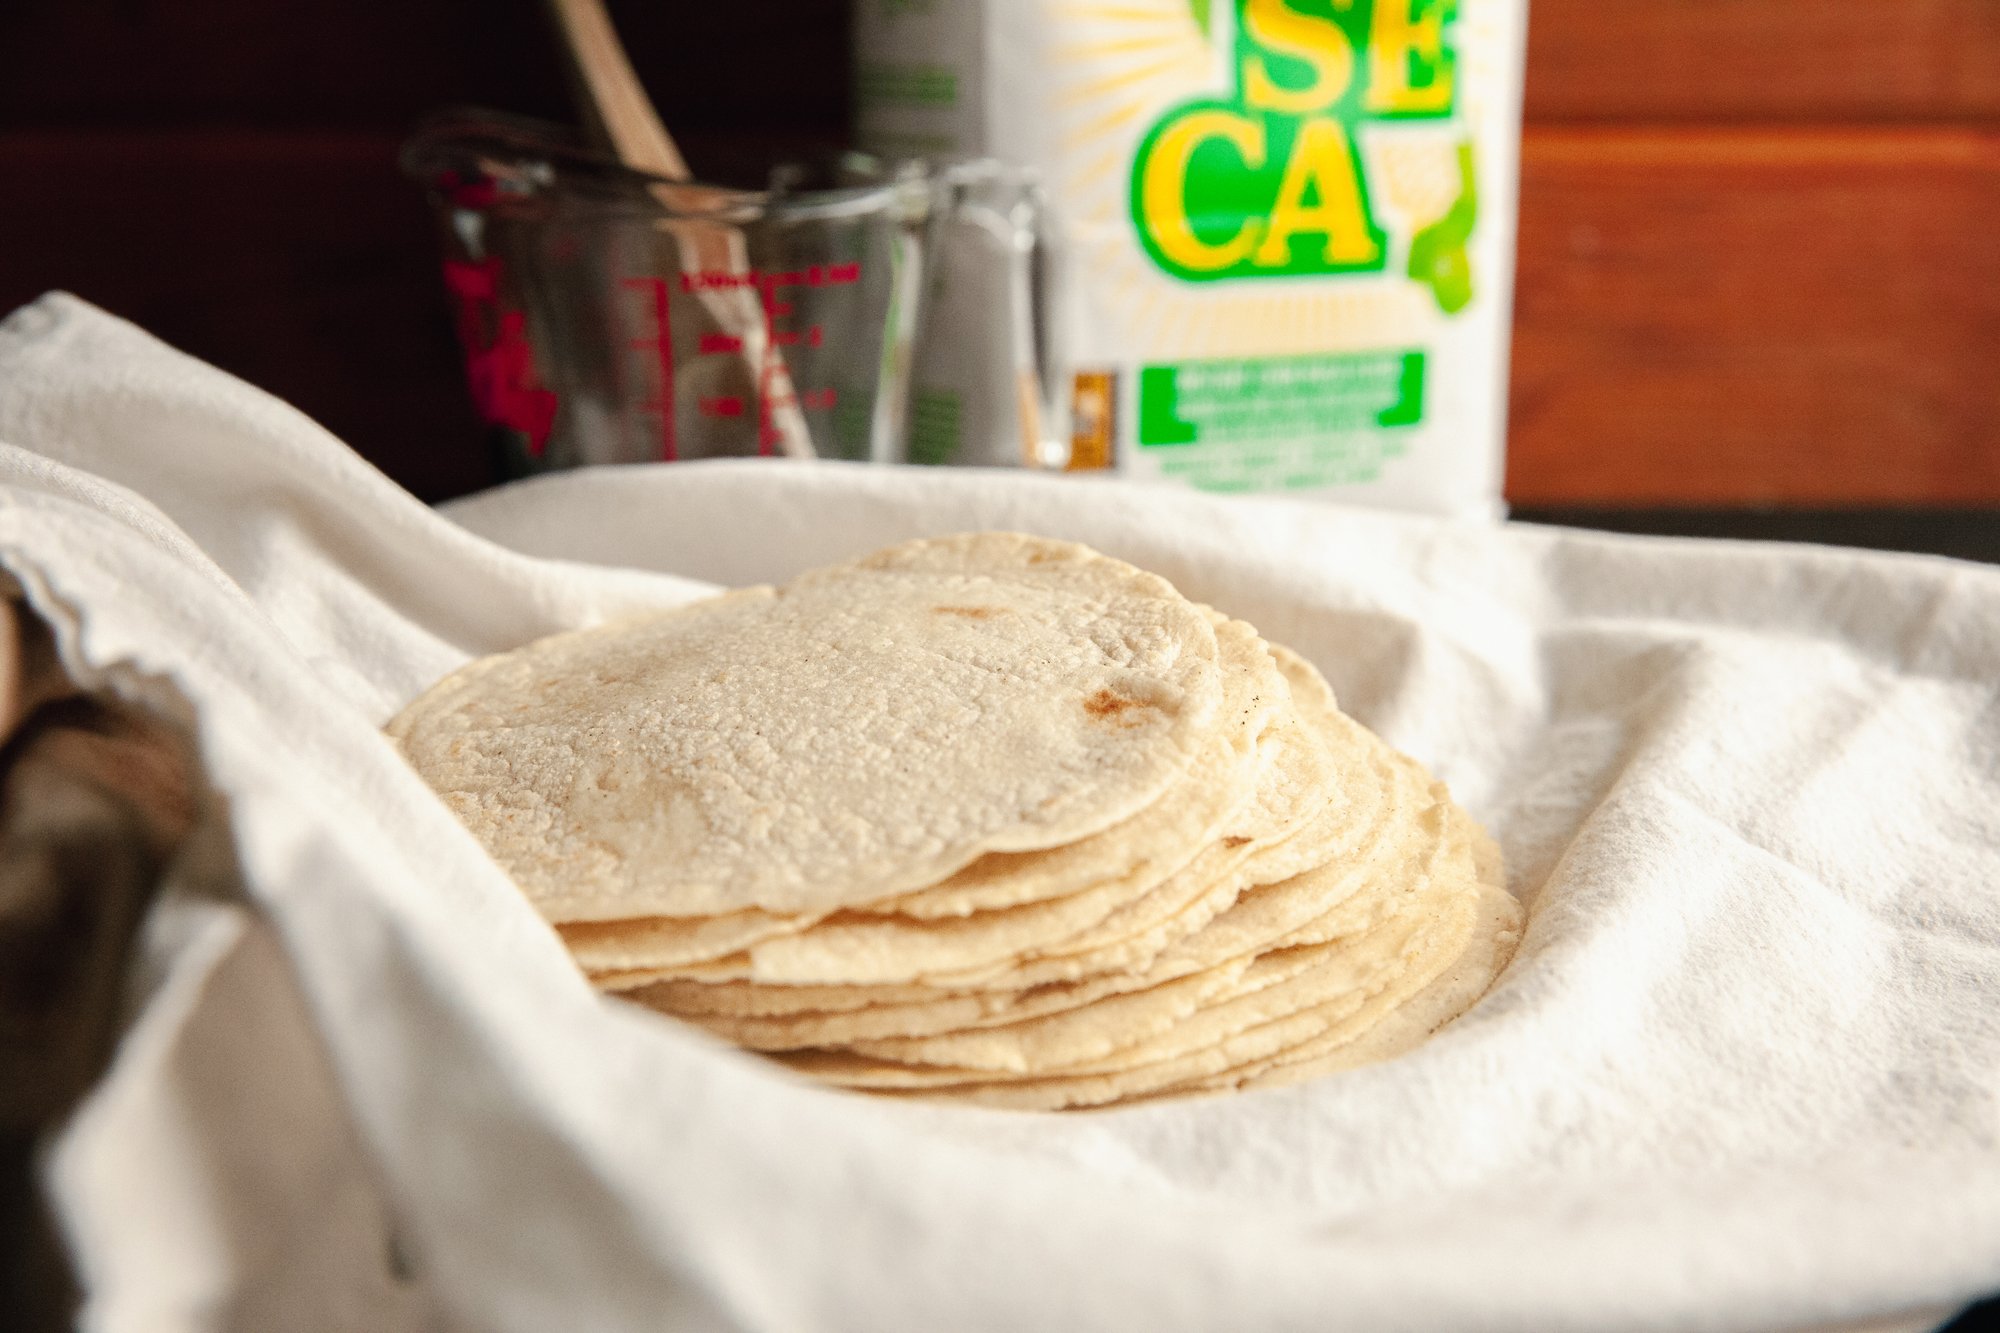
-2 cups corn flour (masa harina) 
-1.5 cups warm (to hot) water 
 
INSTRUCTIONS 
 
[NOTE: I used Maseca brand corn flour for my dough.] 
 

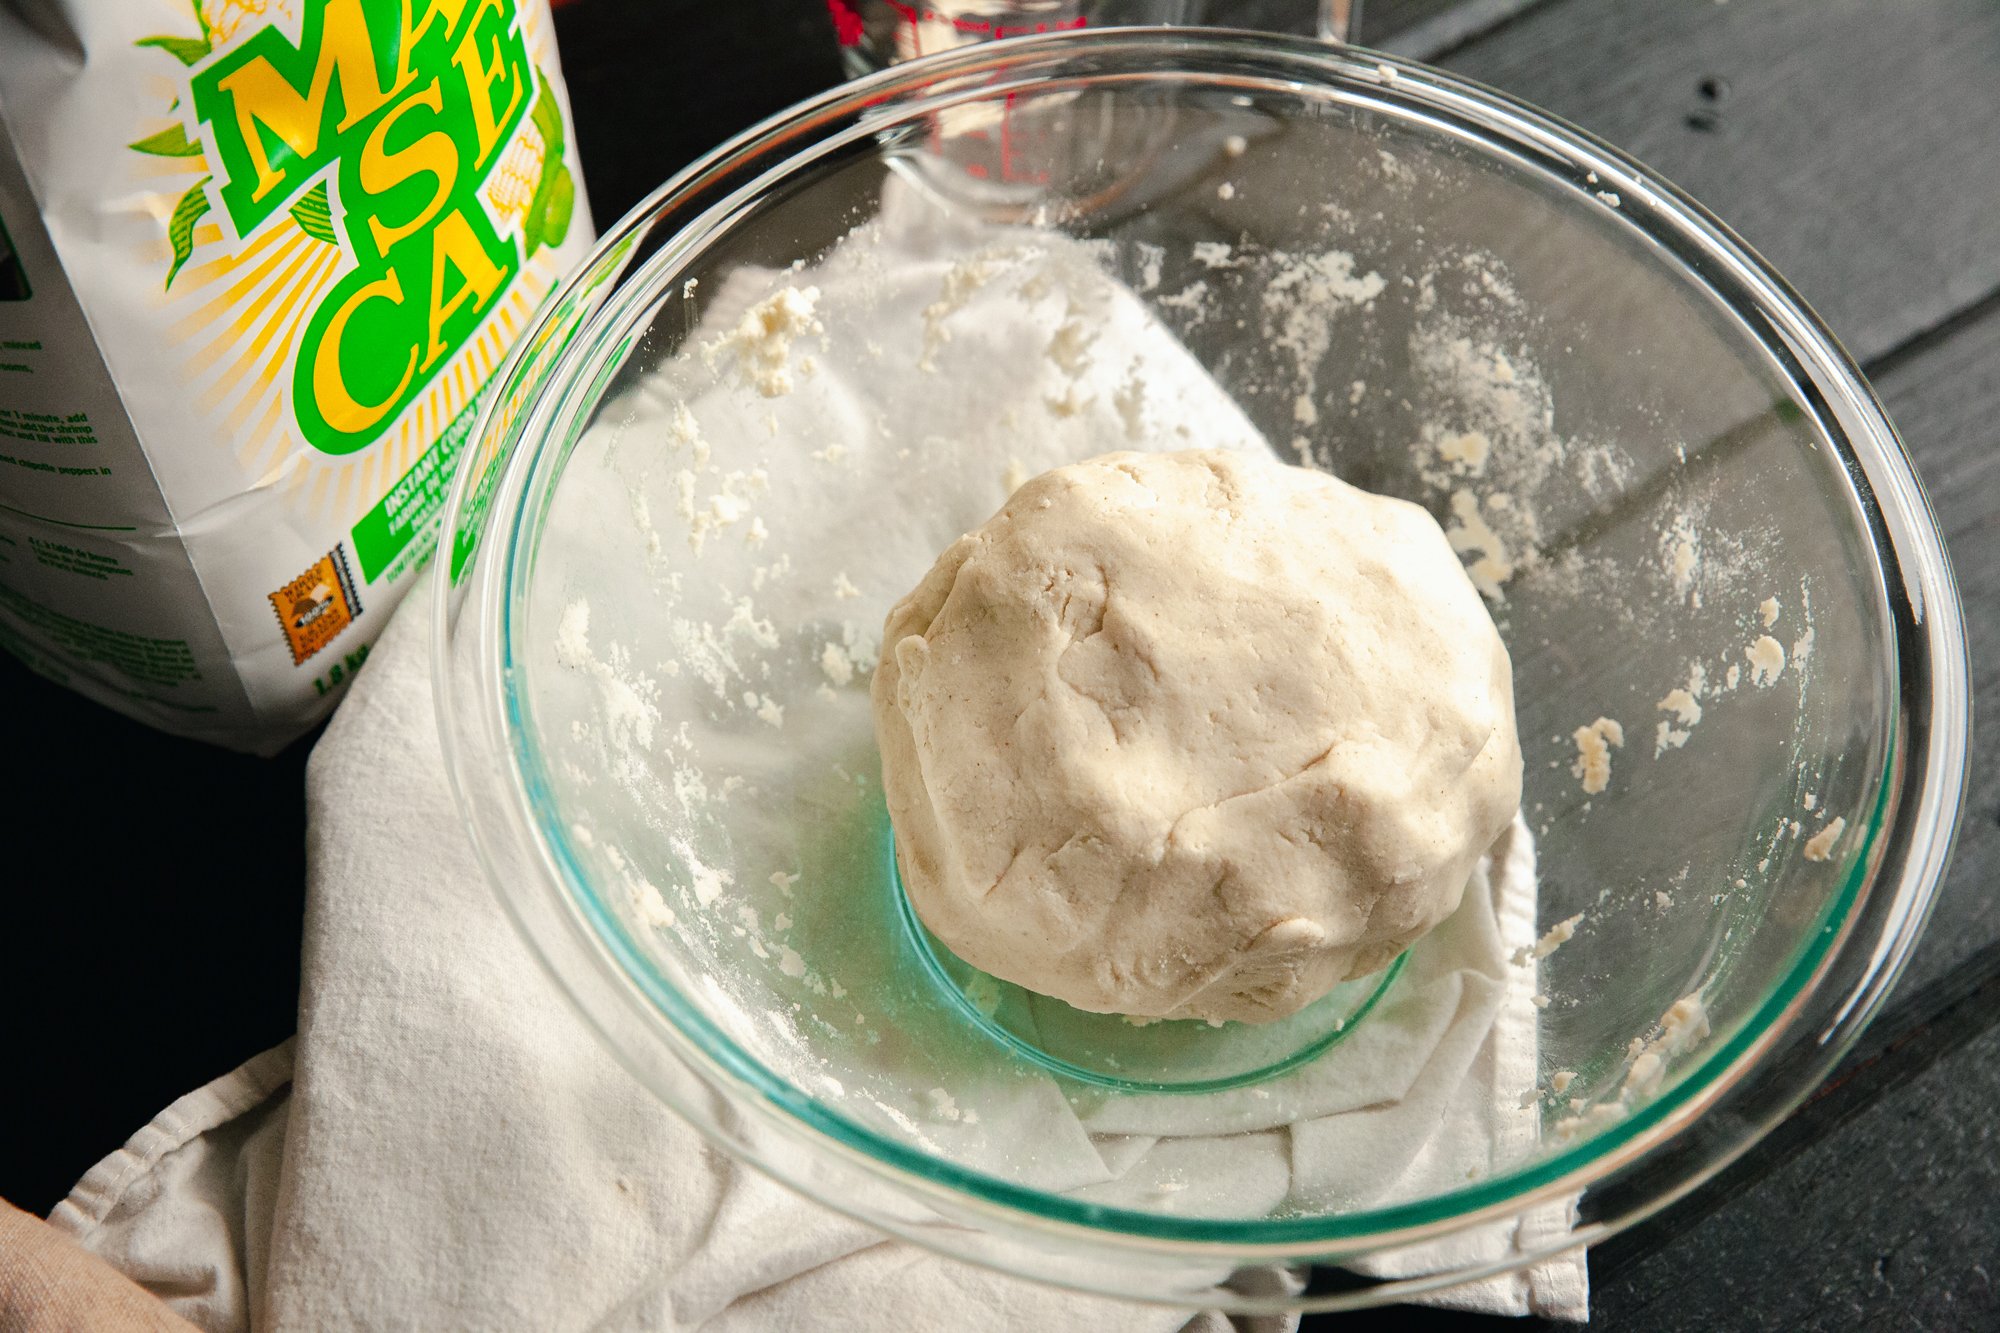
In a large mixing bowl add the flour and water and mix until the dough starts to come together, and then finish with your hands until it is smooth but springy. (I heard it compared to Play-Doh texture and that’s pretty accurate.) If it’s too dry you can add a tiny bit more water and vice versa with flour if too wet. 
 
Once your dough is formed, cover it with a damp towel (paper or tea towel) and let it rest for 20mins. 
 
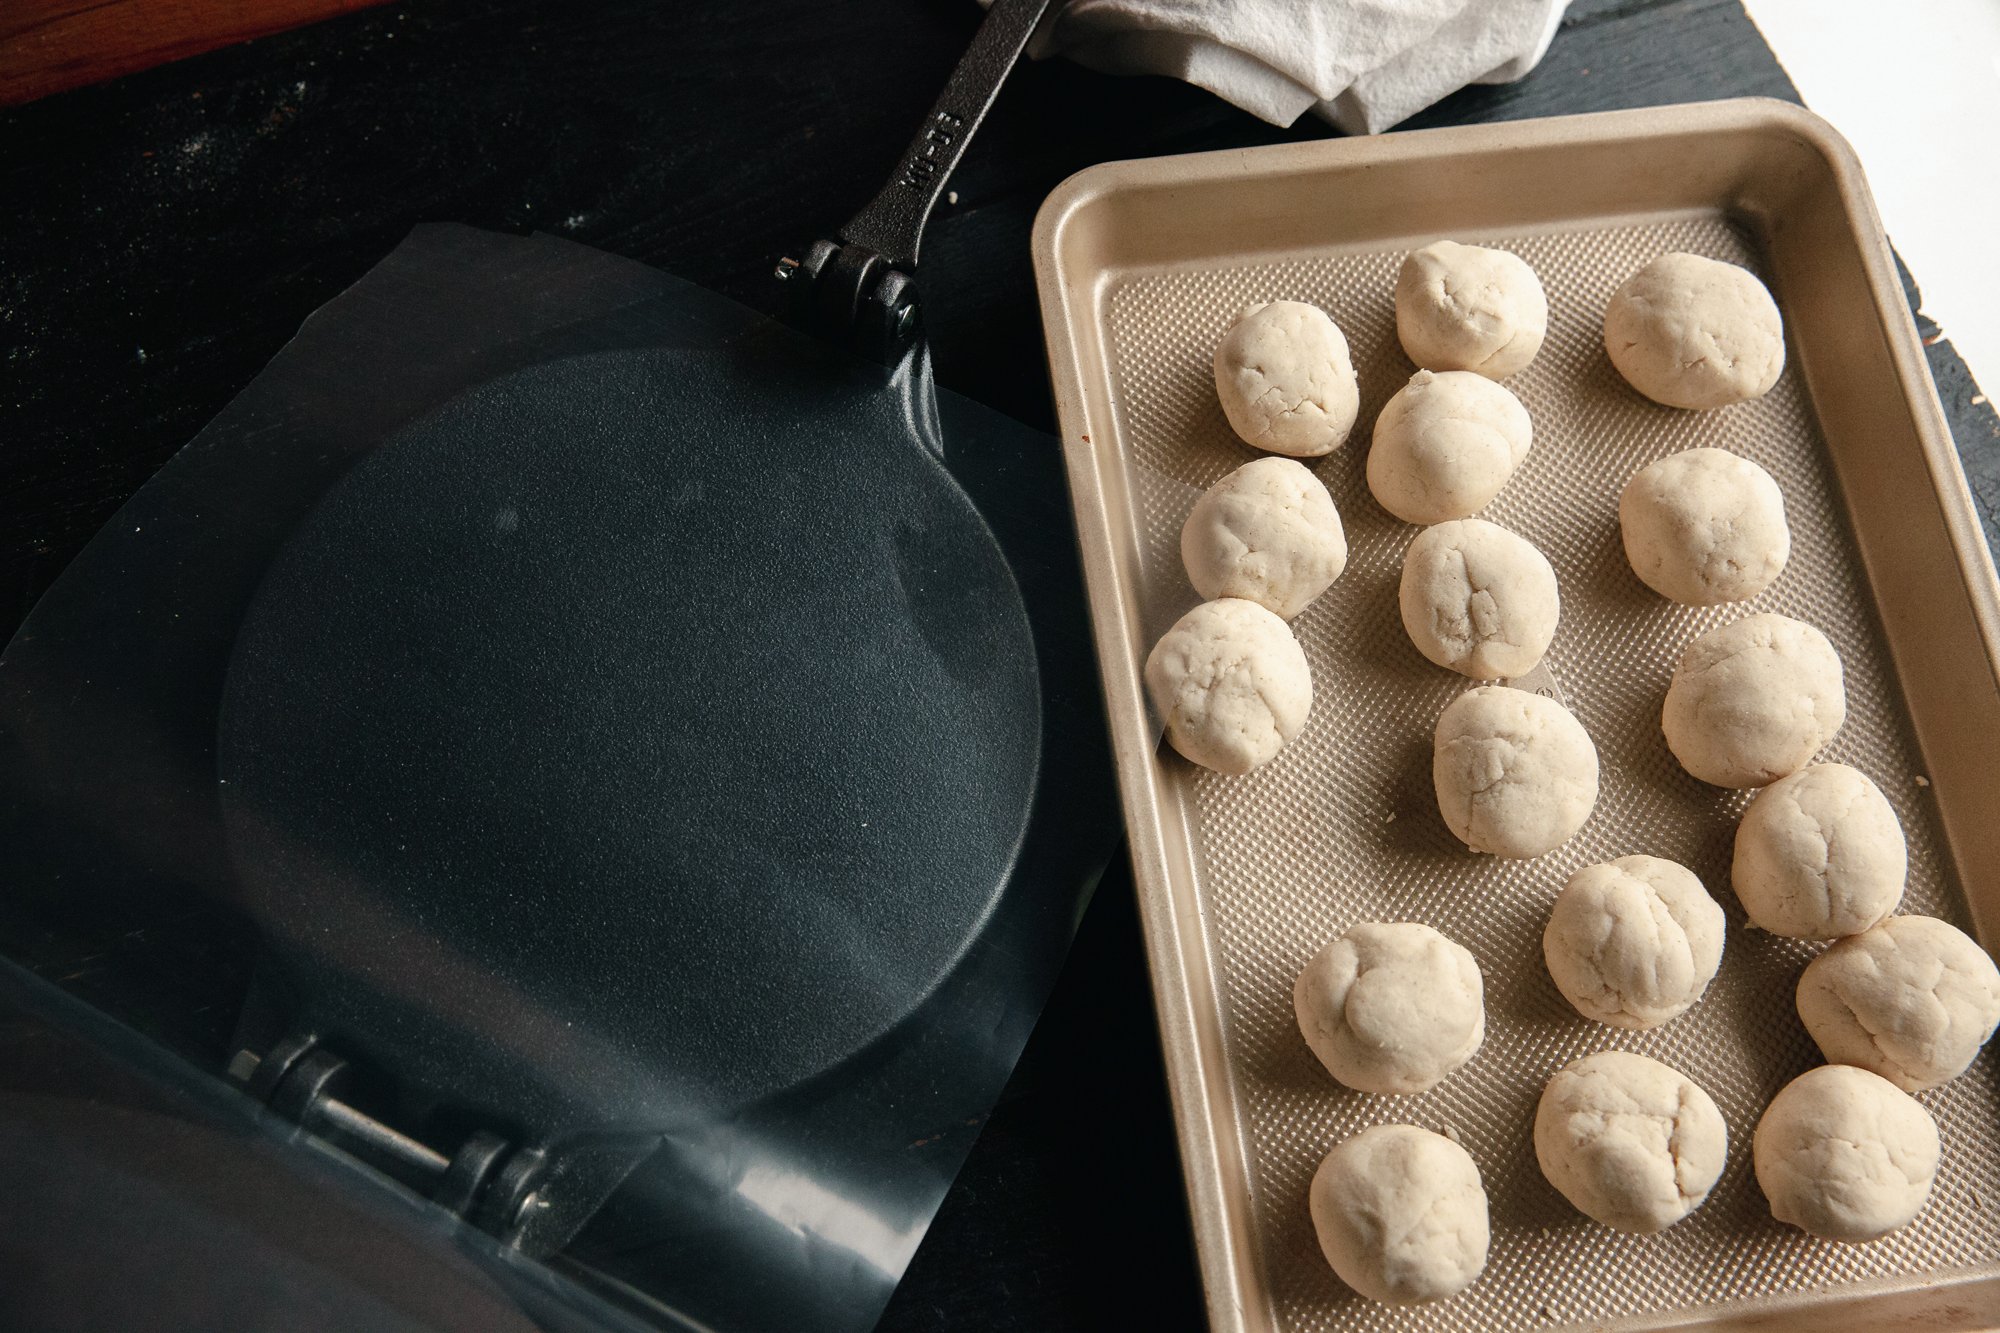
I weighed the dough and portioned it into approx. 40g balls – if you do not have a scale, use either a cookie/ice cream scoop or take approx. 2 tbsp of the dough and roll it into smooth balls. You will get around 16 give-or-take. 
 
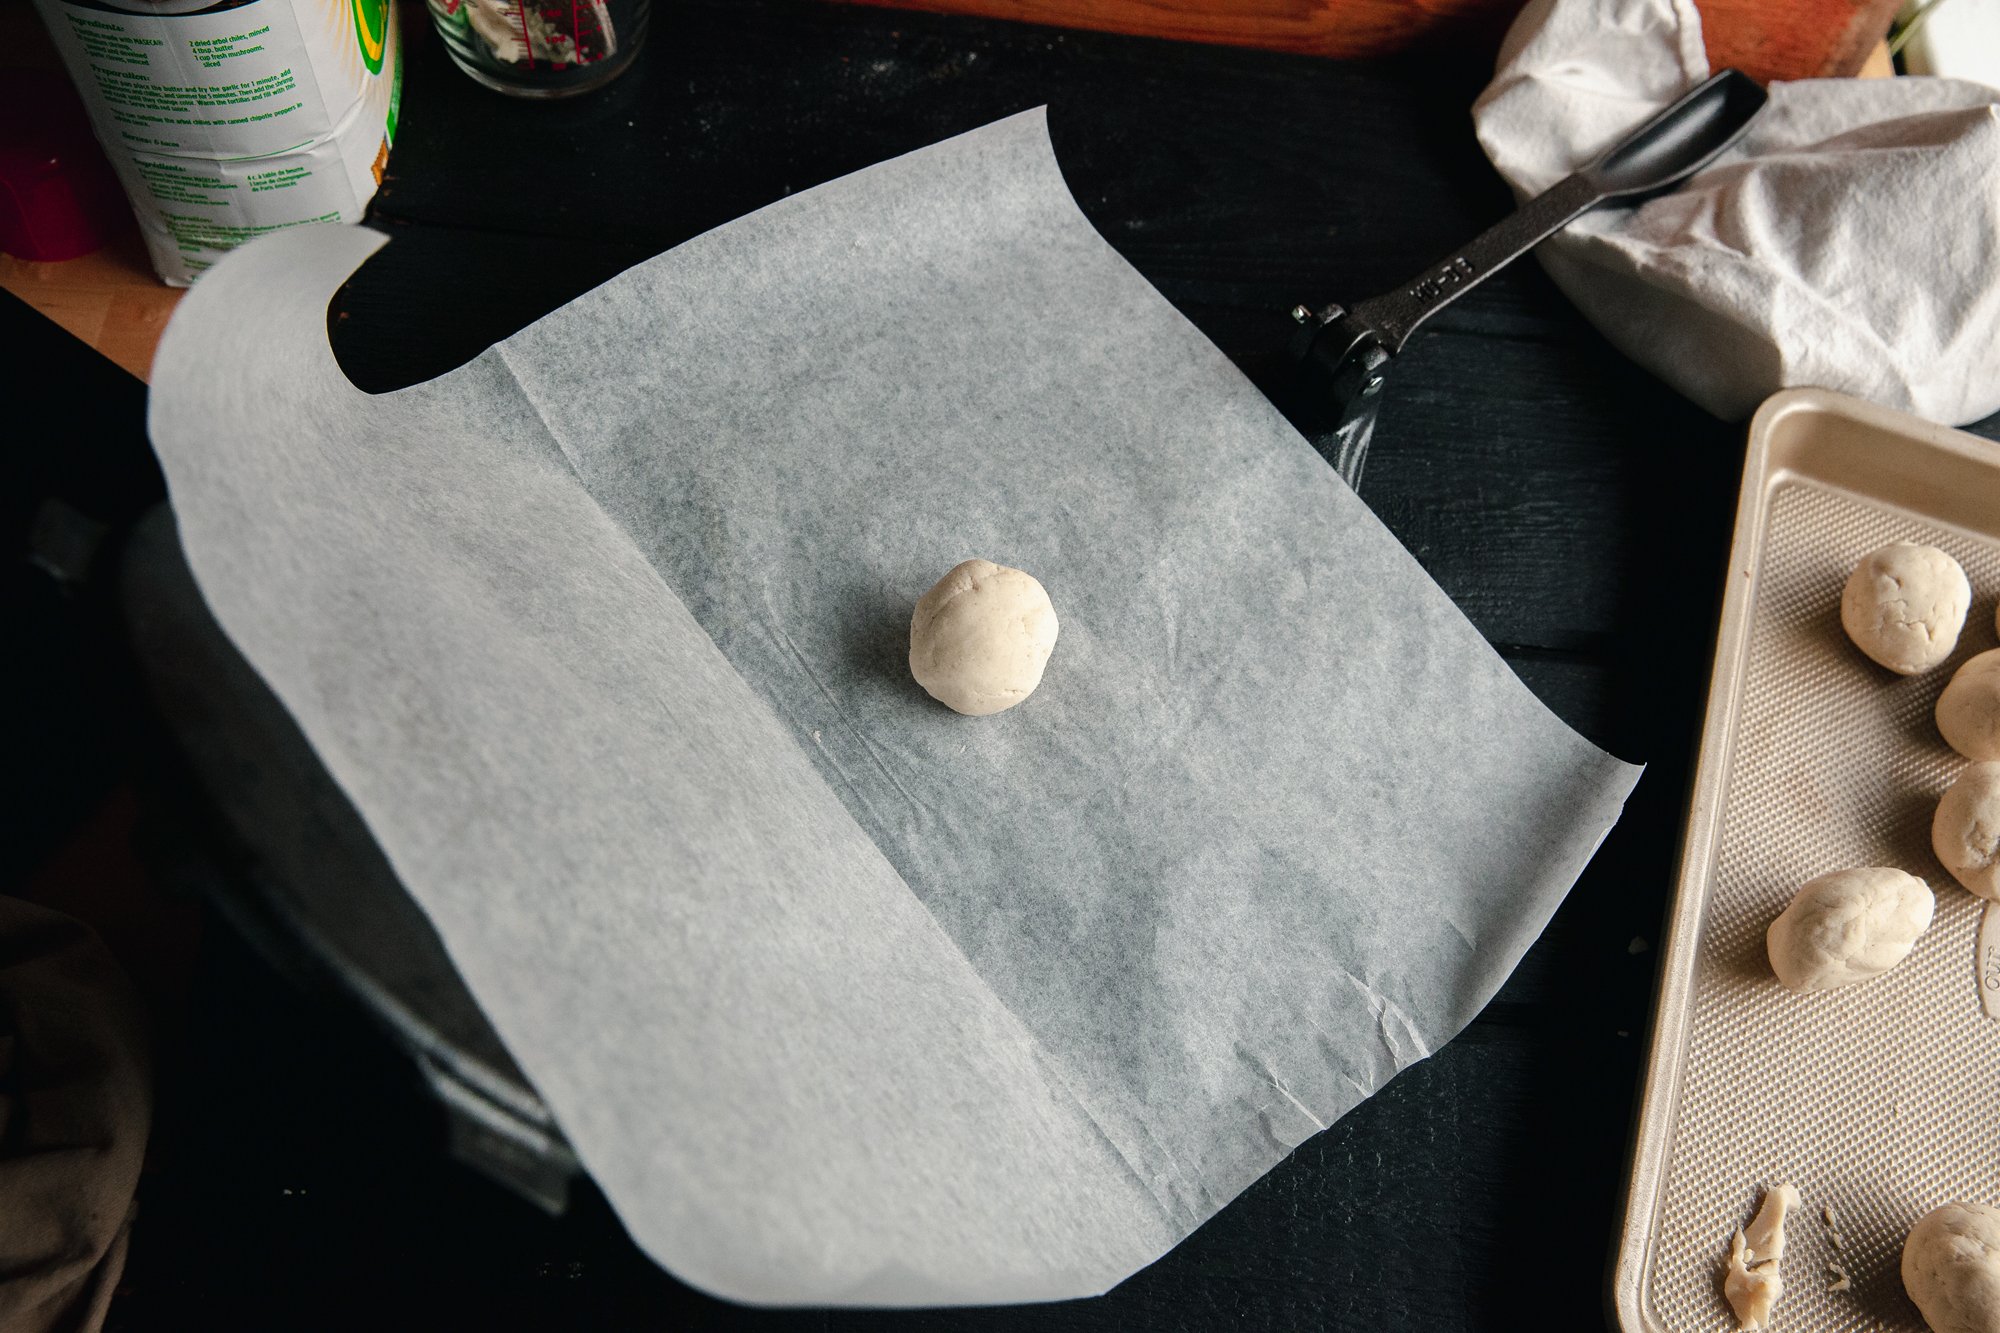
Get two sheets of parchment paper, or wax, or cut the sides away from a ziplock bag – you might find the dough sticks to one of these, so try another if this is the case. 
 
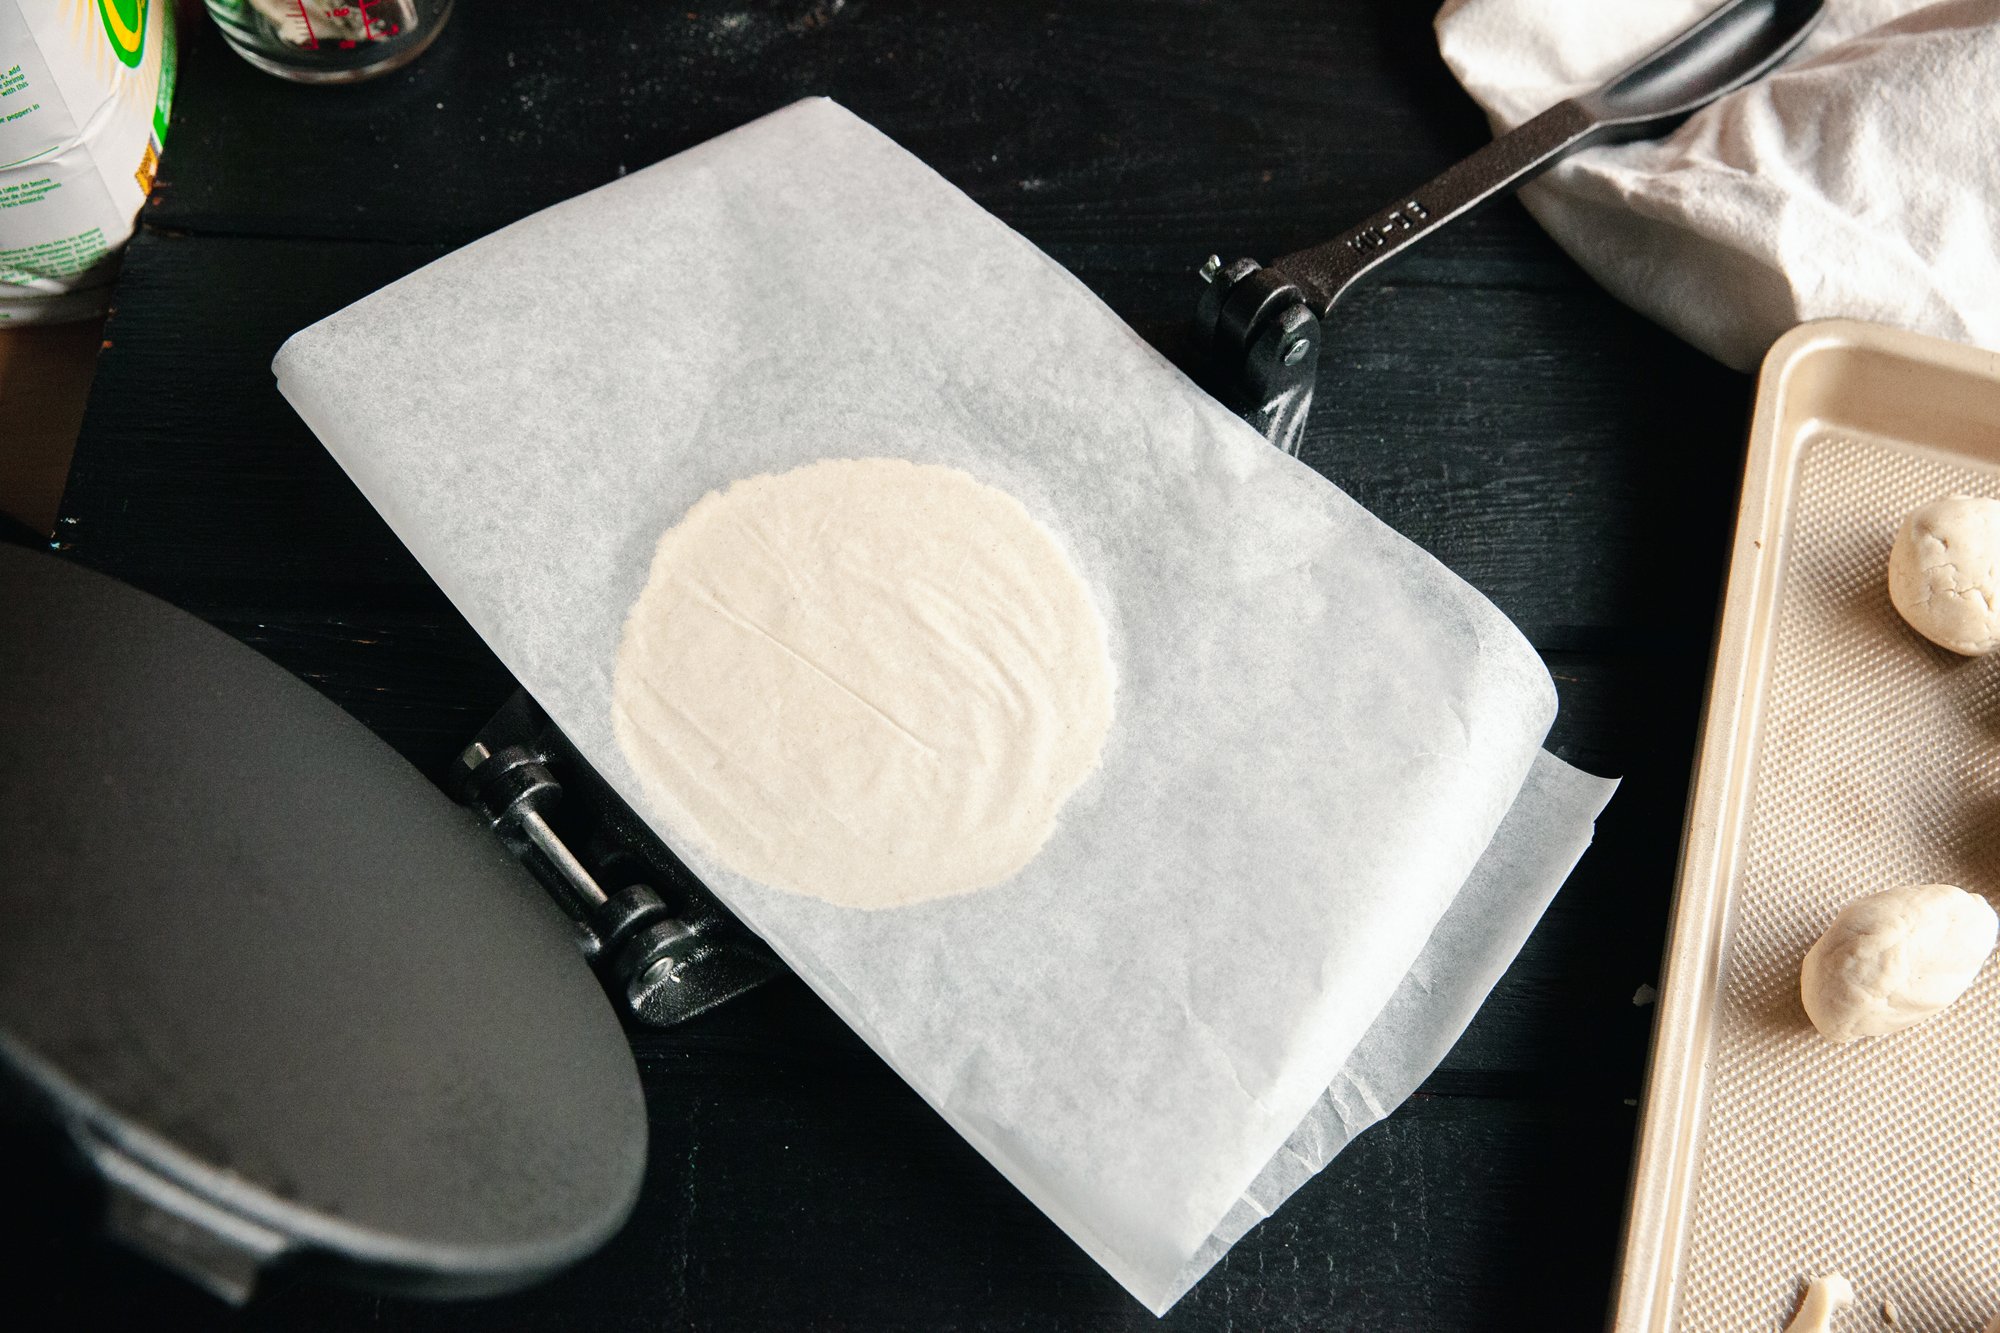
Place one of the balls between the sheets, and press down with the tortilla press (if you are using, or your heavy pan). The tortillas should be about 5 inches across. 
If you’re using the tortilla press, I recommend placing the ball closer to the hinge – the tortilla will be more centered when you press it this way. 

Carefully peel the tortilla away from the lining, taking care not to rip it. 
I laid the tortillas down on a parchment lined sheet while I made a few, and the skillet was heating over medium-high (I used a cast iron pan – a griddle works too). 
 
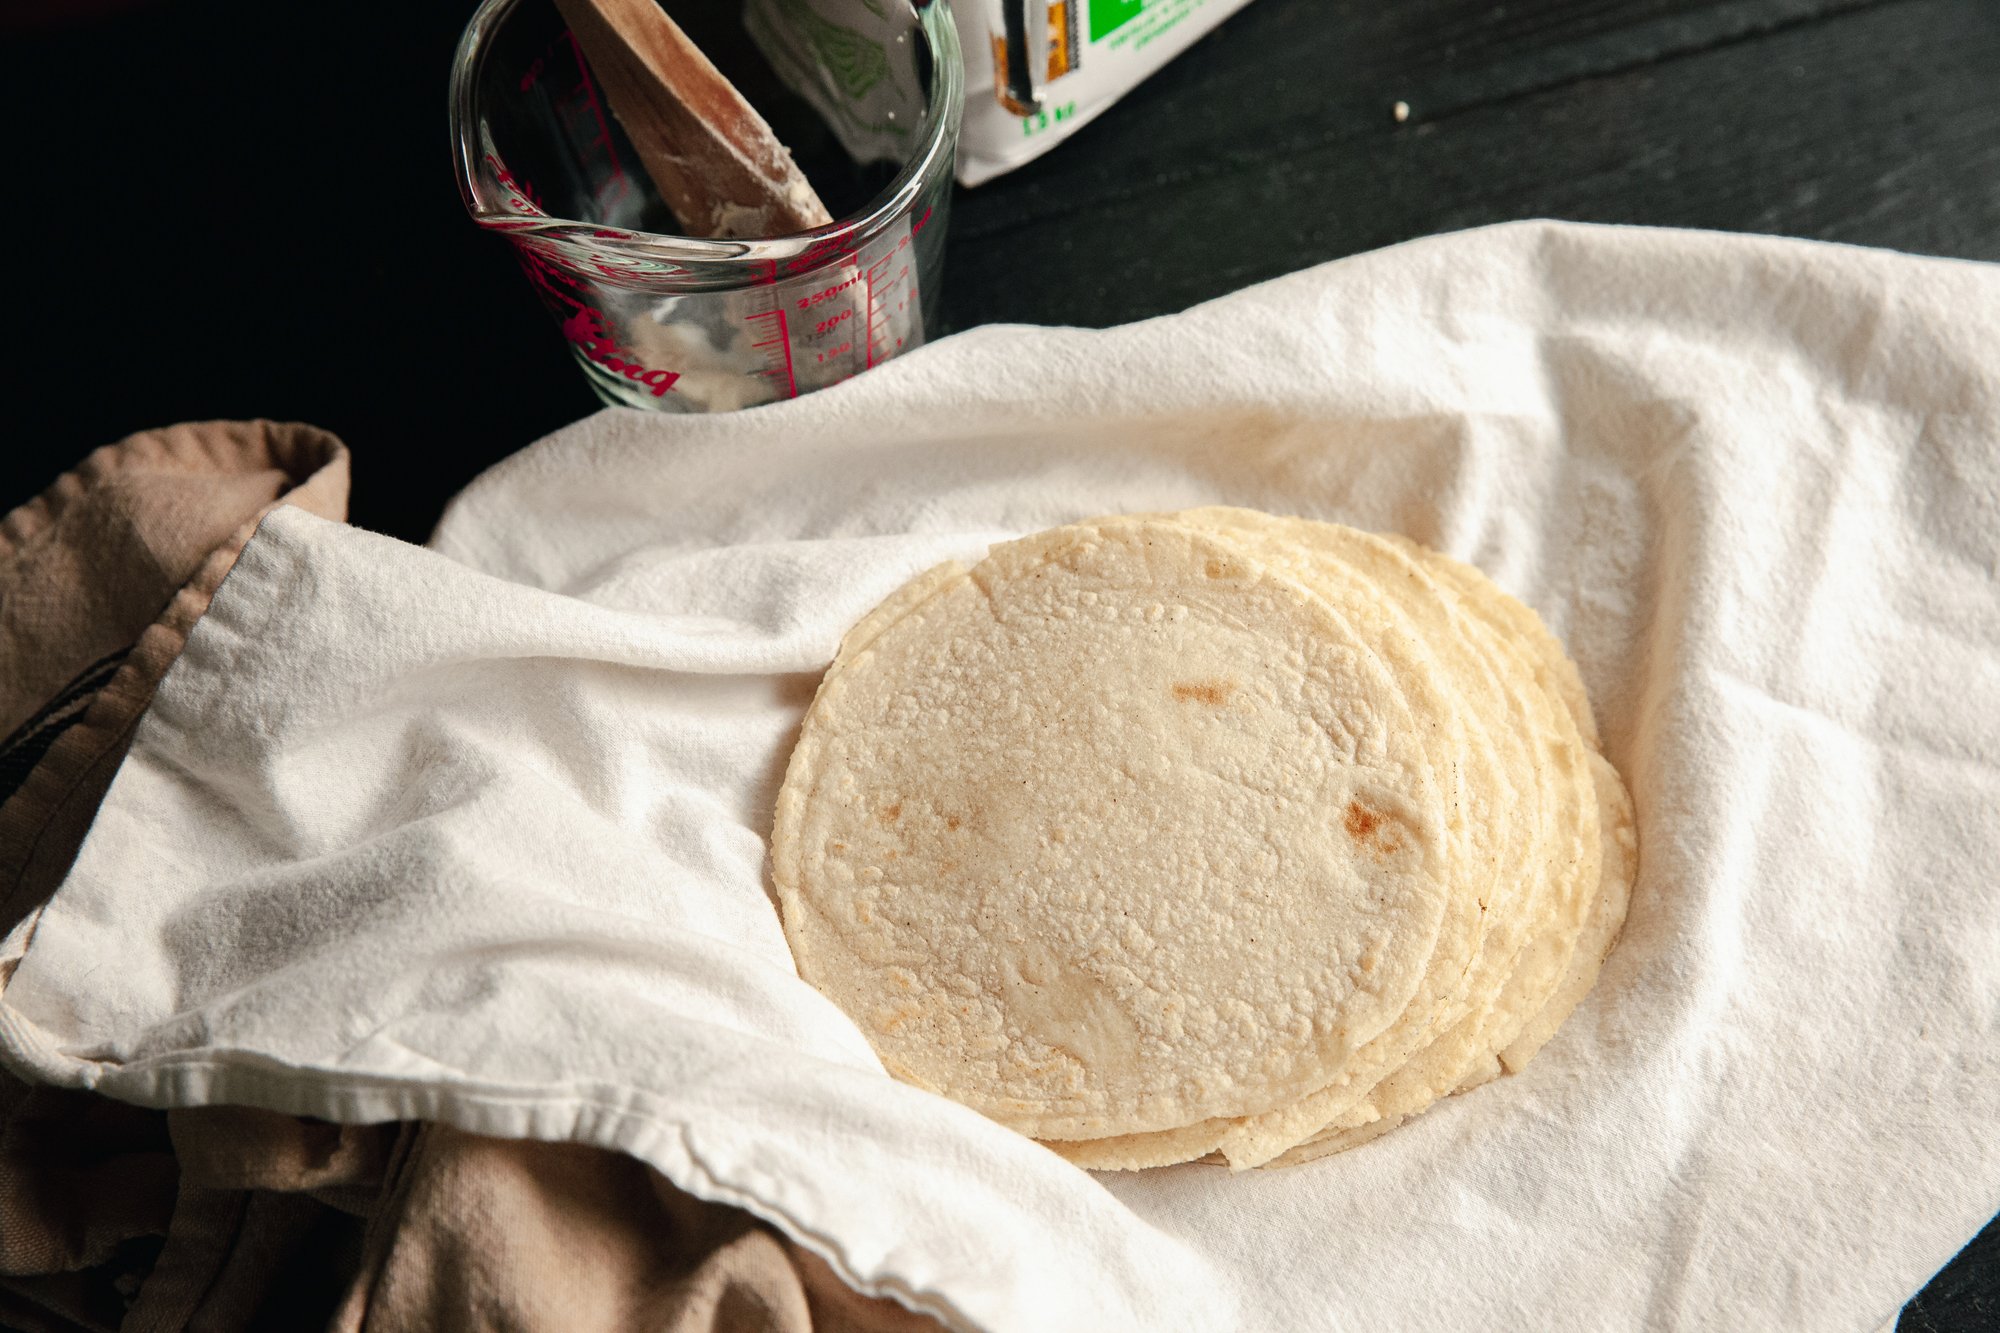
Place the tortilla on the hot pan and cook for about 30 seconds on each side – flipping it 3 times and getting some nice browning on each side. 
 
Place in a clean kitchen tea towel to keep warm (or a tortilla warmer if you have one), and repeat the whole process until you’ve made all the tortillas. 
 
The leftovers will keep in the fridge for a few days – freezing isn’t recommended. 
Reheat them in a pan (I add a tiny spritz of water to each side if they’re a little stale), for about 15-20 seconds. 
 
ENJOY! 


RECIPE: Lasagna From Scratch - for BC Living

Lasagna 
for BC Living
March 2023
 
Last year I posted a recipe on how to make homemade pasta (click here), and now you can put it to good use by creating a lasagna all the way from scratch.  
 
This recipe is for a large, full-sized lasagna, but you can cut it in half, or separate it into two, cook one, and freeze the other. Plus, you can eliminate the meat, add spinach, or anything else you’d like – this is just a base for your basic (but extremely tasty and worth it) lasagna from scratch. 
 

INGREDIENTS 

To make your pasta from scratch, follow the instructions here, and cut your pasta into lasagna noodles
 
- 1lb ground beef (or your choice of meat) 
- 1 onion, finely diced 
- 4 or 5 cloves garlic, minced 
- 796mL San Marzano tomatoes  
- 1 tbsp tomato paste (optional) 
- Italian seasoning 
- salt and pepper 
 
-4 75g ricotta cheese 
- 1 eggs  
- approx. 2 cups mozzarella, shredded,  
- approx. 1.5 cups grated Parmesan 
- salt & pepper 
- dried basil approx. 2 tsp 
 
- fresh parsley for topping 
 
INSTRUCTIONS 
 
To make your pasta from scratch, follow the instructions here, and cut your pasta into lasagna noodles
For lasagna noodles it’s best to roll them on the thinnest setting, so you can layer more into the dish. 
 
For the meat sauce, brown the beef in a pot or a high-walled pan until browned. Drain the beef, leaving the juices in the pot, and place the beef in a bowl and set aside. 
 
Add the onions to the pan and cook for 5 minutes, and then add the garlic, cooking until the onion are soft and transparent.  
Add the tomato paste and cook for a minute to two until caramelized. 
 
Add in the tomatoes, and bring to a simmer, crushing the tomatoes with your spoon (or whichever utensil works for you), as you go. Cook for about 45-50 minutes, stirring occasionally, and add water if the sauce gets too thick. 
 
While the sauce is cooking, in a bowl, place the ricotta cheese, a cup of the mozzarella and a cup of the parmesan cheese, as well as the egg, salt and pepper, and dried basil, and stir until combined. 
 
To puree your sauce, use an emersion blender (careful with the heat), and then stir in the seasoning, meat and salt and pepper, adjusting the spices to taste. 
 
Cook your pasta until al dente (it will continue to cook when baking, so don’t overdo it), drain and reserve. 
 
In your lasagna dish (or dishes if using two), place a layer of the meat sauce, and then cover with lasagna noodles. Add a layer of the cheese sauce, and then another layer of lasagna noodles. 
Continue this pattern until you’ve used all of your cheese, but finish with a layer of sauce, and then top with the remaining cup of mozzarella cheese, and parmesan. 
 
You can cover and refrigerate the lasagna (or freeze from here – it's best to freeze it uncooked), until ready to cook. 
 
Preheat the oven to 375, and when ready, cover the lasagna with tin foil, and cook for 25 minutes, and then remove the foil and cook for about 20 more. You may need a little more time if it’s coming straight from the fridge. 
If you’d like the top cheese a little more melted and browned, bake it under the broiler for a few minutes, watching it carefully. 
 
Let cool for 10 minutes and then divide and serve with chopped parsley, grated parmesan and some fresh cracked pepper sprinkled on top. 
 
ENJOY! 

RECIPE: Fries - From Scratch for BC Living

Fries - From Scratch
for BC Living
January 2023


Fries 
 
While fries might seem like an easy food to make from scratch (and they are), I’m more so here to give you tips and my experience experimenting with different methods to achieve a top tier fry. 

From there, you can cook the fries based on what you have at your disposal, maybe including that air fryer you got for Christmas? 


INGREDIENTS 
 
- potatoes, Russet, 2 per person 
- cooking oil (amount depends on how you choose to cook them) 
- salt 
- desired seasoning (see section below) 
 
INSTRUCTIONS 

I’m going to break this down into 3 parts: Preparing, Cooking, and Seasoning. 
 
Obviously first up is Preparing. 
You have the option to peel your potatoes (I did), or just wash them and leave the skin on (take out any eyes or spots). Leaving them on doesn’t change much except the texture, and gives it some color. 
 
You want to be sure that your fries are evenly cut or else some will cook faster than others. Size and shape are up to you, just be consistent.  
 
Place the cut fries in a bowl and soak for at least an hour and up to a day. This removes excess starch and will make the fries crispier.  
Rinse them once or twice after soaking, and then pat dry with either paper towel, or a clean tea towel. 
 
Now on to Cooking! 
There are several options here, if you don’t have an air fryer or want to deal with the mess of frying them in oil, you can bake them. 
 
Toss the fries in some vegetable oil, and sprinkle with salt. 
Preheat the oven to 400F, and bake for about 15 mins. Then remove, shaking/turning them, but make sure none are overlapping, and bake for another 10-15 minutes. Keep an eye on them and test as you go. 
 
For deep frying in oil, heat to 300F degrees and then cook in batches (don’t overcrowd) for about 5 minutes, removing with a slotted spoon to paper towels. 
Increase the heat to 400F and fry them in batches a second time, this time when removing them, add salt right after you take each batch out of the oil. 
 
For the air fryer (what I used) I had it preheat to 375F, coated the fries lightly in oil in a bowl, and then placed the first batch in a single layer in the bottom of the fryer, so that none overlapped. 
I cooked for 15 minutes, flipping them halfway, and removed when they were browned to my liking. 
 
I continued this process until they were all done, and then tossed everything back in to reheat and give an extra crisp and followed that with salt. 
 
Seasoning! 
 
This is where you make it your own. Maybe you’d like just salt on the fries to go with some cold ketchup, or maybe you’d like to get wild and add truffle oil and parmesan. 
There’s also the option to make your own homemade poutine... but that’s for another day. 
 
ENJOY! 

RECIPE: Queso Fresco (Cheese) From Scratch for BC Living

Queso Fresco (Cheese)
for BC Living
November 2022


Did you know that you can make homemade cheese with just 3 ingredients? I am kicking myself for not attempting this sooner, and now I want to try out other cheeses to make at home.

I did this with the intention of sprinkling it on some tacos (refried bean recipe coming in the future!), but you could spread it on toast, put it on eggs, in a salad, you name it.

INGREDIENTS

- 4L of whole milk
- 1/2 to 2/3 cup fresh juice from about 5 lemons, or lime or white vinegar
- Kosher salt

Other Required Items
- cheese cloth


INSTRUCTIONS

In a pot large enough to hold the liquids, pour in the milk and begin to heat over low-medium, stirring throughout. The key here is to not burn the bottom of the pot, and gradually heat the milk before it boils.

When it’s at a pre-boil/gradual simmer stage (approx. 15-20 minutes) pour in the acid of choice (I used lemon juice) and stir. You will see the milk separating and curds starting to form.

When this process has begun, remove from heat, cover and let sit for about 20-30 minutes.

After this, line a colander with the cheese cloth and pour the mixture through both.
You can discard the whey (the liquid) or save it as there are several uses for it, including making other cheese!

Carefully, as the curds will still be warm, squeeze the cheesecloth to help drain more of the liquid out.
You can twist the curds in the cloth and place some weight on top to help this along – the longer you let the cheese drain, the firmer it will be in the end.

Once it’s drained, place the curds in a bowl, sprinkle in the salt, and mix well. Taste to see if you’d like more salt, and if so, add it in.

Find a container with a tight-fitting lid, and pack the cheese in to help mold the desired shape, and then place in the refrigerator to chill.

It should last for a week, if you don’t eat it all with a spoon right away.

RECIPE: Chicken Shawarma with Fresh BC Greenhouse Vegetables 

Chicken Shawarma
with Fresh BC Greenhouse Vegetables 
September 2022


Just over a week ago, I helped create a Middle Eastern themed feast with a few of my food blogger friends, using some fresh vegetables from BC Greenhouse.
I had a craving for a pita filled with delicious things, so I picked some turnips (a first), marinated some chicken, chopped some veggies and made a huge platter that everyone dove into.

Most of the prep for this one is done ahead of time, so it’s an easy dish for parties, or feeding a large amount of people!

Ingredients: 
- 2 lb boneless, skinless chicken thighs 
 
For the marinade: 
- 3 tbsp olive oil 
- 2 large cloves of garlic, minced 
- 1 tbsp ground cumin 
- 1 tbsp ground coriander 
- 1 tbsp ground cardamom 
- 1 tsp cayenne pepper (optional – this is the heat) 
- 2 tsp smoked paprika 
- salt and pepper 
- juice of one lemon 

Greek Yogurt Sauce: 
- 1 cup full fat Greek yogurt 
- 2 cloves garlic, minced 
- salt and pepper 
- tsp of lemon juice (more to taste/to thin) 
- pinch of cumin (more to taste) 
 
To Serve: 
- pita (your choice of kind) 
- lettuce, shredded 
- tomatoes, roughly chopped 
- cucumbers, chopped 
- pickled turnips (homemade is best and easy) 
- hot sauce (optional) 
- hummus (optional) 
- tahini sauce (optional) 
 
Directions: 
 
Mix the marinade ingredients together and place in a container of bag with the chicken, mixing until it’s completely coated. Let sit in the fridge for 24 hours, occasionally mixing it again. 

To make the sauce, combine all the ingredients in a bowl – adjusting seasoning to taste, and place in the fridge covered until ready to use. 
 
If you’re making the shawarma into a platter, you can pre-chop the lettuce, tomatoes, cucumbers, turnips if using and place into individual bowls. 
 
To cook the chicken you can either do so on the bbq or in a hot skillet on the stove for about 4 minutes on each side depending on the size of the thighs. 
Once it’s cooked through, let it rest on a plate covered in foil while you prep the platter with the vegetables and sauces. 

Slice the pitas in half or leave them whole, and let your guests choose which fillings they want to fill it with! 
 
Enjoy! 

RECIPE: Crab Cakes - But Make It Vegan for Environment911.org

Vegan Crab Cakes
for Environment911.org
August 2022


I was recently at a wedding and they had delicious crab and shrimp cakes and I wondered to myself whether I could make a vegan version.
The taste and texture of crab is hard to replicate but as a stand-alone appetizer, these are super tasty. You can make them in various sizes too if you want bite-size or one you’d need a fork to break down.


INGREDIENTS
- approx. 400g of young jackfruit (in water)
- 2 tbsp ground flax
- 2 tbsp Old Bay seasoning (more to taste)
- 1 tsp Dijon mustard
- 3 cloves minced garlic
- salt and pepper (to taste)
- 1 tsp Worcestershire sauce (vegan)
- 1 tsp soy sauce (low sodium)
- 2-3 tbsp green onion or chives, finely chopped
- 3 tbsp cilantro, finely chopped (option to sub in more chives)
- approx. 1.5 cups bread crumbs (regular, panko or both)
- splash of lemon juice

INSTRUCTIONS
In a small bowl combine the ground flax with 6 tablespoons of water. Whisk together and set aside for 5-10 minutes until it thickens.

Drain the jackfruit of excess water, and break up into fine pieces. (If it’s not already broken up, you can use a food processor to help shred it.)

In a bowl whisk together the lemon juice with the Worcestershire, soy and the Dijon mustard, as well as the old bay, garlic, and salt and pepper – until combined.
Add the broken-down jackfruit, flax egg, chives/green onion and cilantro, and 1 cup of the bread crumbs. Combine (with your hands is easiest) until the mixture comes together evenly.

Form the mix into balls and then patties – at your desired size – and then press the extra breadcrumbs into them for a crispier exterior.
Place on a plate in the fridge for approximately an hour or until ready to cook.

I put mine in the air frier at 375, cooking for about 15 minutes, flipping halfway – if you chose to bake them be sure to keep watch and cook until golden brown.

If you’re frying them in oil, get it nice and hot and cook until golden brown on one side, then flip and cook on the other. Place on a paper towel afterwards to drain excess oil.

Plate and serve with your choice of dipping sauce (I made a homemade vegan tartar sauce) and optional lemon wedges.

ENJOY!