


Food Photography
Recipe Testing with the Ooni Pizza Oven
July 2024
See review by Rebecca Coleman by clicking here.
BLOG
Food Photography
Recipe Testing with the Ooni Pizza Oven
July 2024
See review by Rebecca Coleman by clicking here.
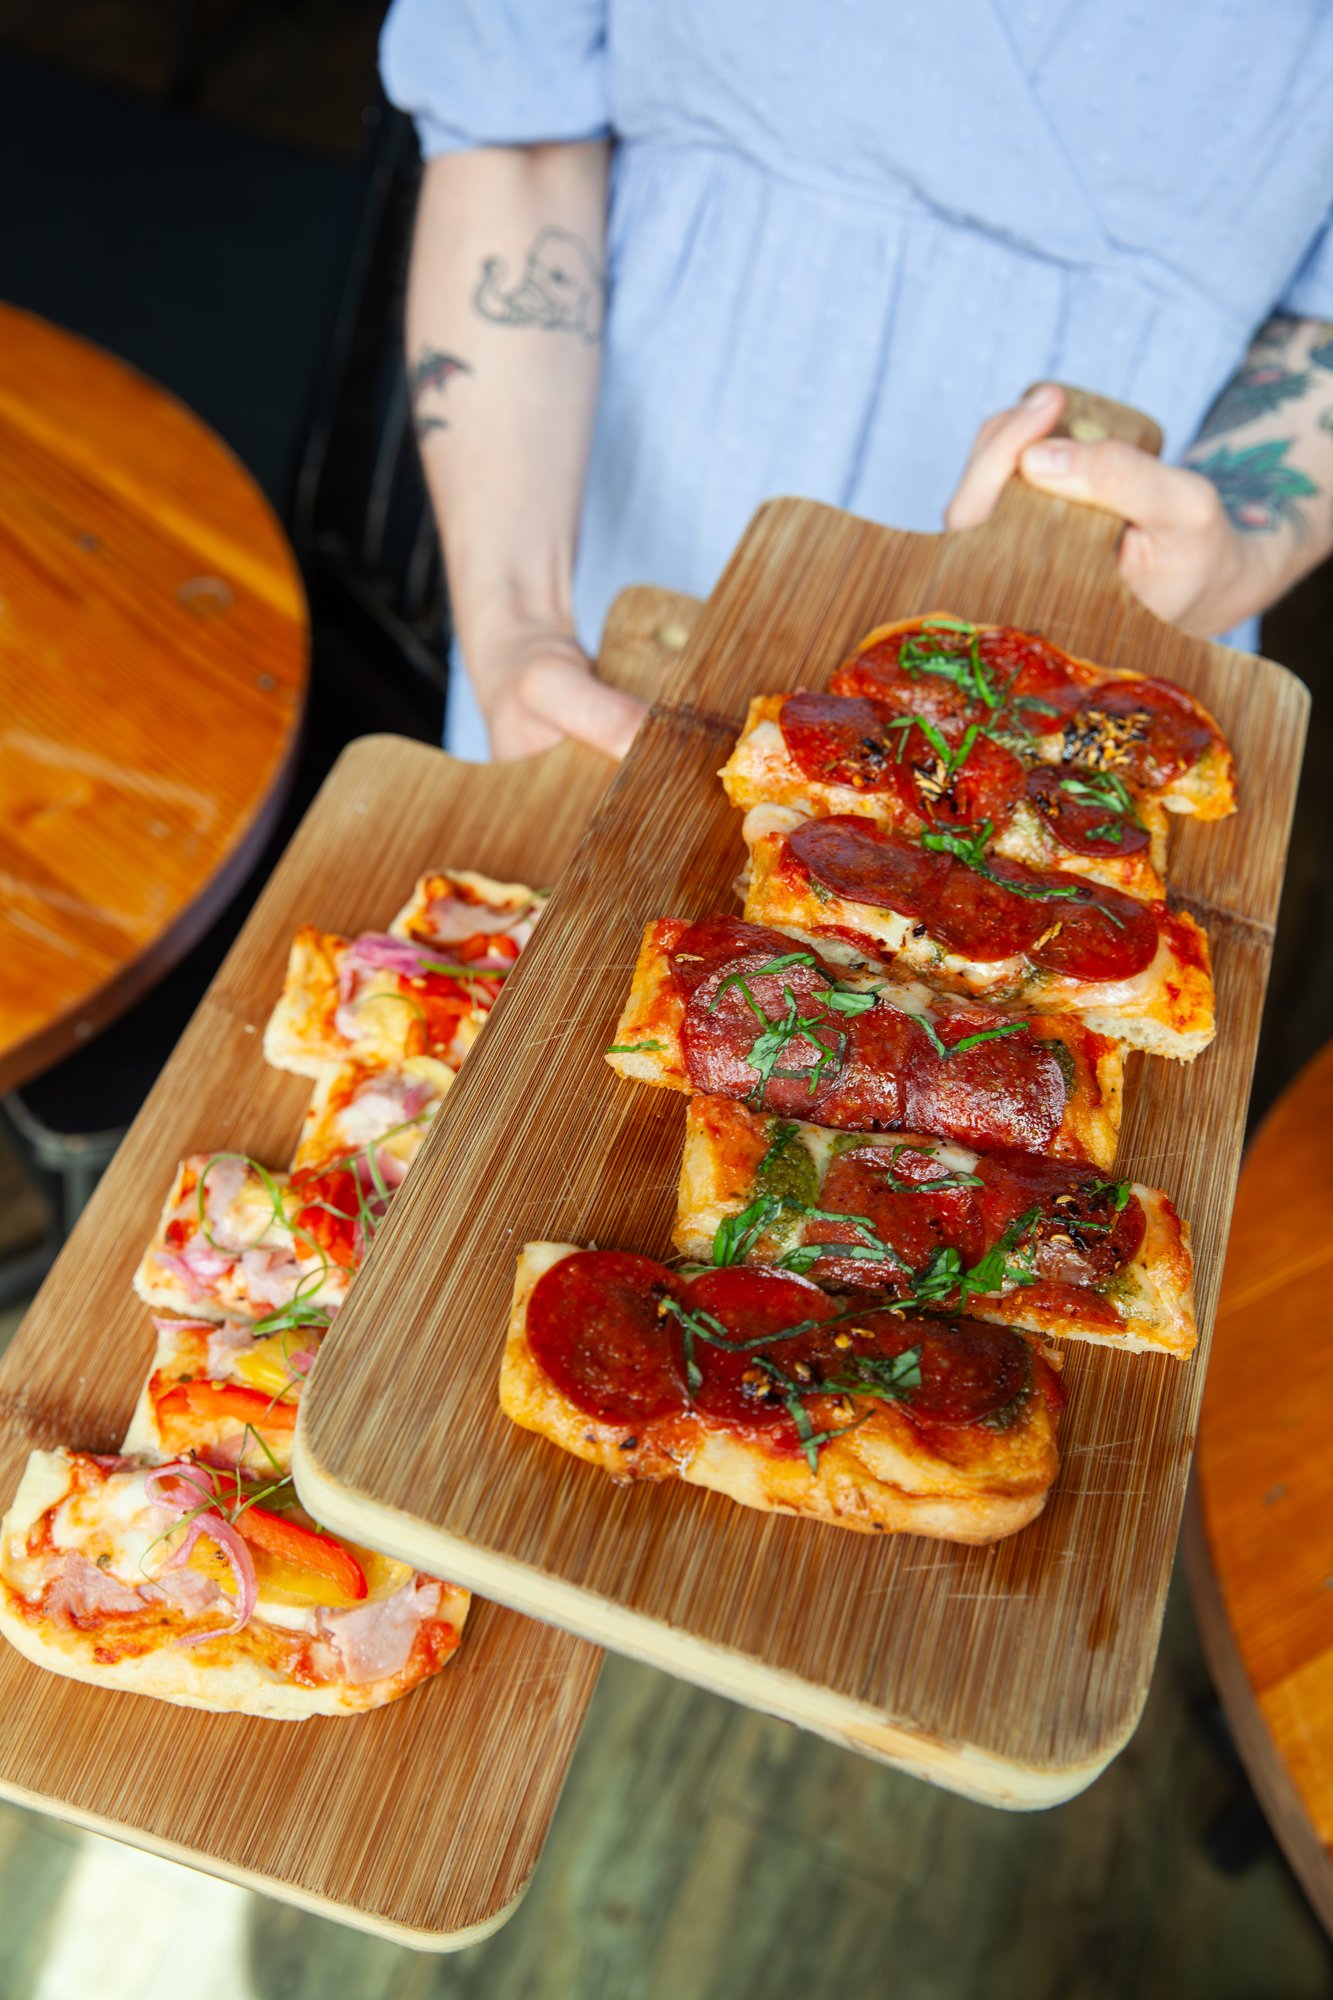
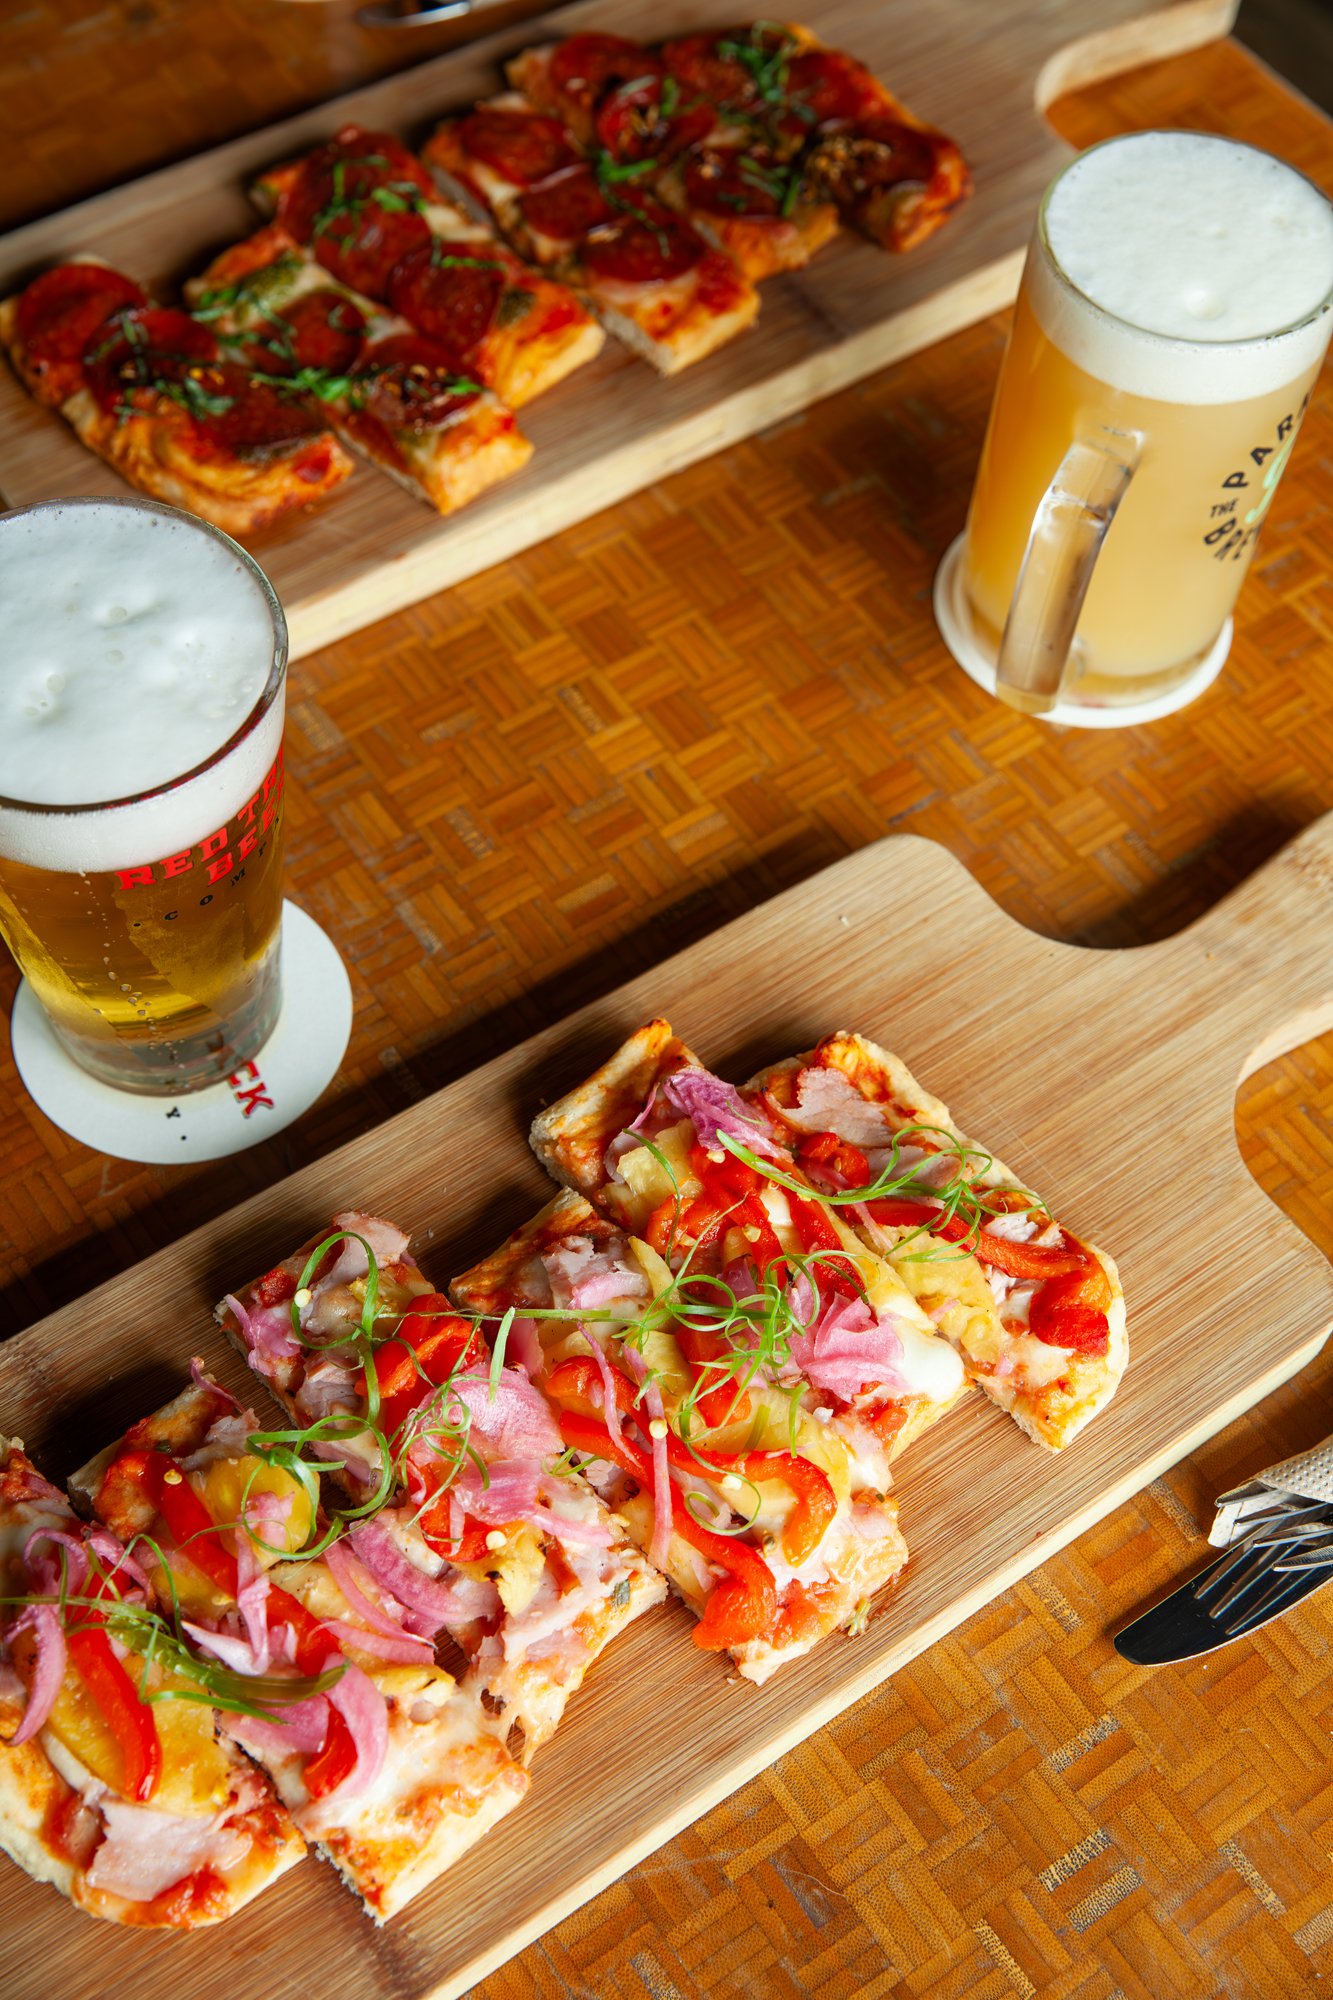
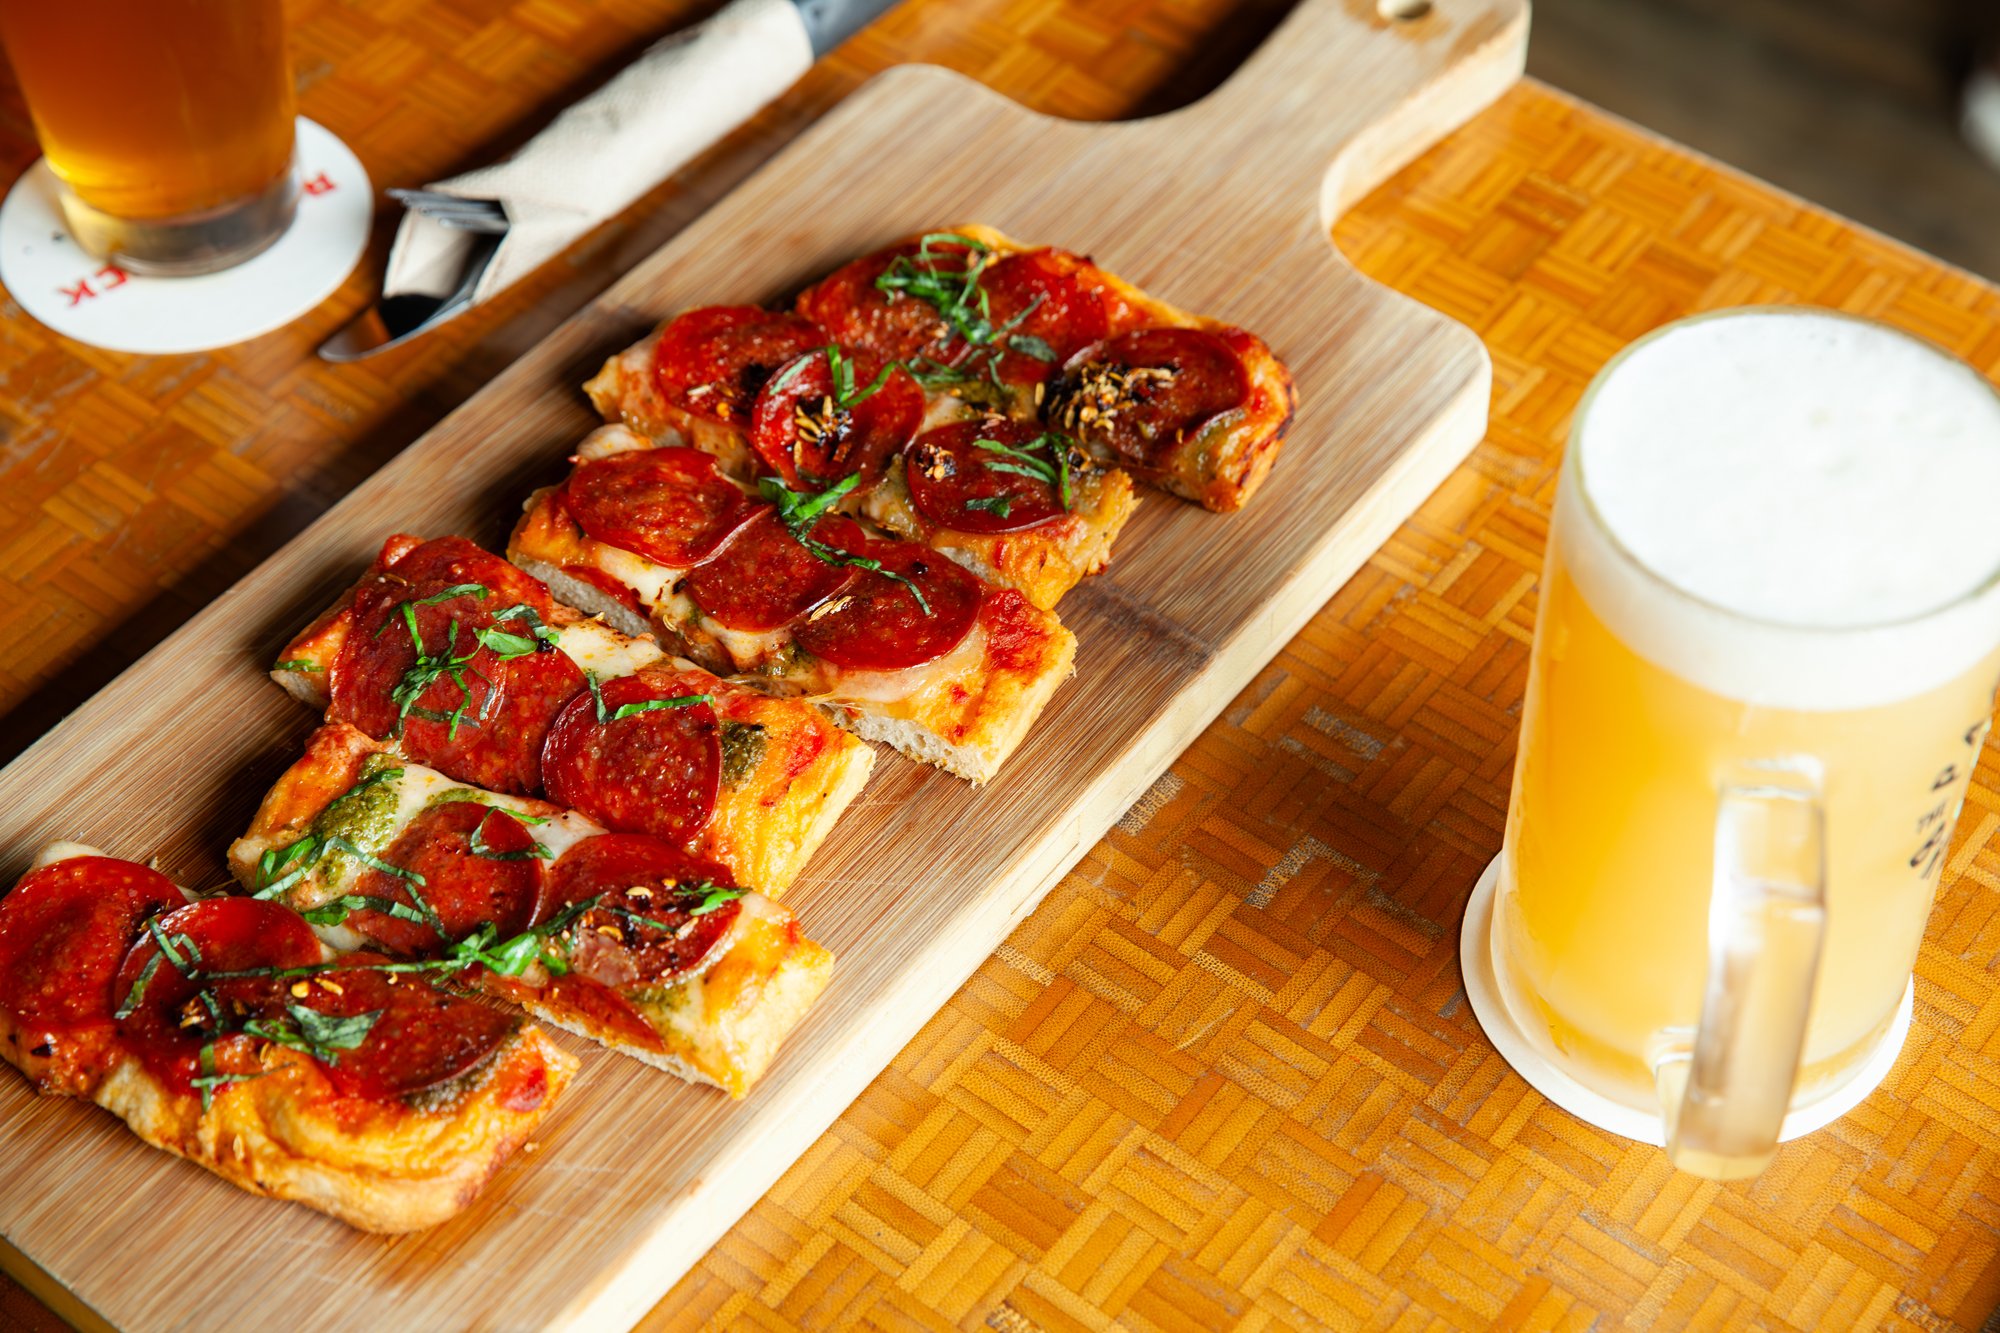
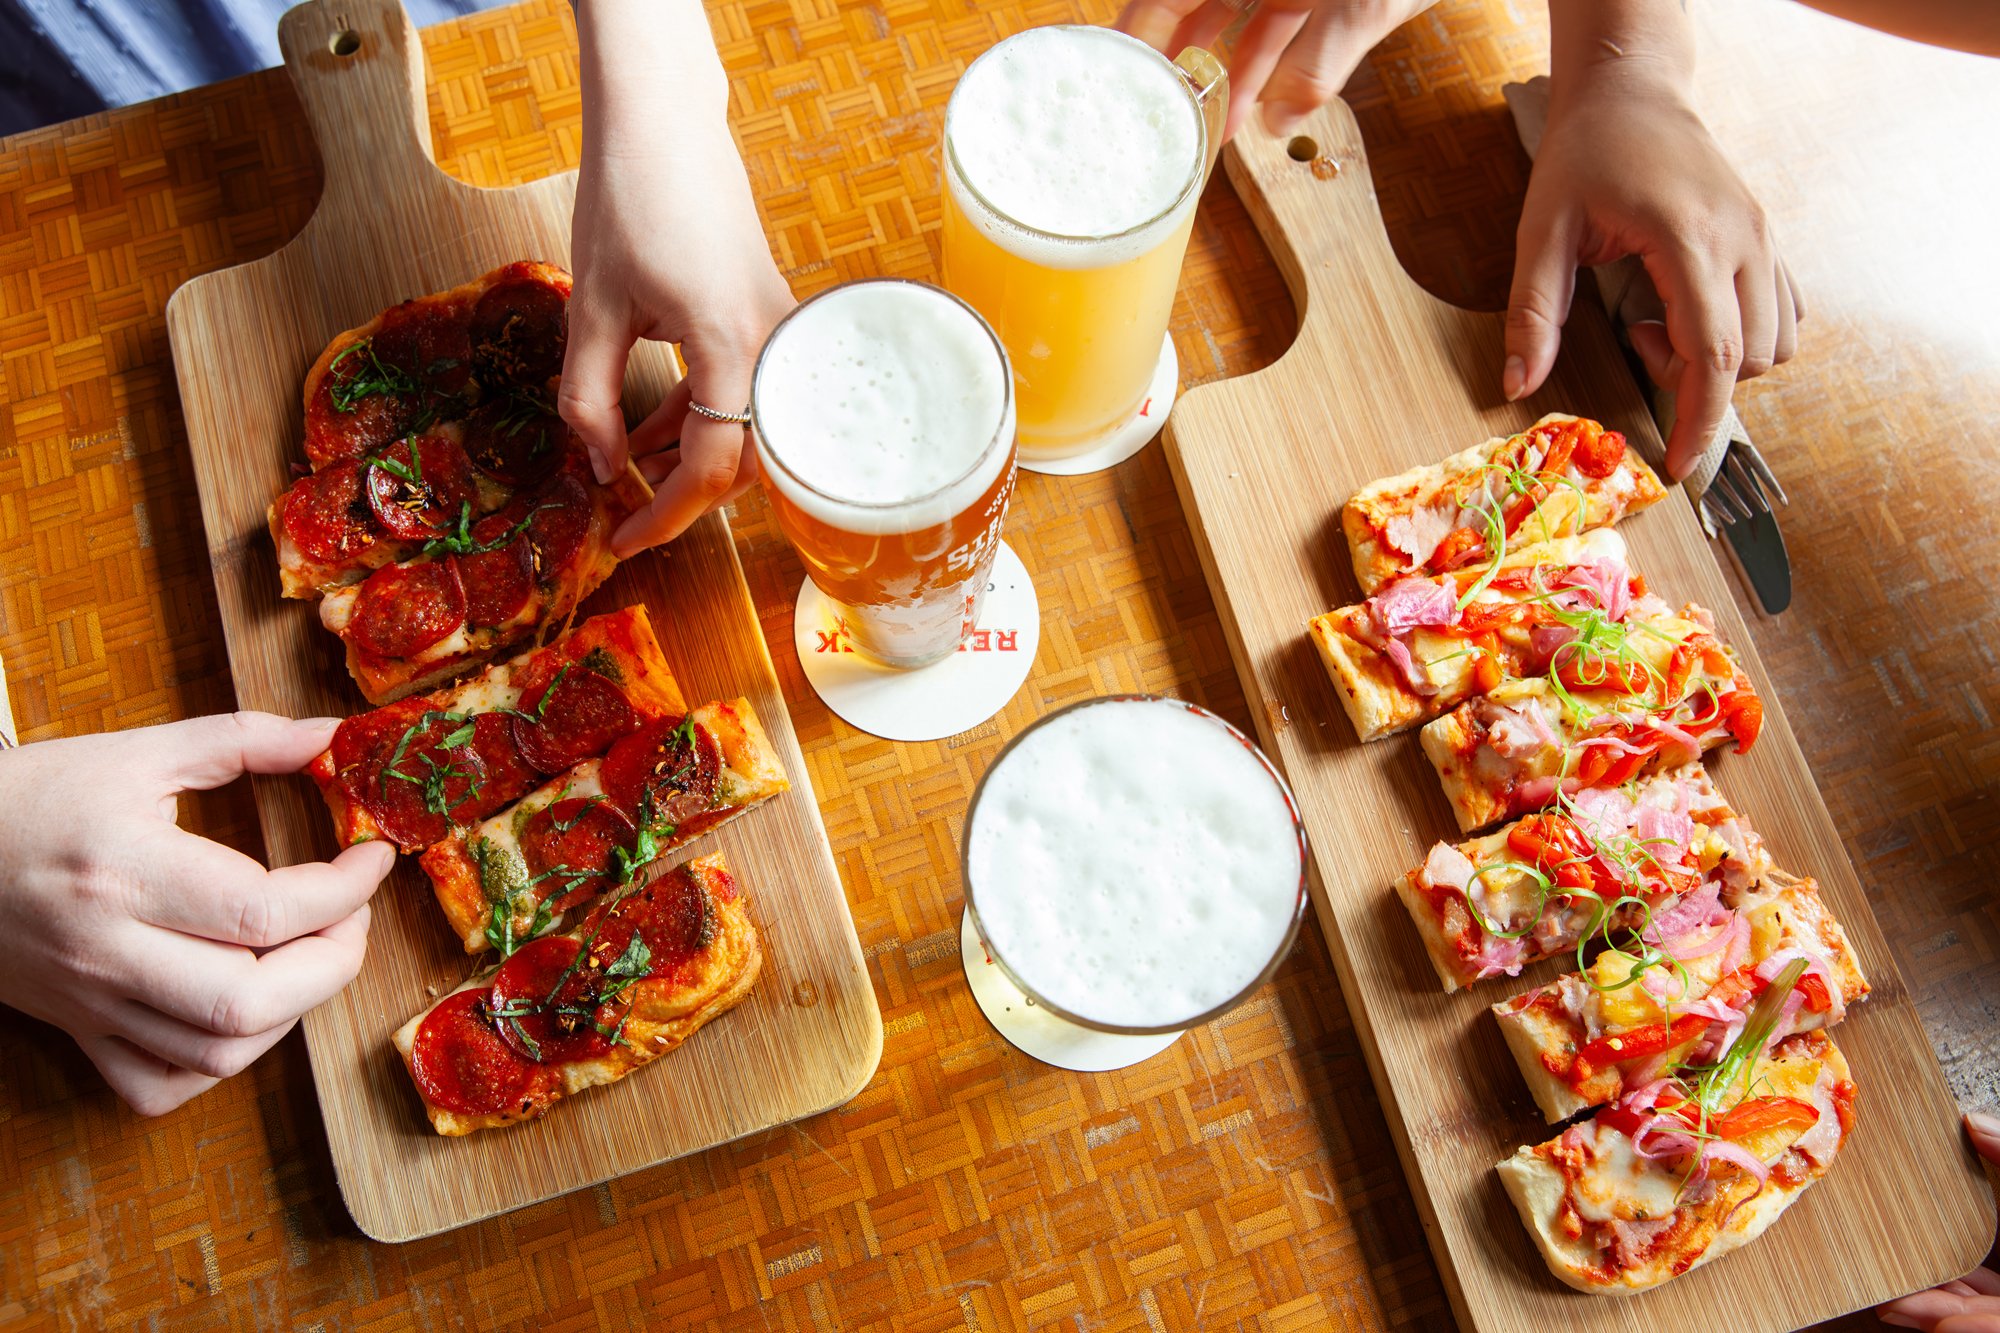
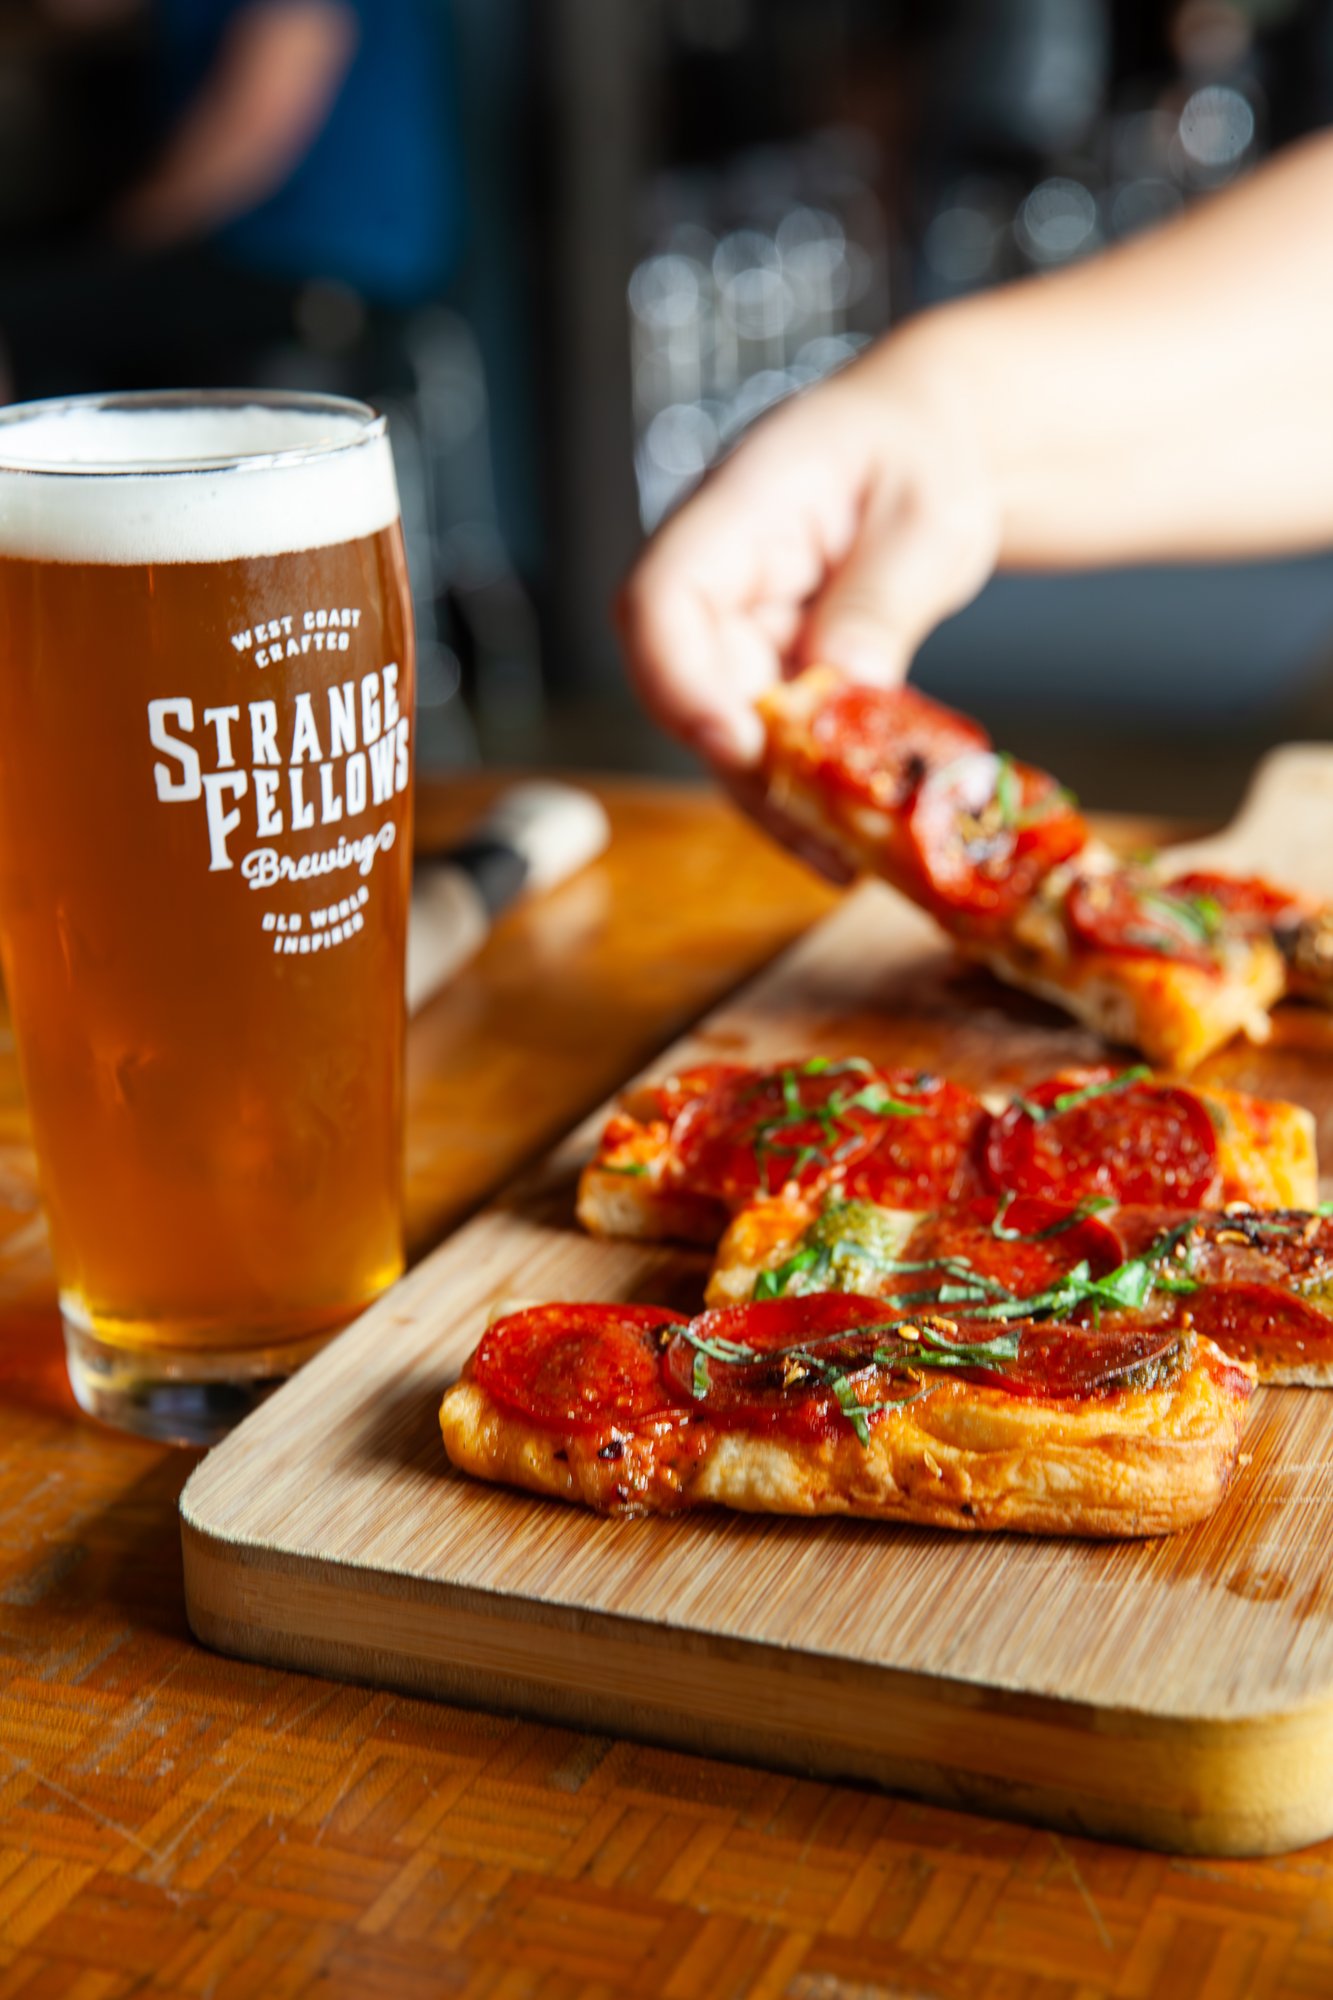
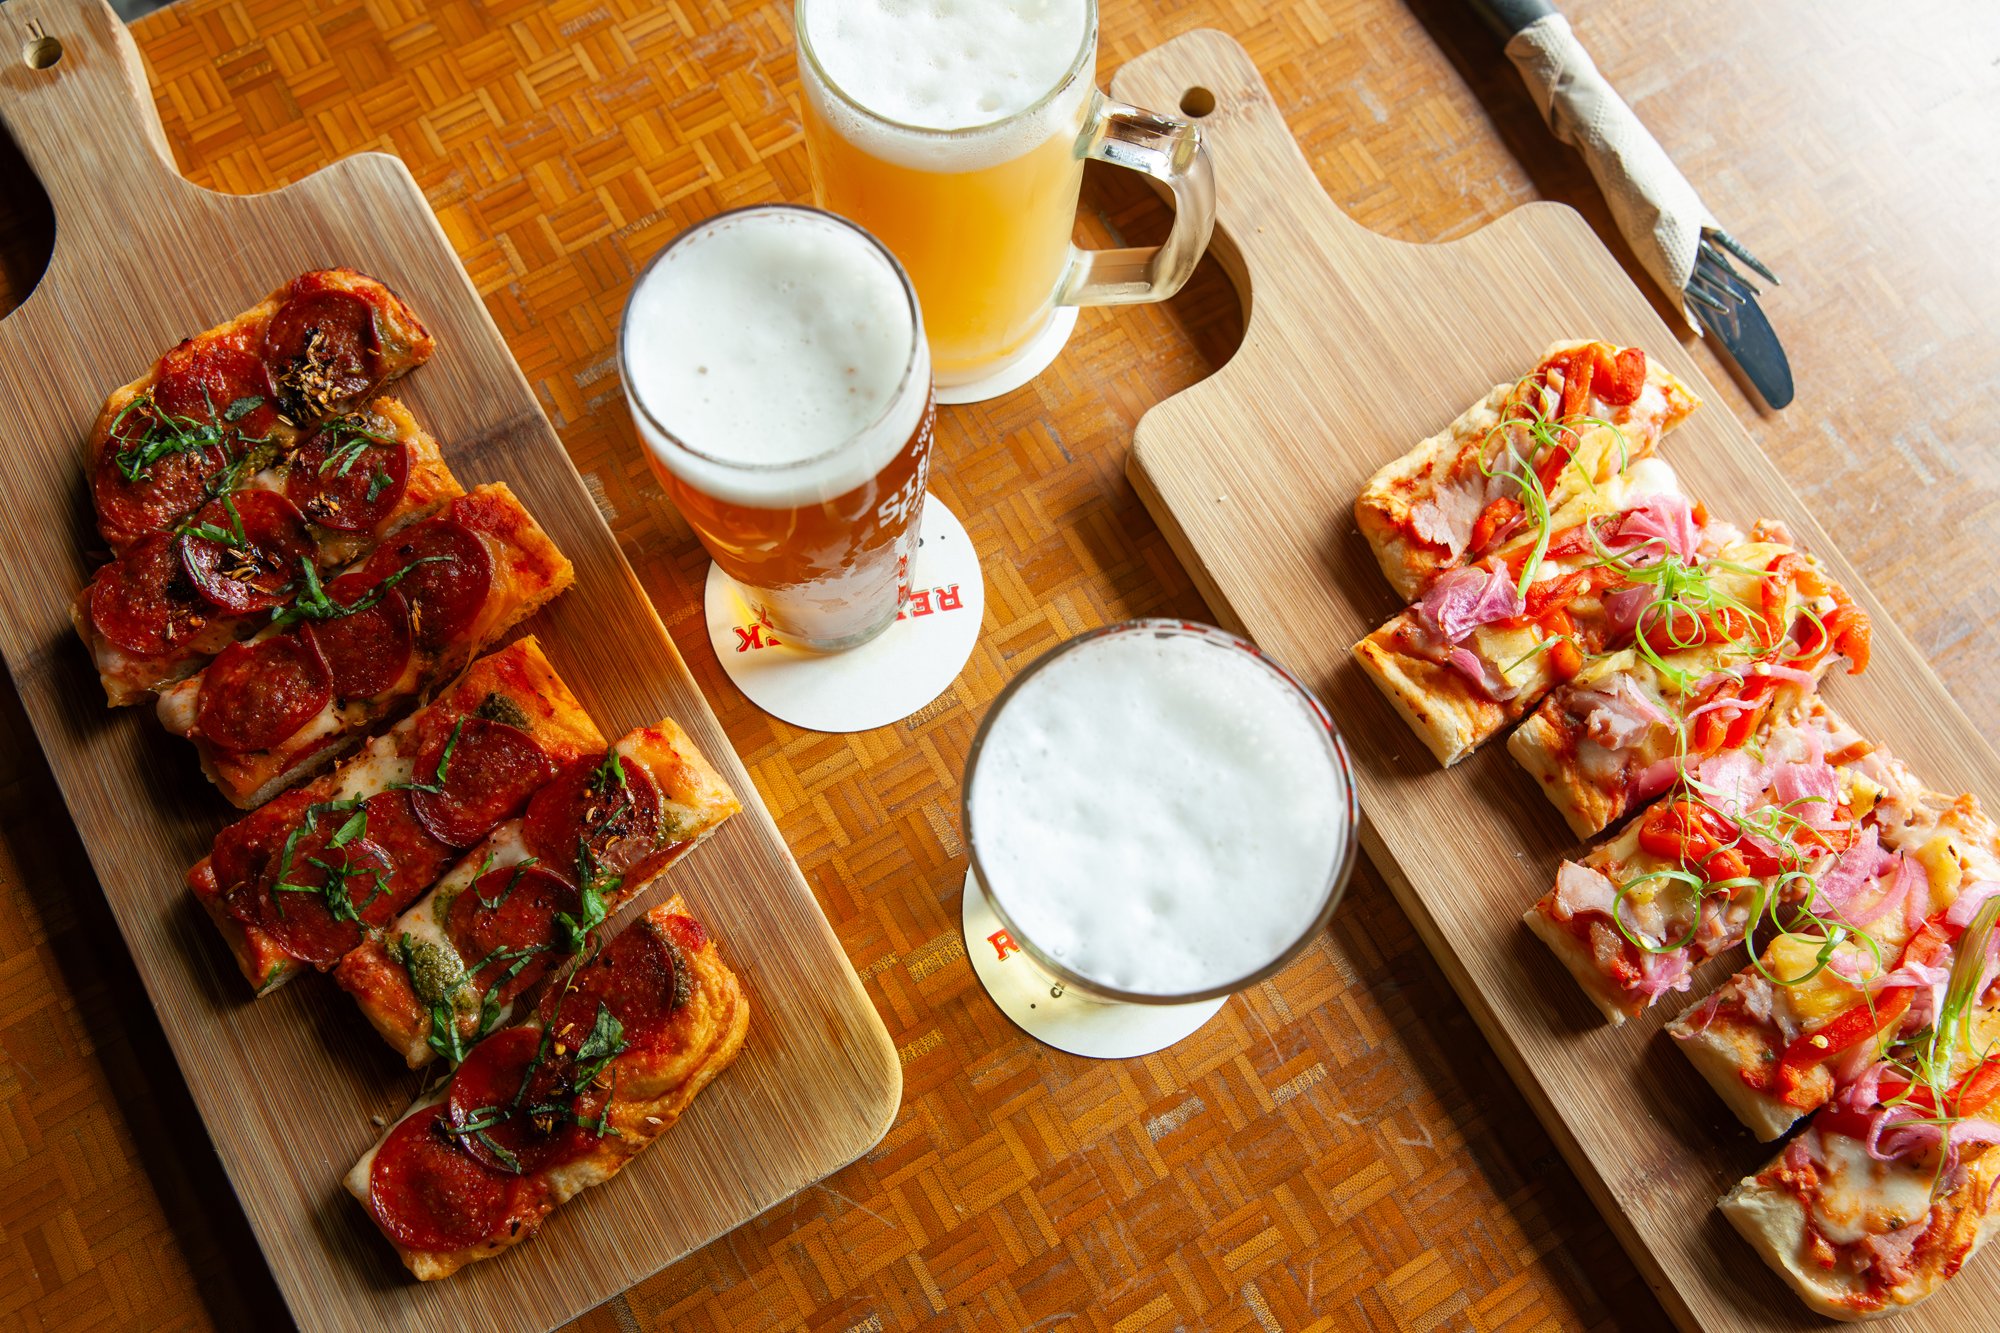
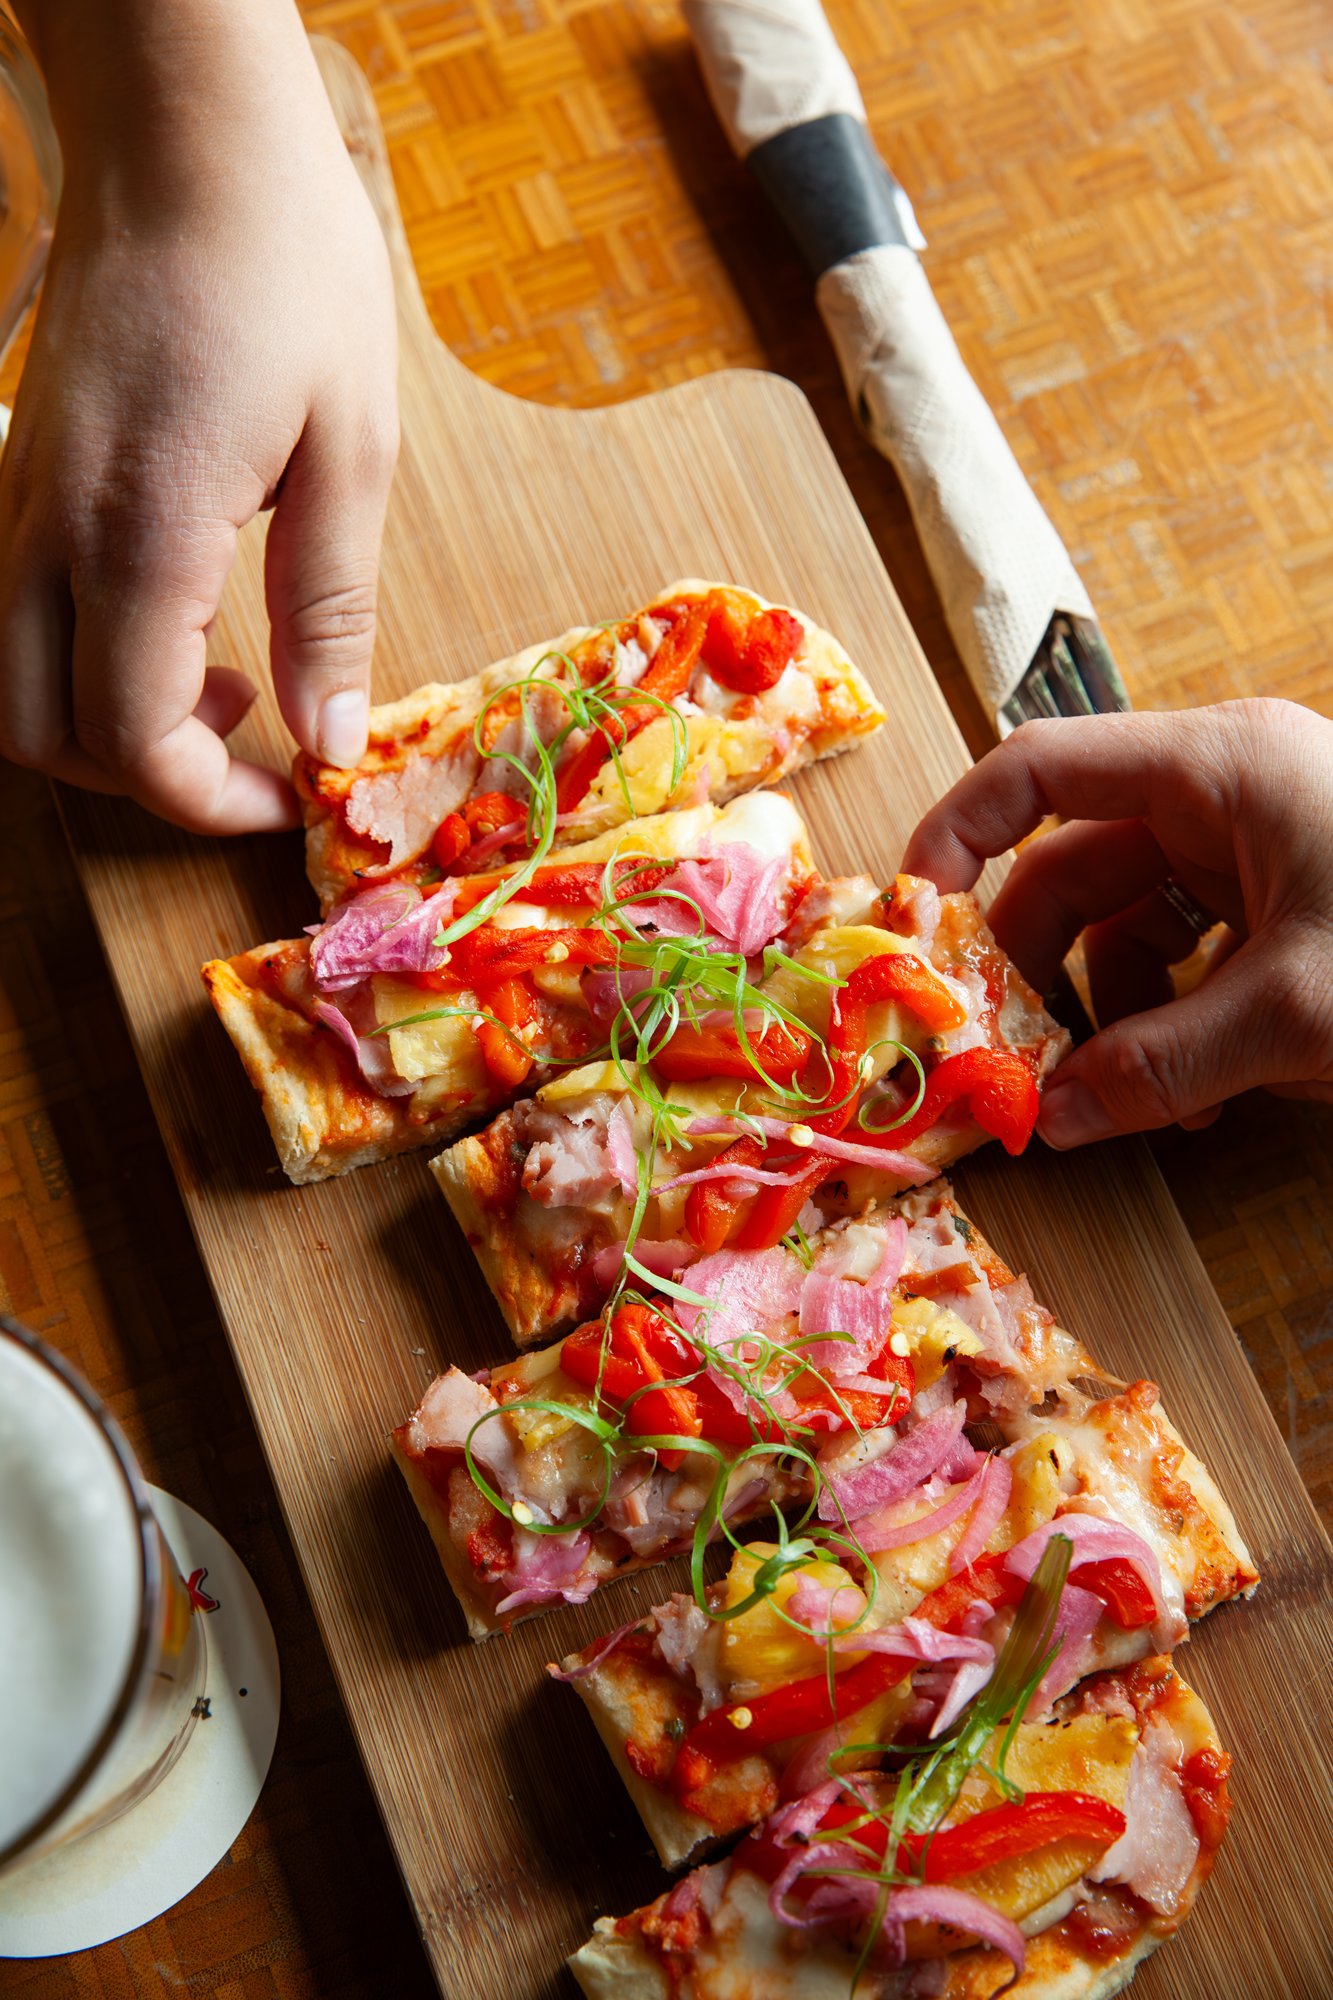
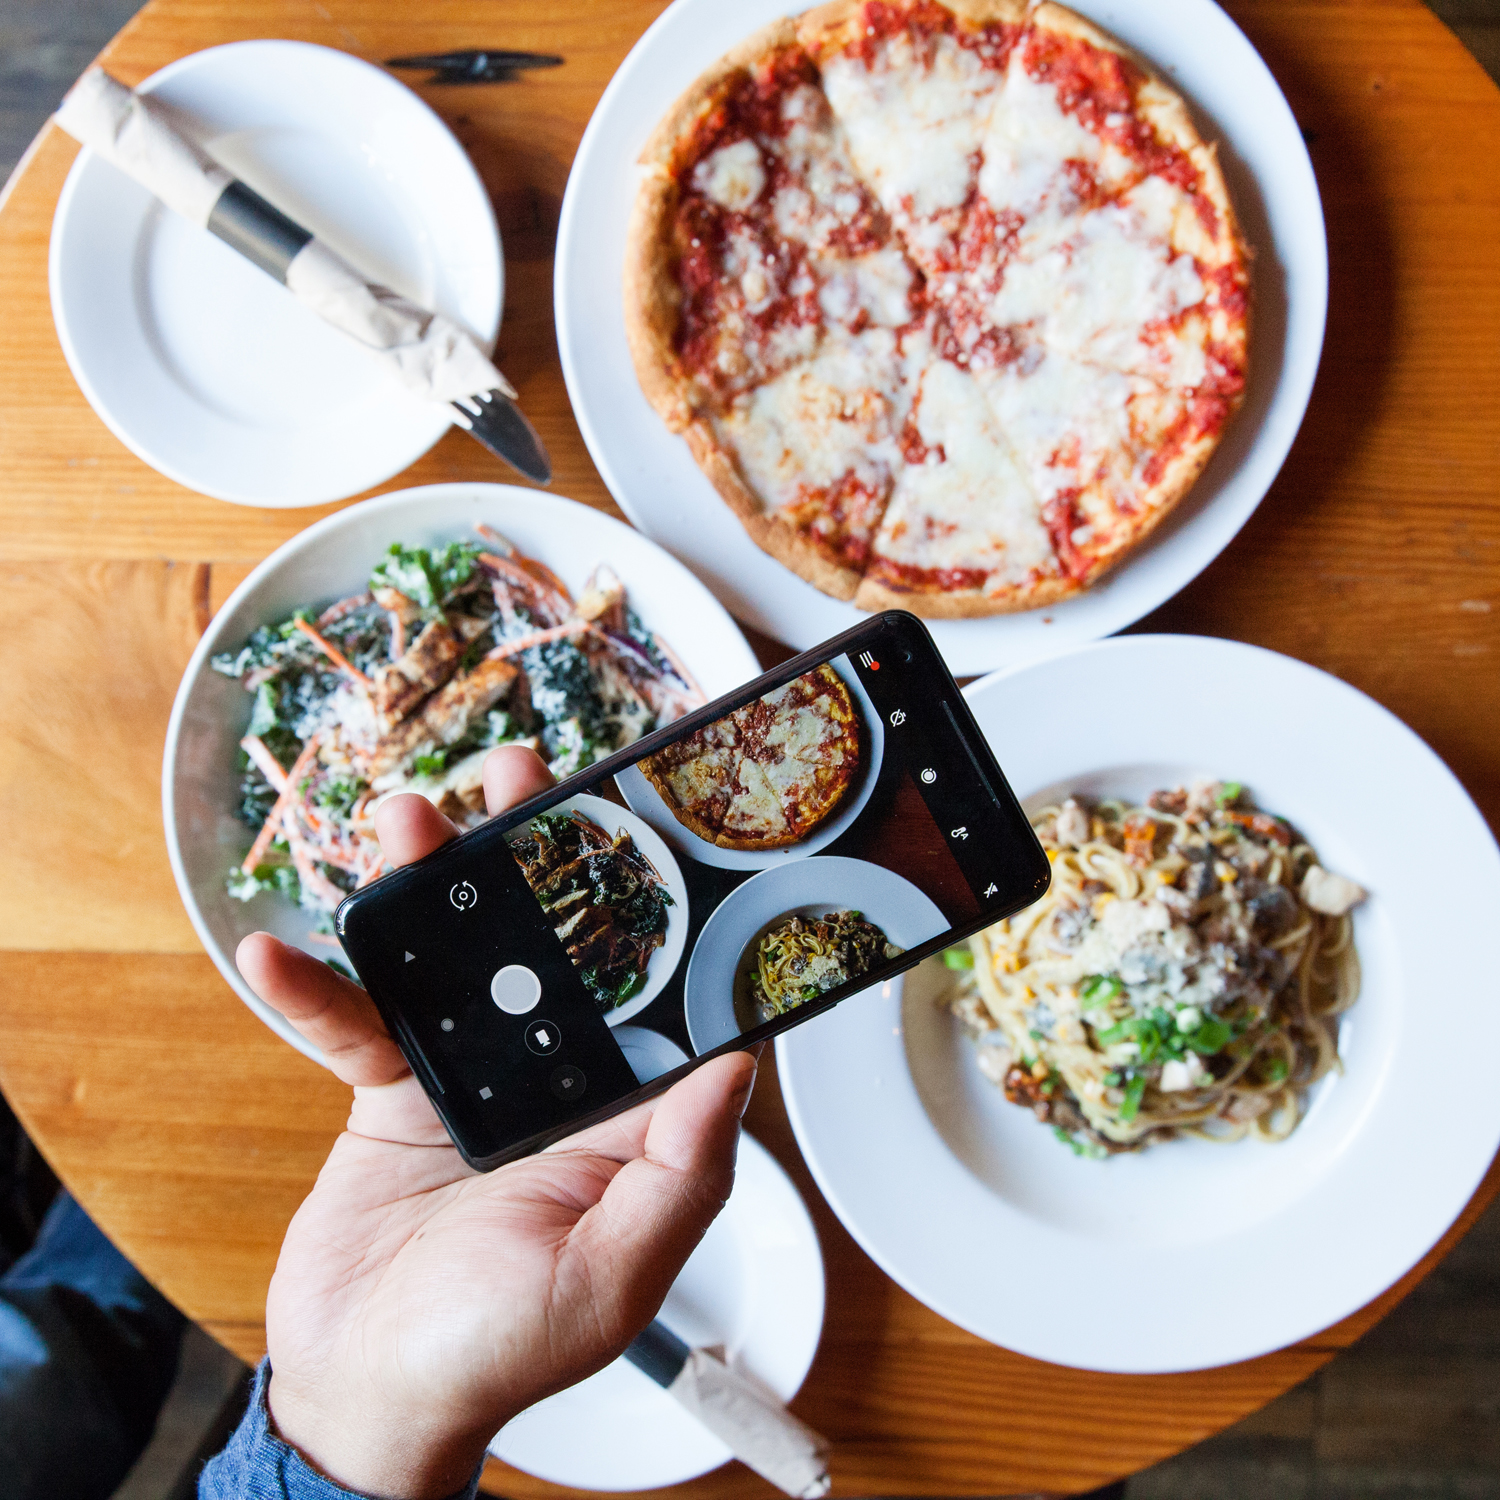
Restaurant & Food Photography
The Regal Beagle
Vancouver, BC
June 29, 2023
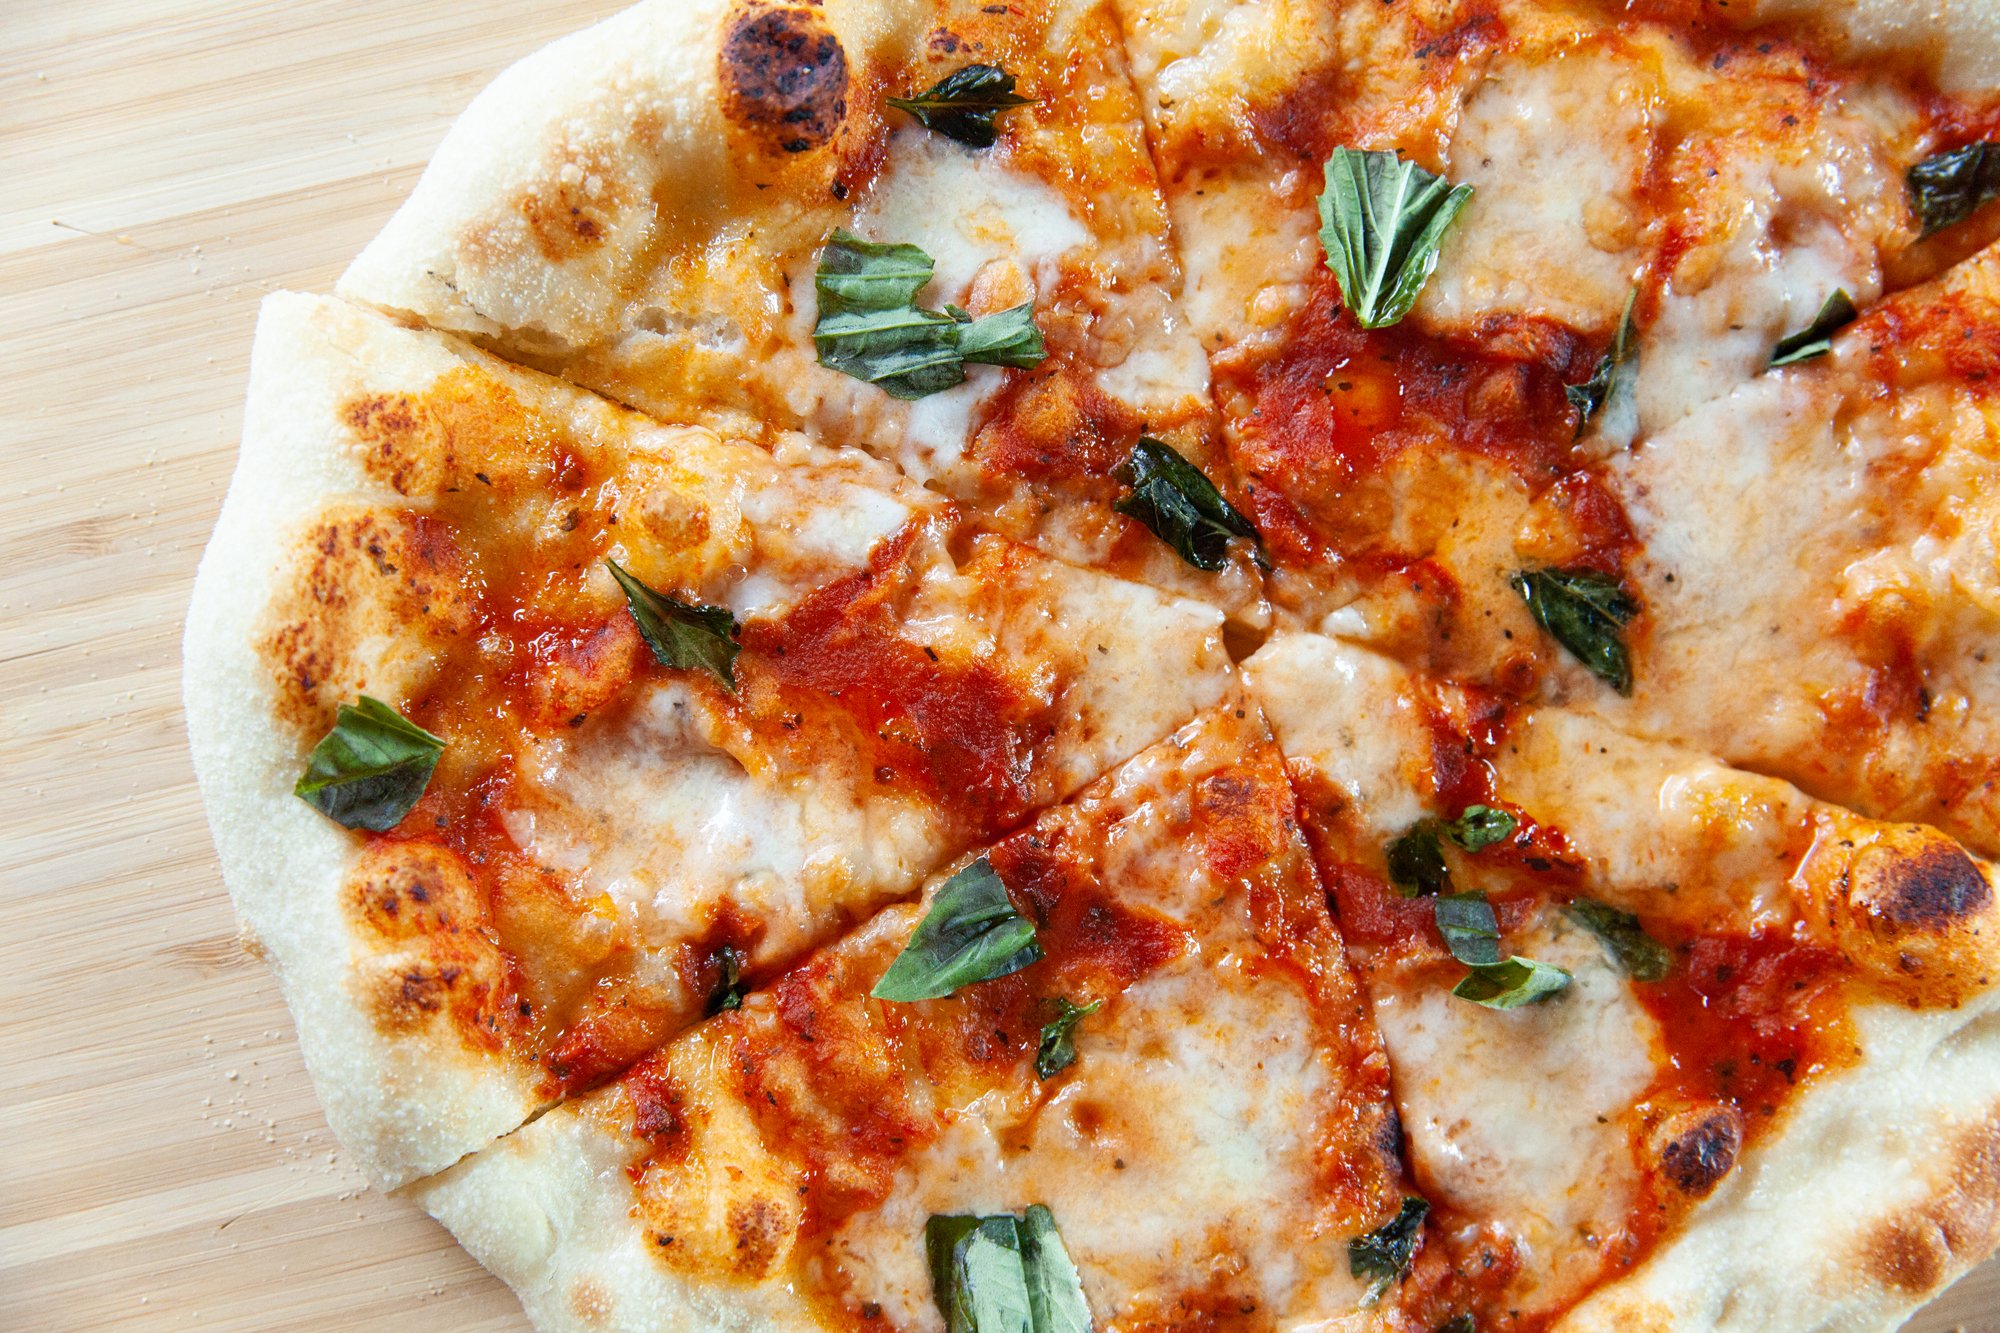
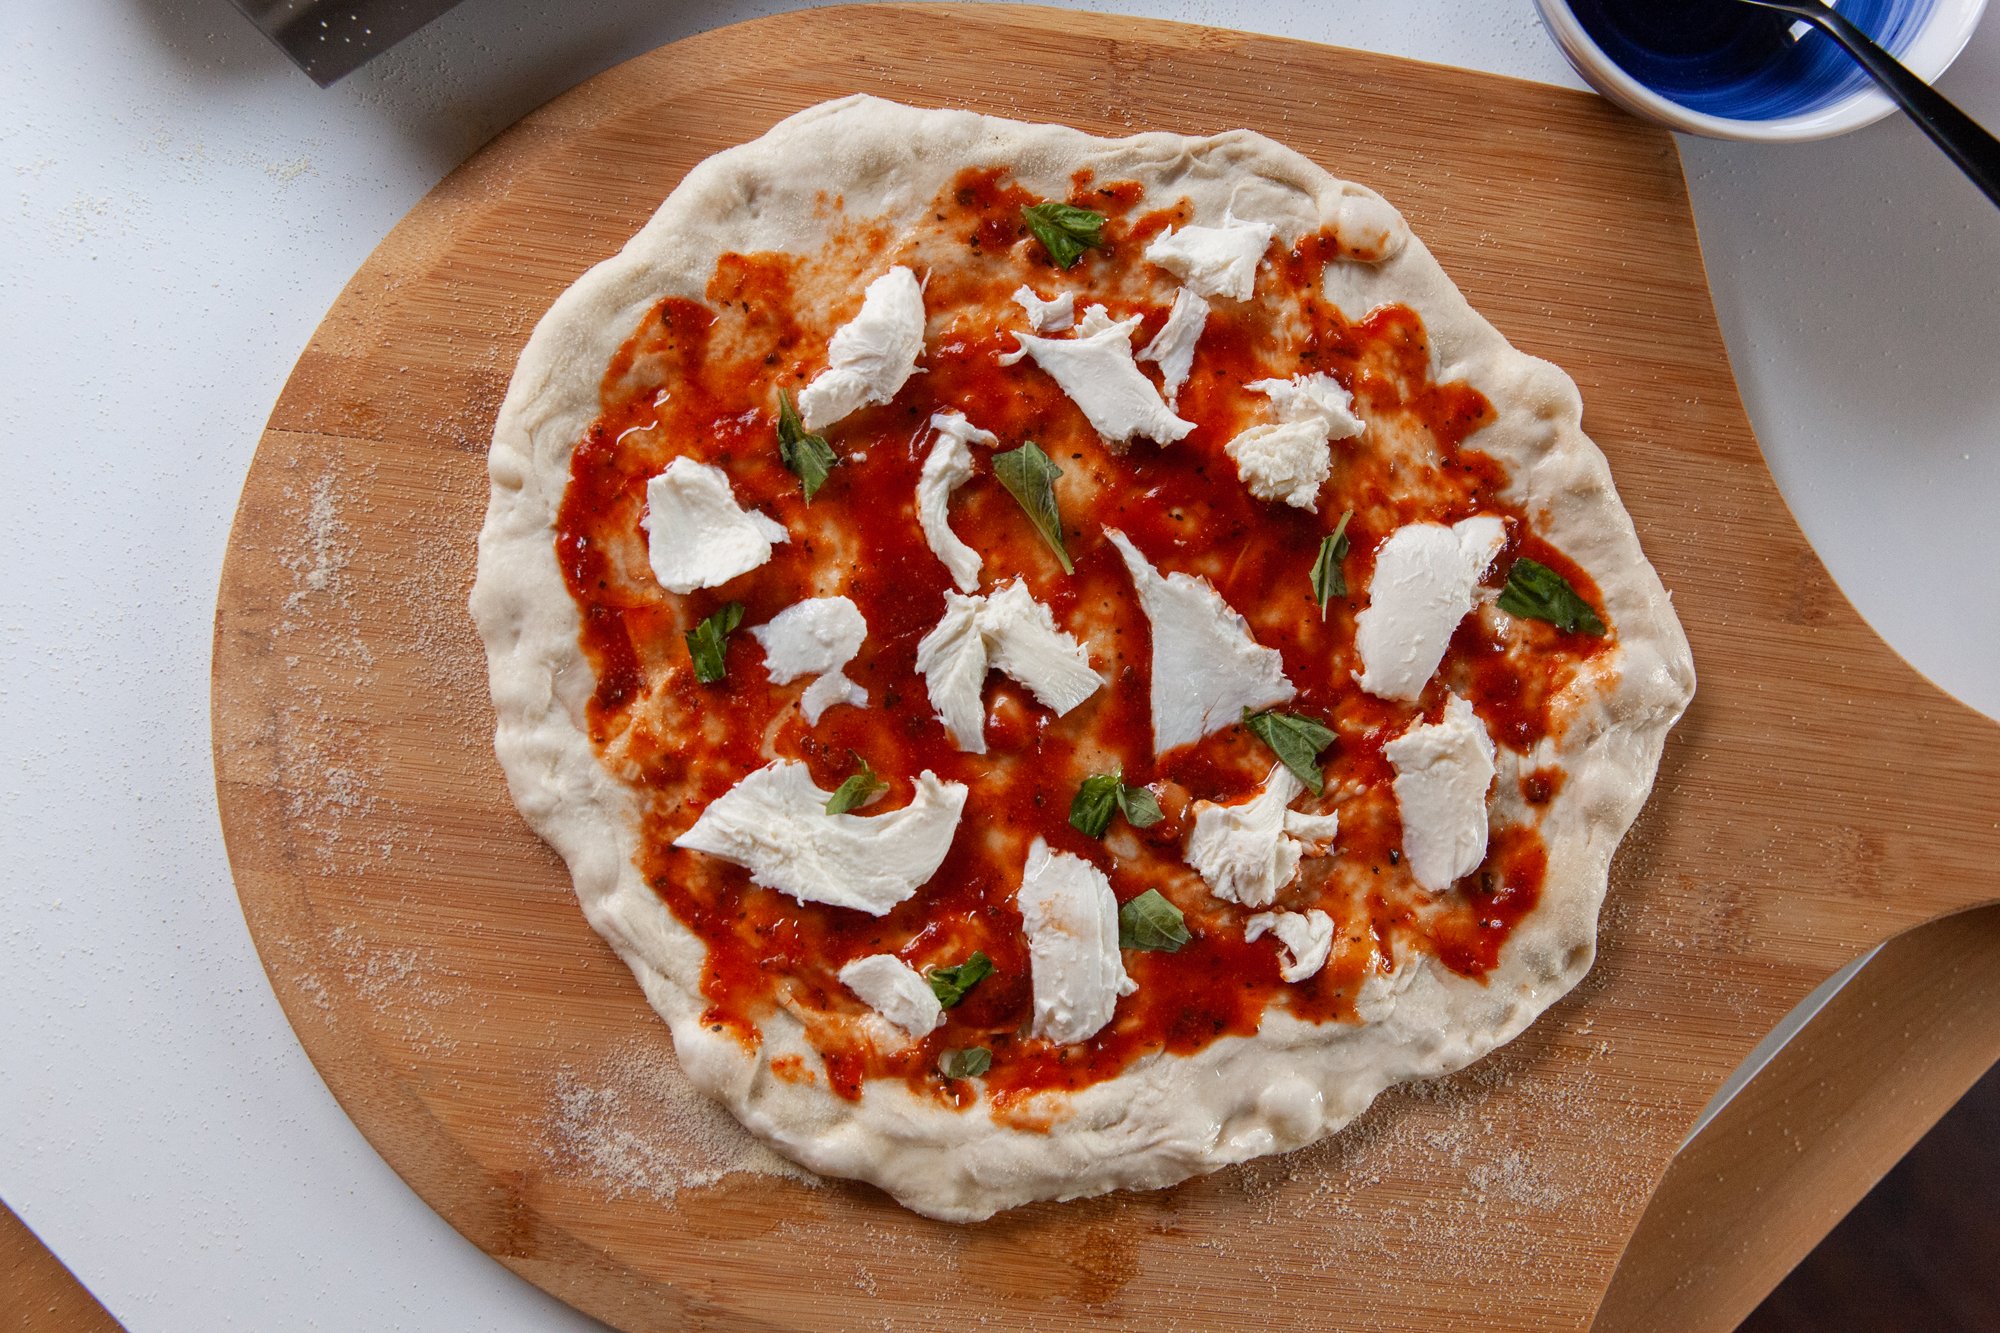
Pizza Dough From Scratch
for BCLiving
March 2022
Some things are just better when they're made from scratch, not to mention that making something “with your own two hands” gives such great satisfaction. When you do this, you will know exactly what ingredients went into your meals, and because of that, it gives you wiggle room for dietary or taste preferences. From Scratch is the way to go...
Pizza Dough
In 2020 I gave some tips about making your homemade pizza even better, and one of the most important ones was making your dough from scratch!
There are many ways you can do this, and much of it depends on time. But if you plan ahead you’ll get some of the best homemade pizza you’ve ever had!
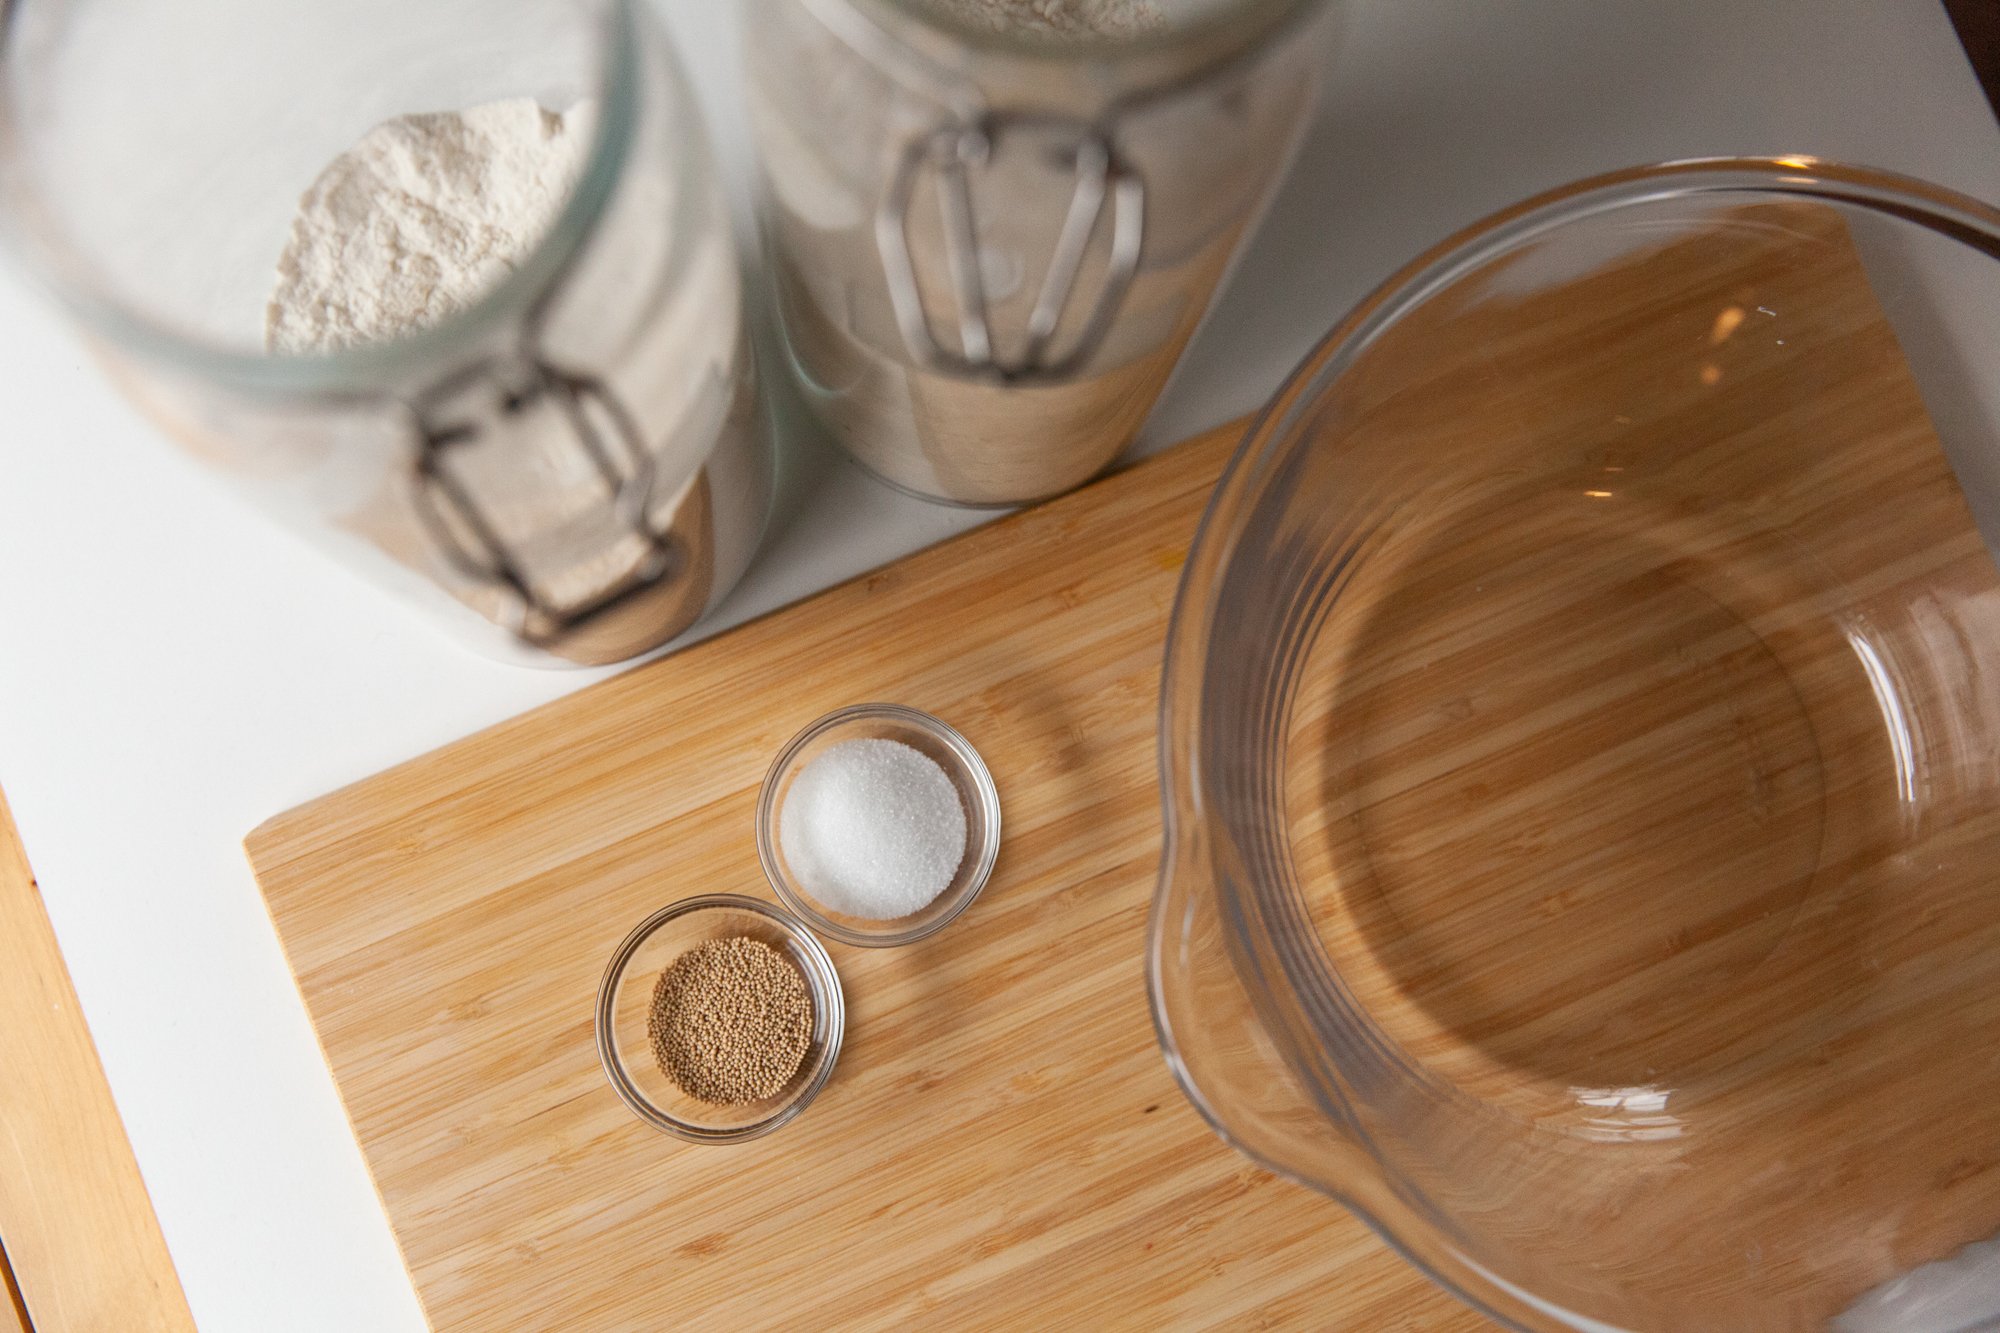
INGREDIENTS:
- *1 ½ teaspoons of yeast or 1 tbsp
- 2 cups of lukewarm water
- 1 teaspoon of sugar
- 2 cups of all-purpose flour
- 3 cups of 00 flour (or AP flour)
- 2 teaspoons of salt
- 2 tablespoons of olive oil
- semolina flour
- pizza sauce and toppings of your choice
INSTRUCTIONS:
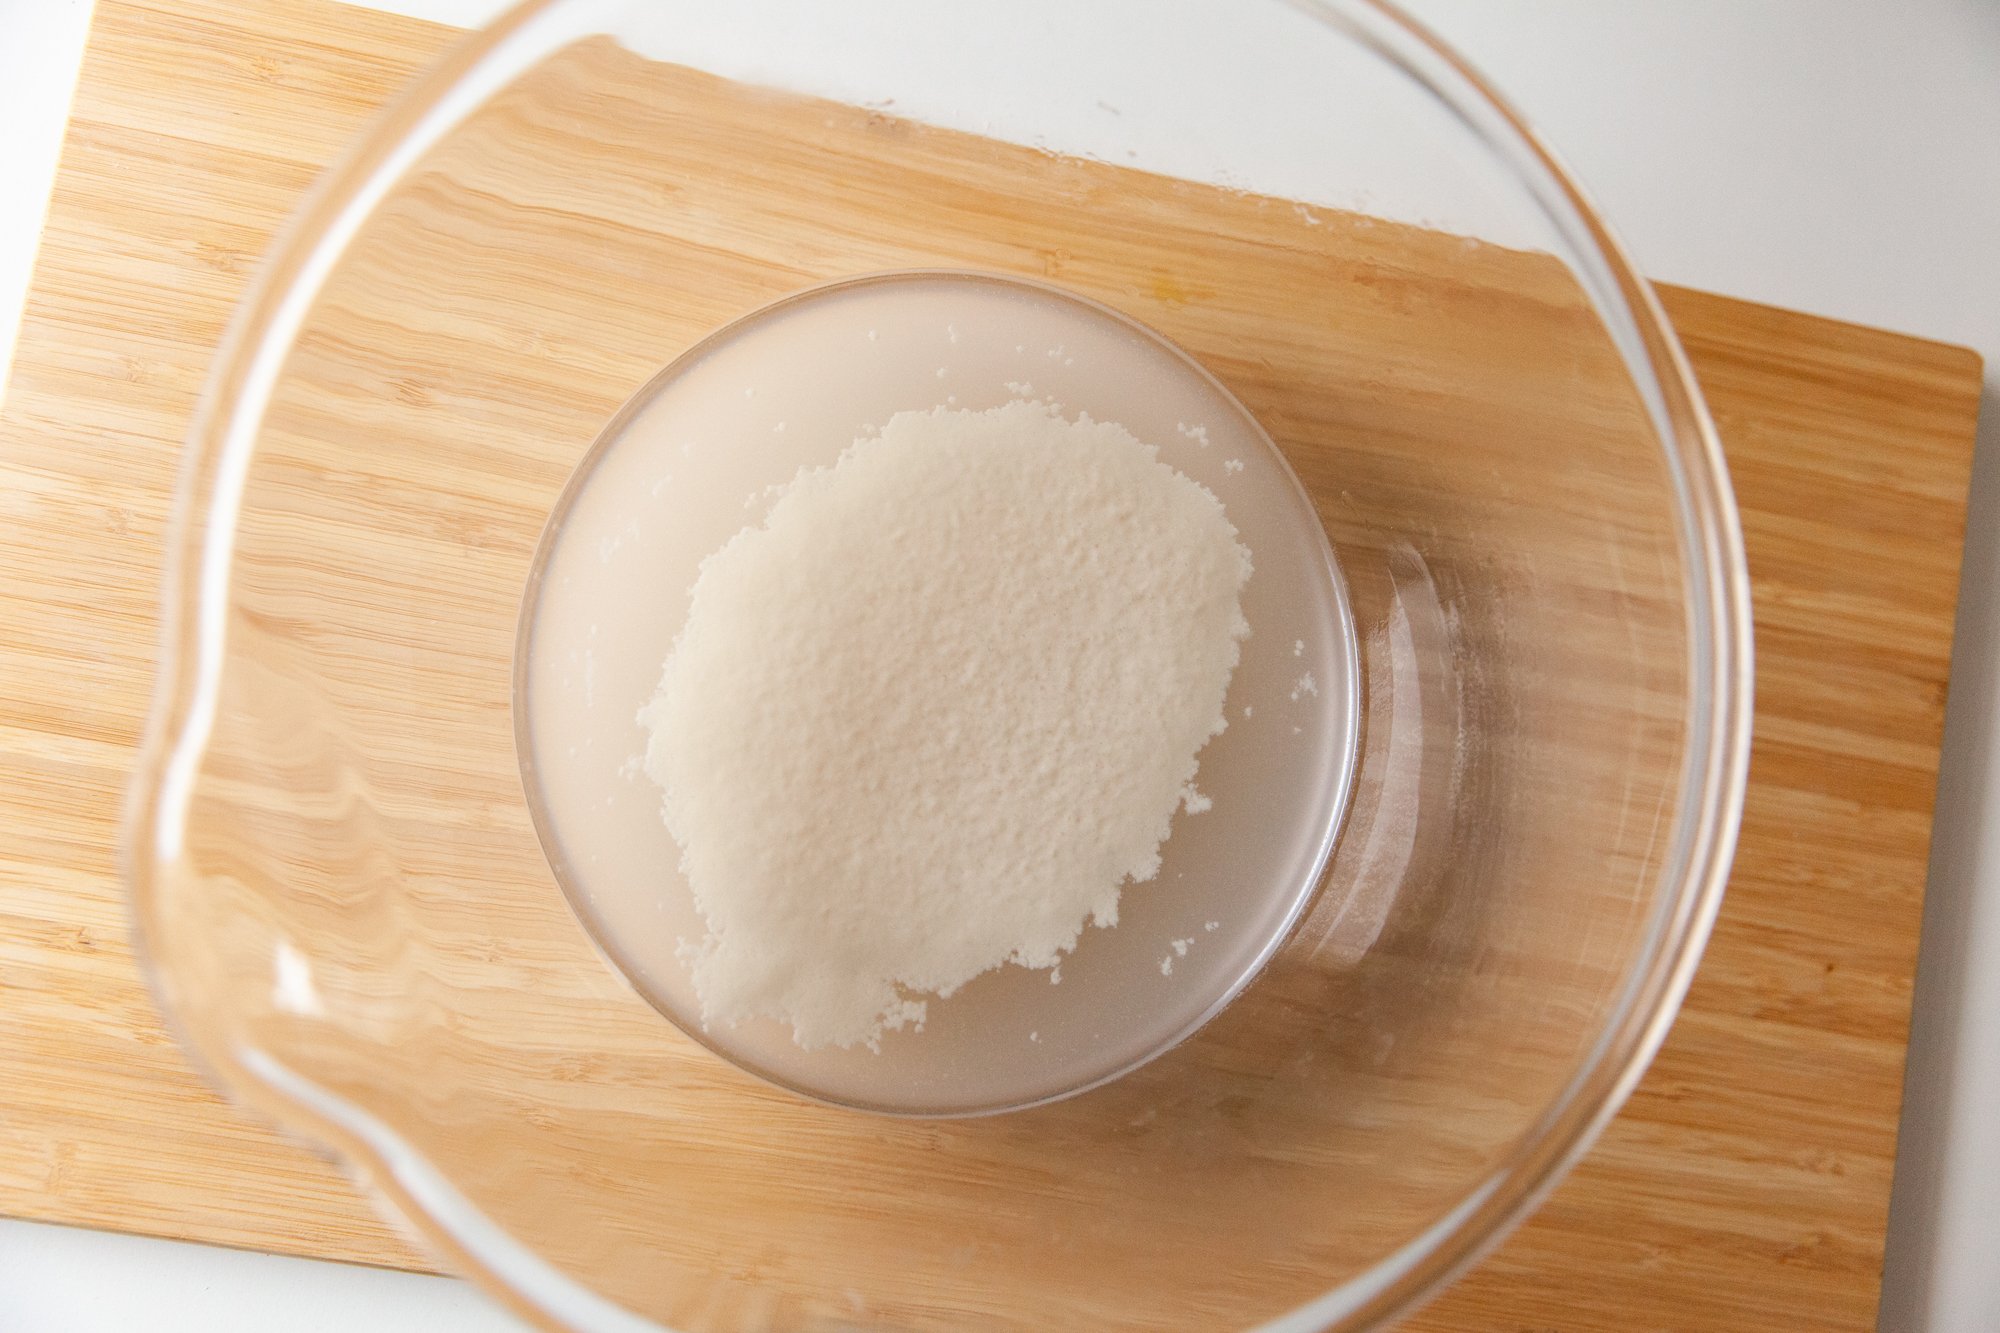
*If you are making the dough for the same day, use 1 tbsp of yeast. If you are going to cold-ferment it overnight, use 1 ½ teaspoons
Place the yeast, sugar and lukewarm water in a bowl and whisk together.
Let it sit for 15-30 minutes until you see it is bubbling and smells yeasty.
Stir in the salt and the olive oil, and then add 2 cups of AP flour and 2 cups of 00 Flour.
Mix loosely and add more flour until the dough isn’t wet, and then let rest for 10 minutes.
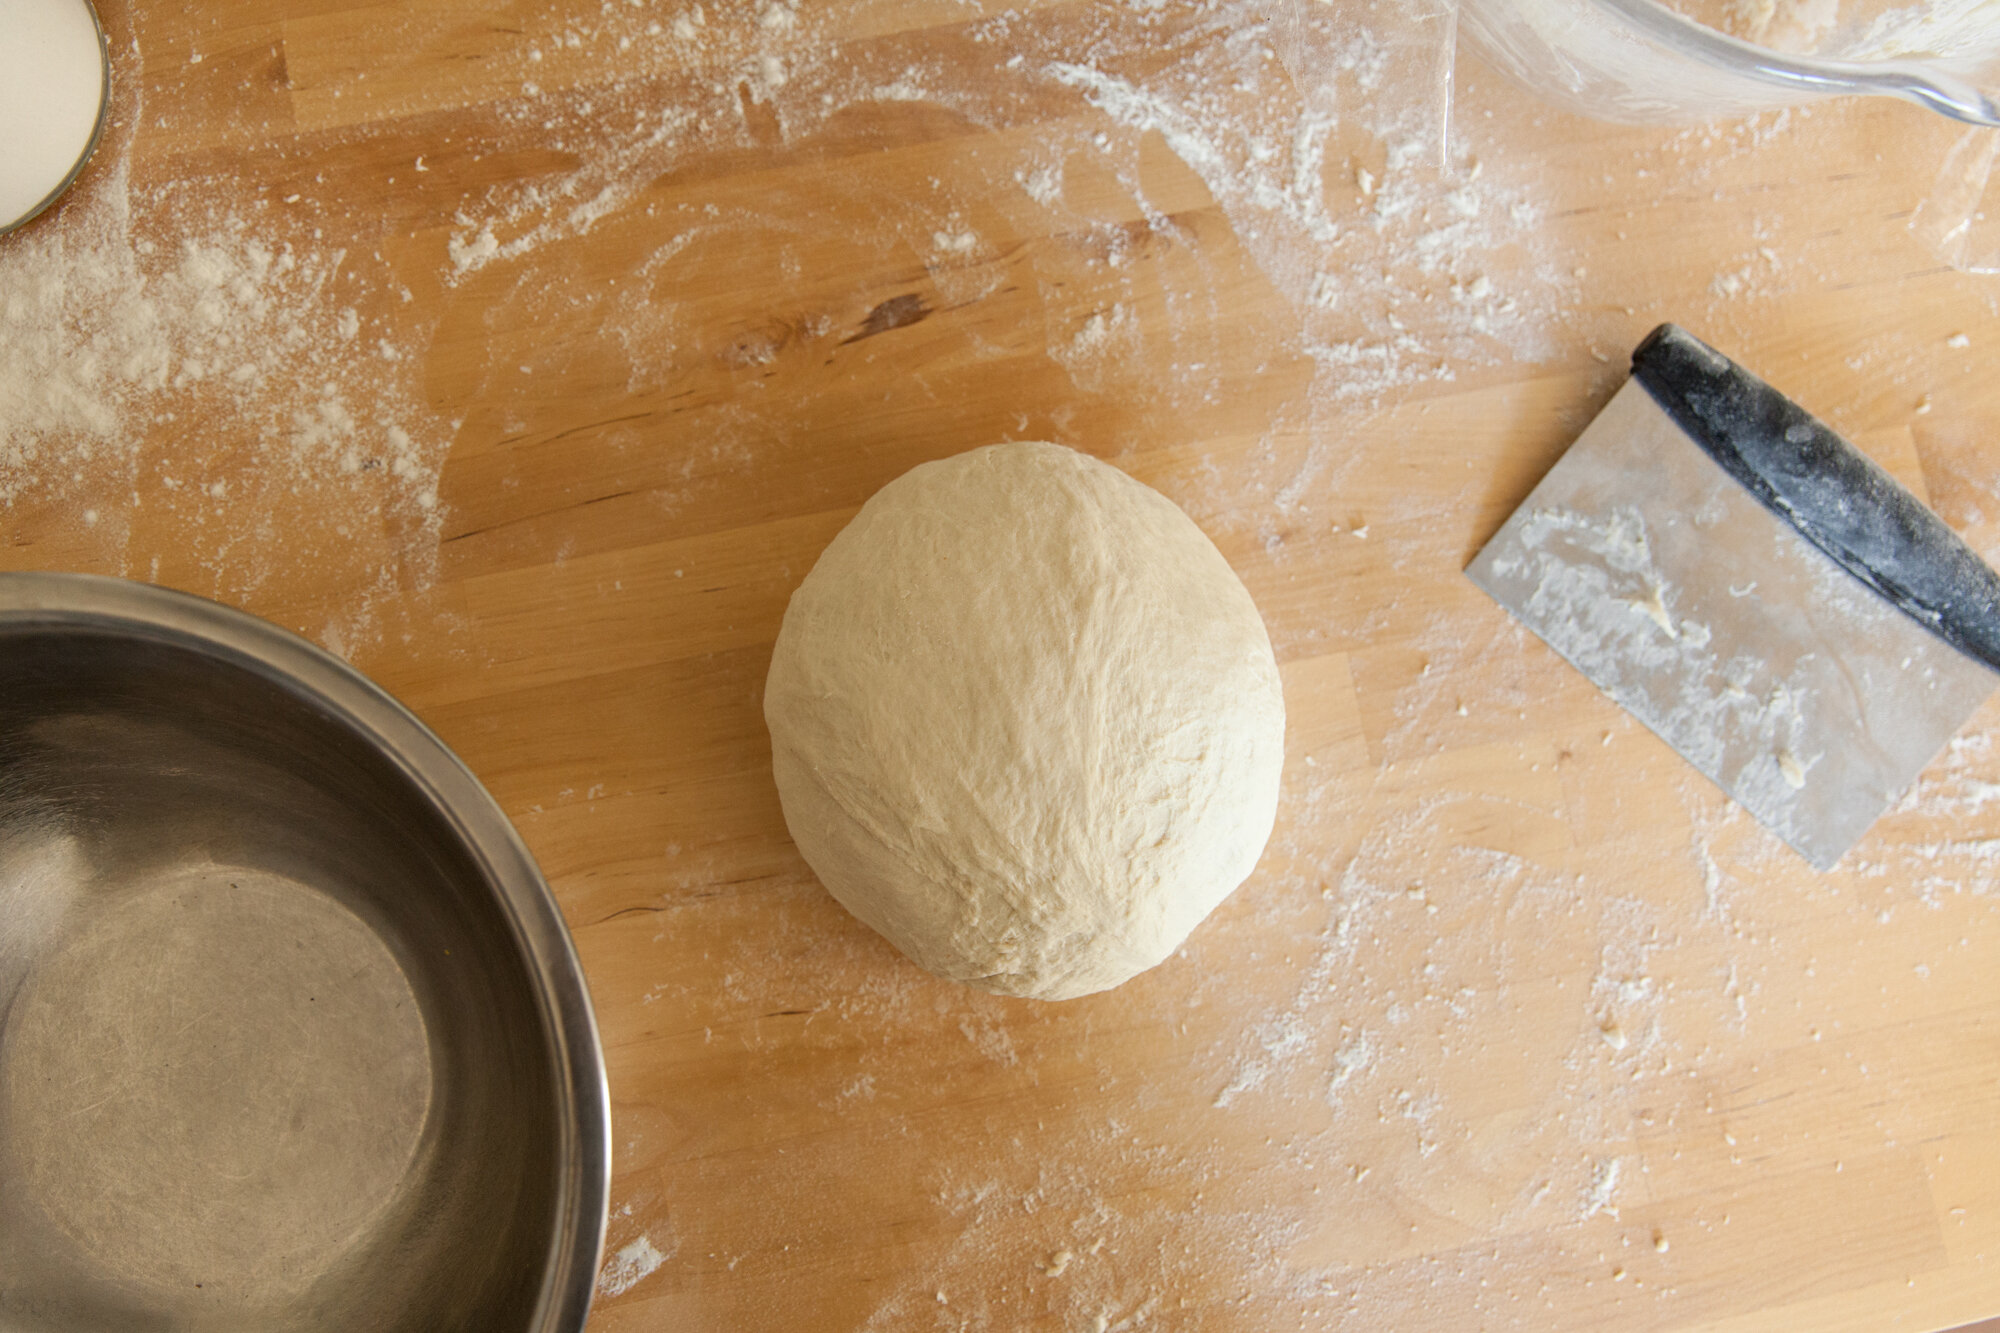
Transfer to a clean, lightly floured surface and knead until the dough for five minutes.
Cover with cling-wrap or a tea towel and let sit for 10 minutes so the water can absorb more.
After this rest, knead for 4-5 more minutes until you have a smooth ball.
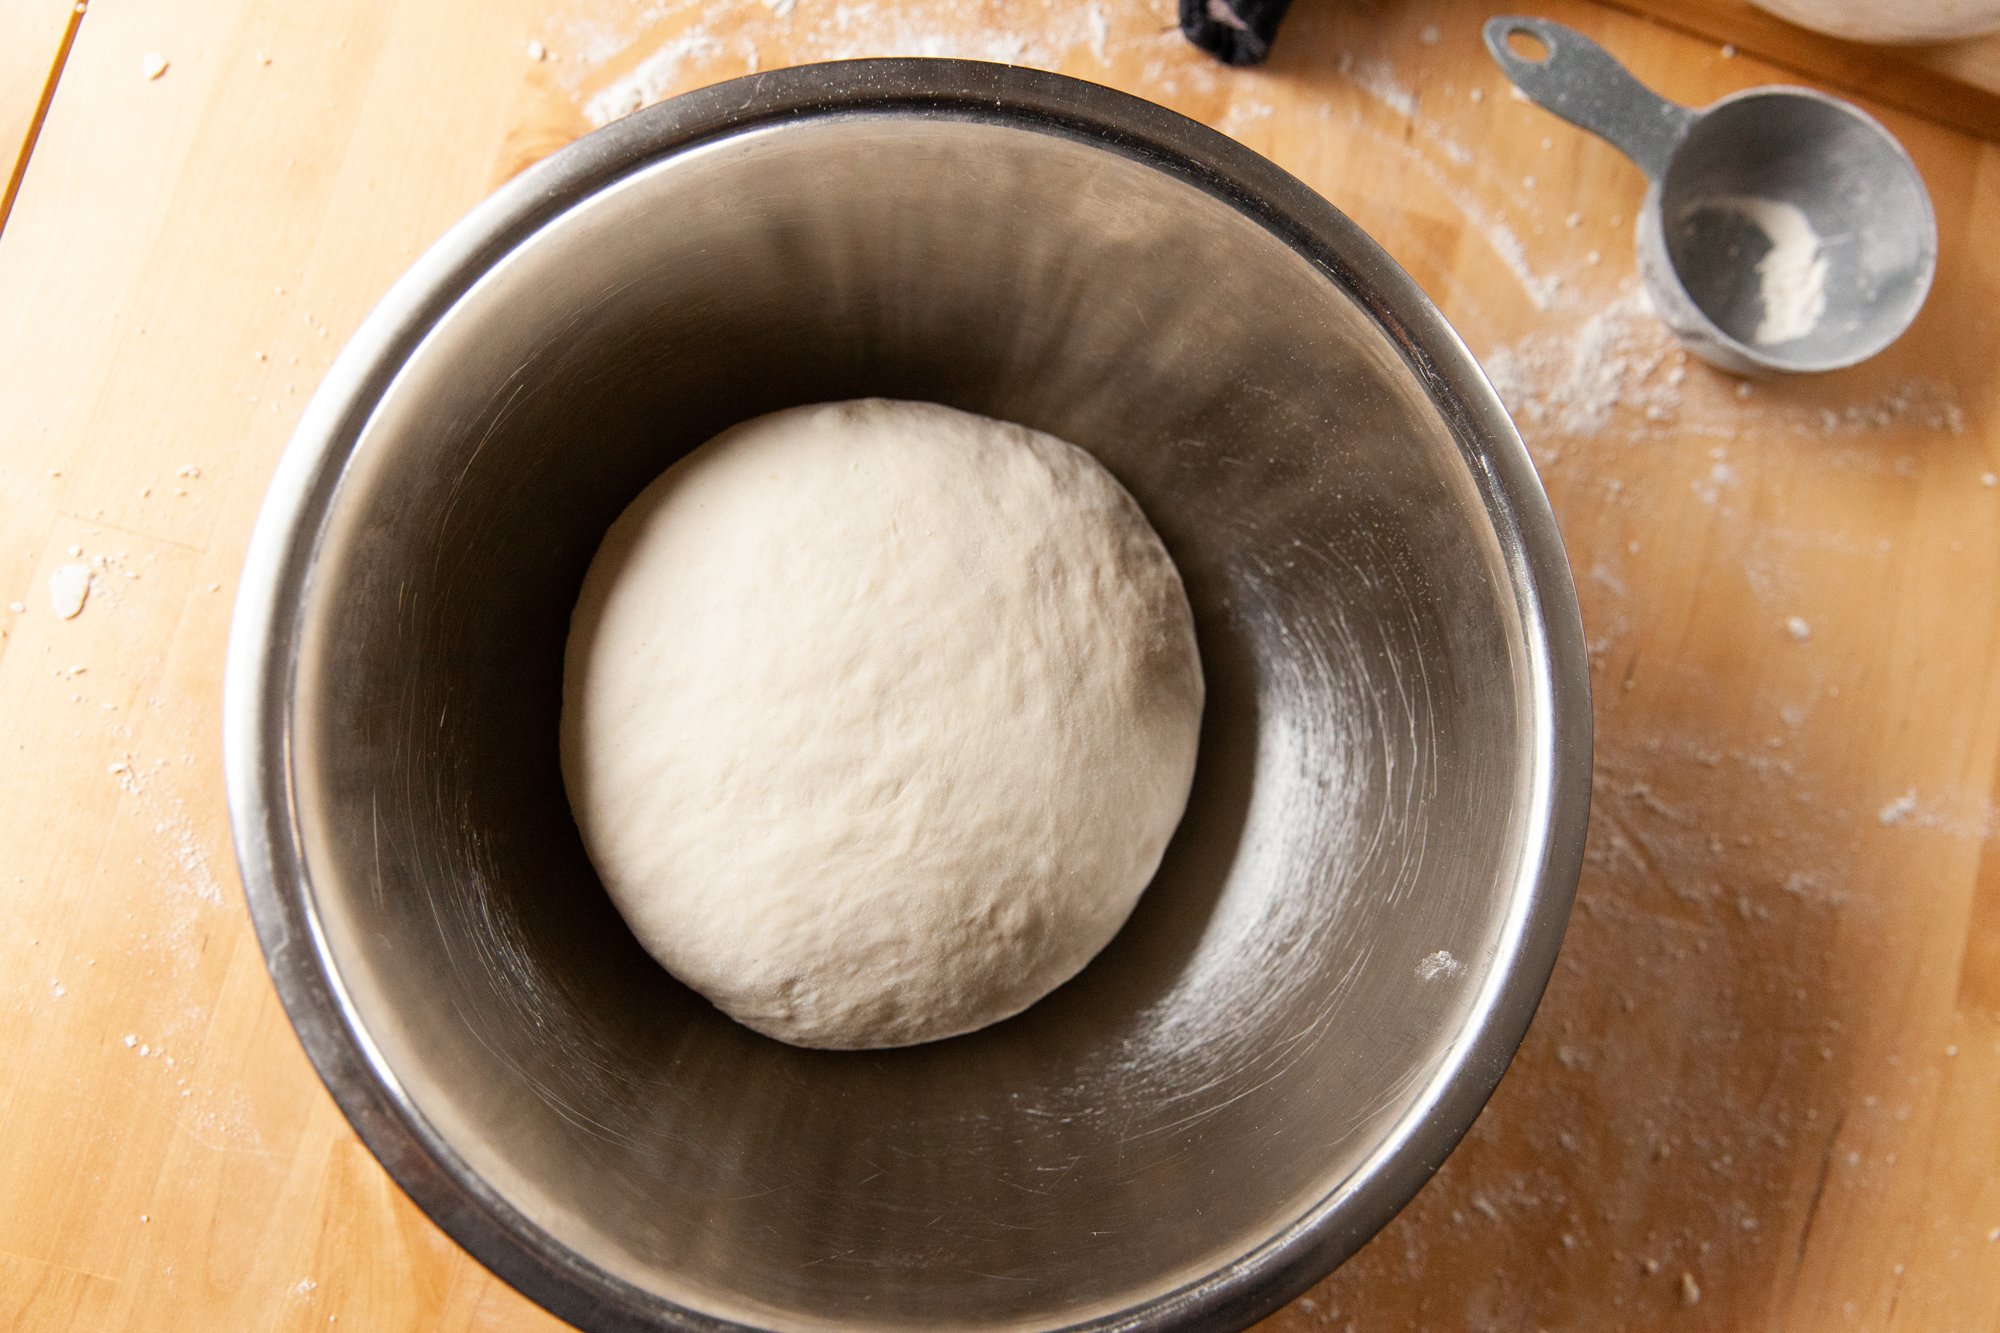
Place in an oiled bowl, cover, and let it rest until it doubles in size. This can take anywhere from 1-3 hours depending on your environment.
Once the dough has doubled you can cut into 3 or 4 even pieces (depending on the size you’d like), and then shape into balls.
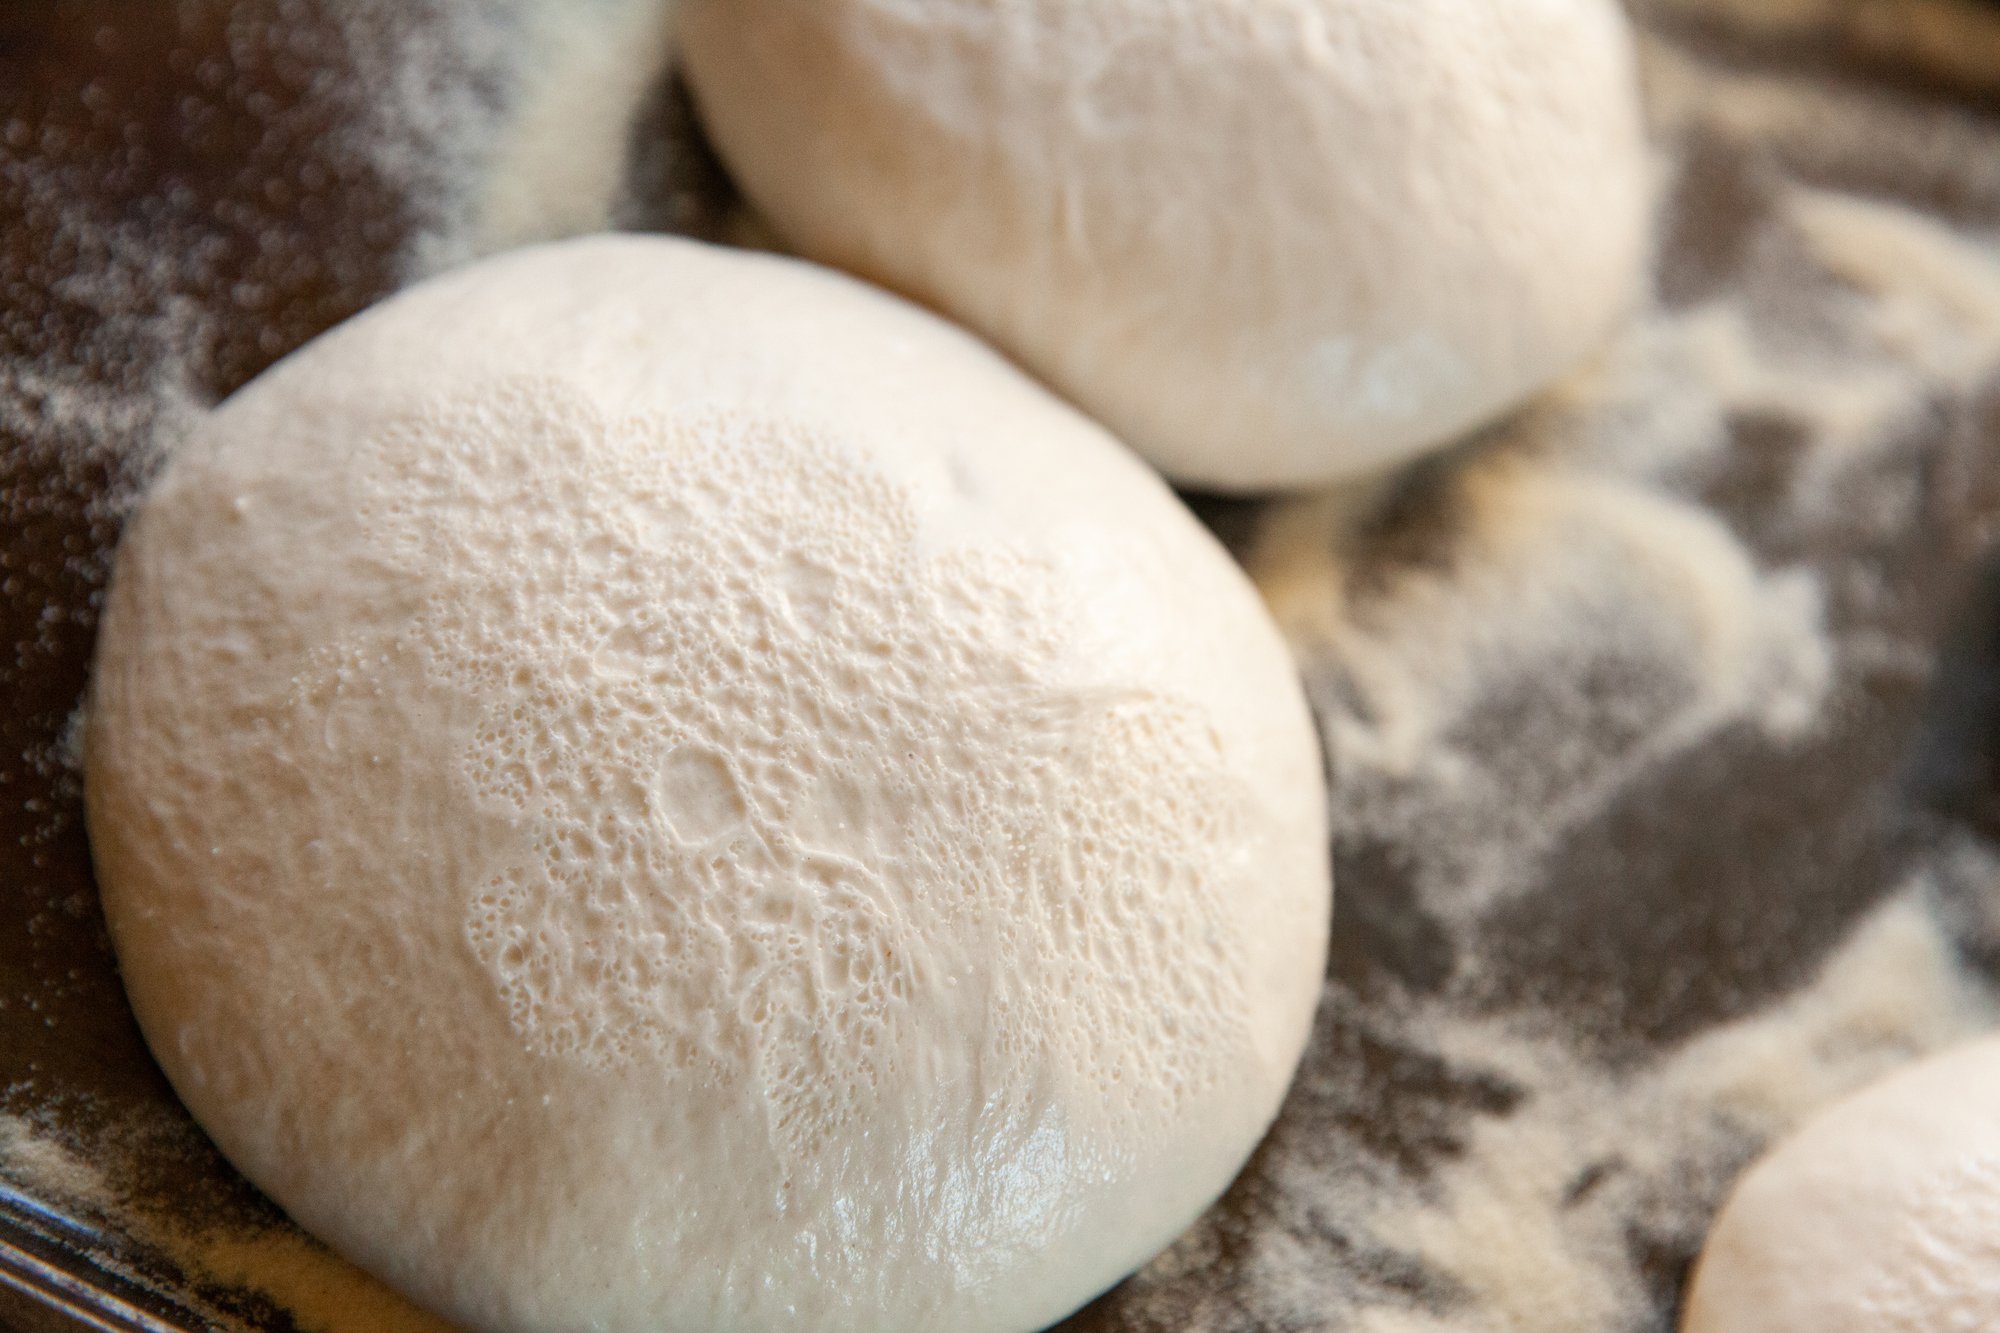
At this stage, if you are using it right away, let them rest on an oiled sheet pan a while longer.
If you are cold-fermenting them, place some semolina flour on a sheet pan, then place the balls on top, and then smooth some olive oil over the top so the crust doesn’t get hard.
Cover the dough with plastic wrap and you can place it in the fridge for 12-72 hours (longer it ferments, the more flavor).
Before you use the dough, remove it from the fridge and let it come to room temperature. (At LEAST an hour).
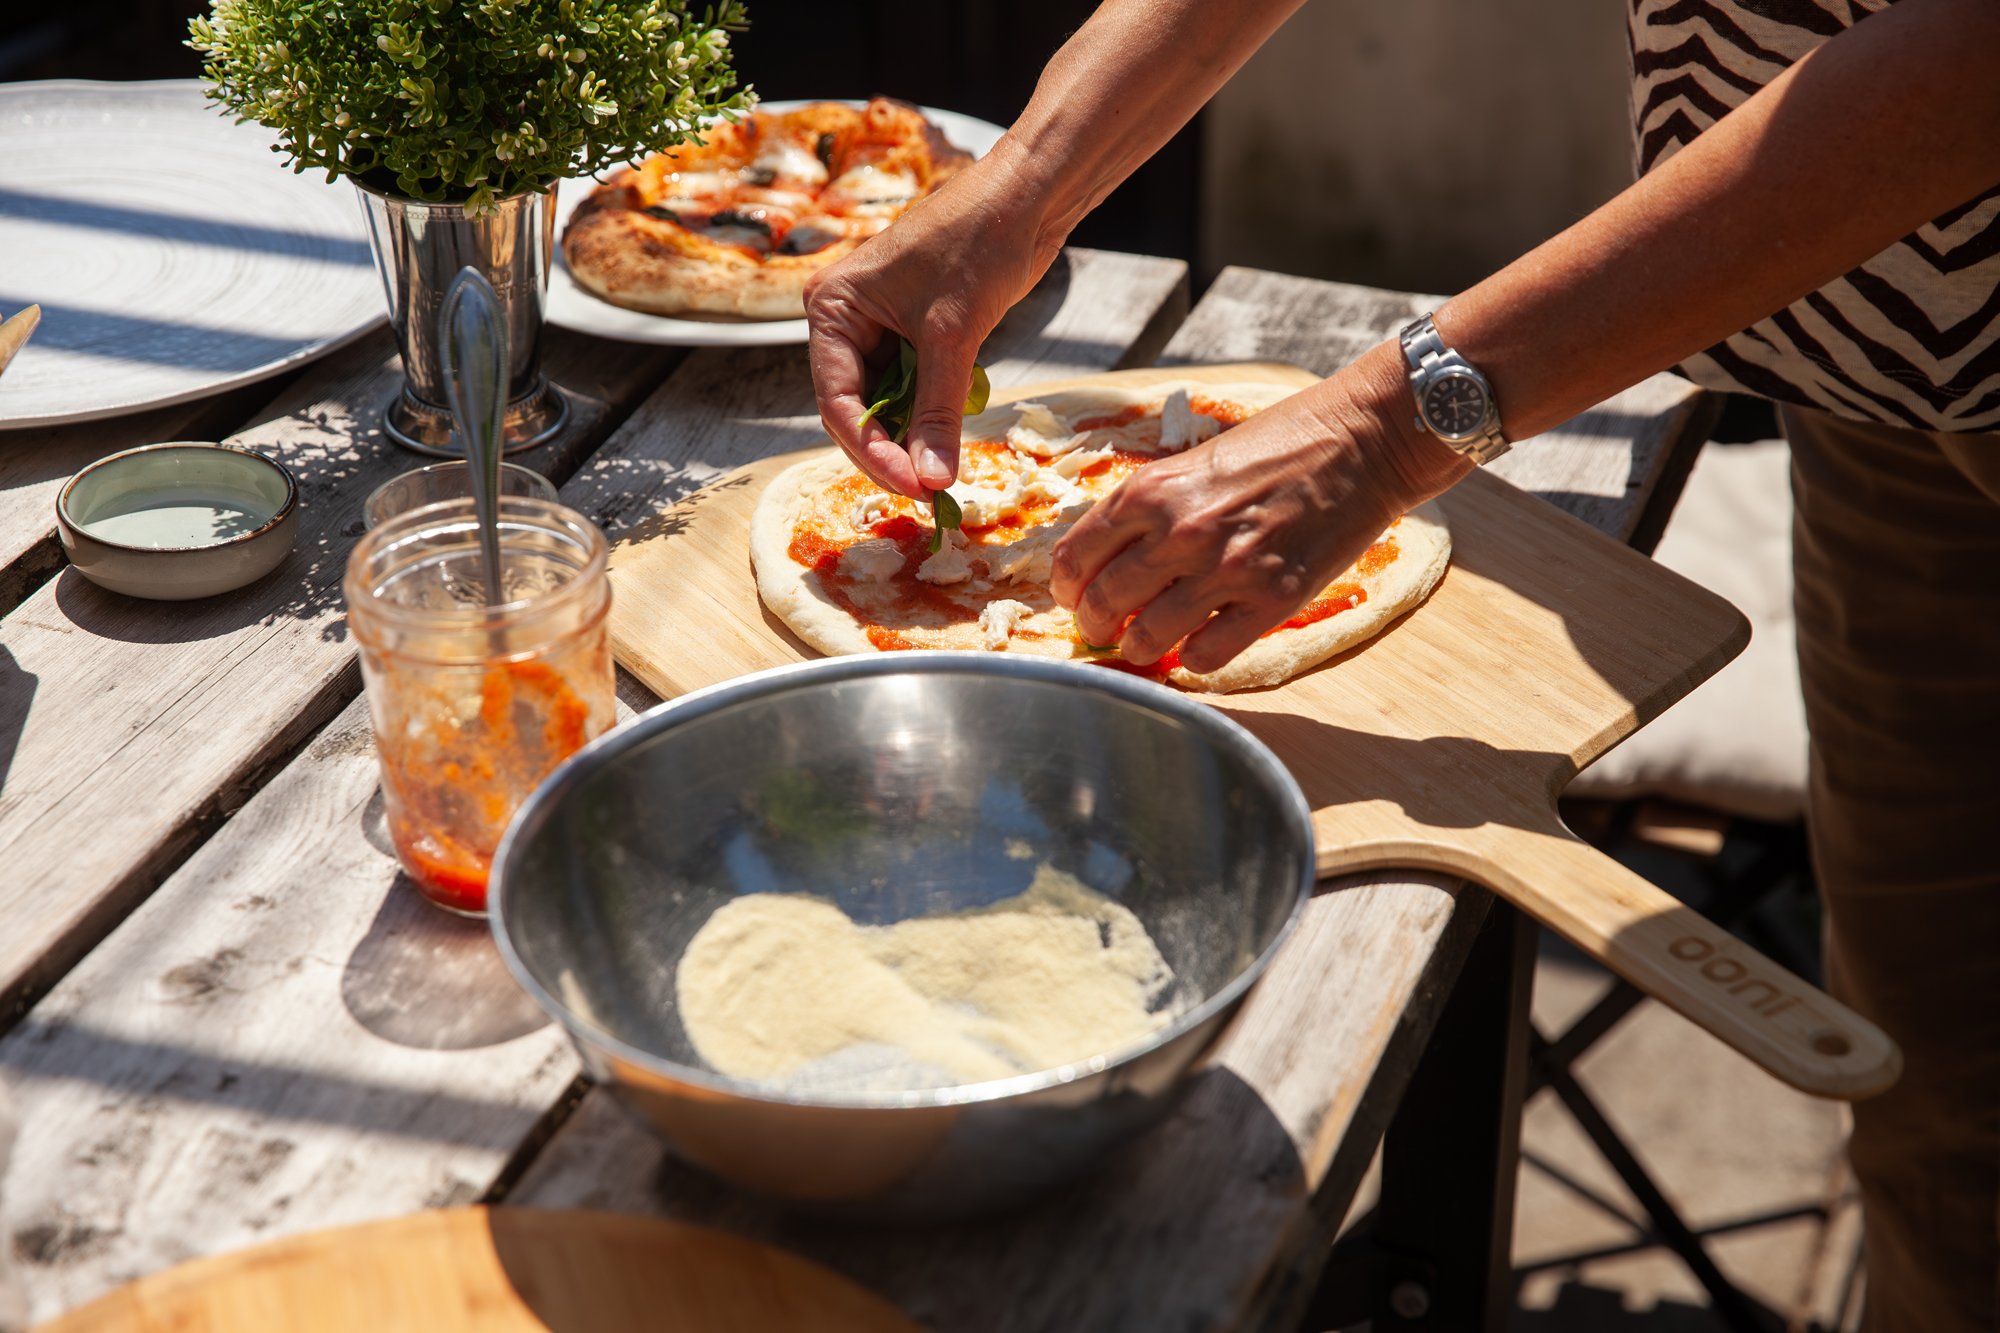
You can shape your dough balls either with oil or semolina on the counter. Do NOT use a rolling pin!
Press your fingers into it to create the crust and work the dough from there. You can use your knuckles and slowly rotate the dough to stretch it out as well.
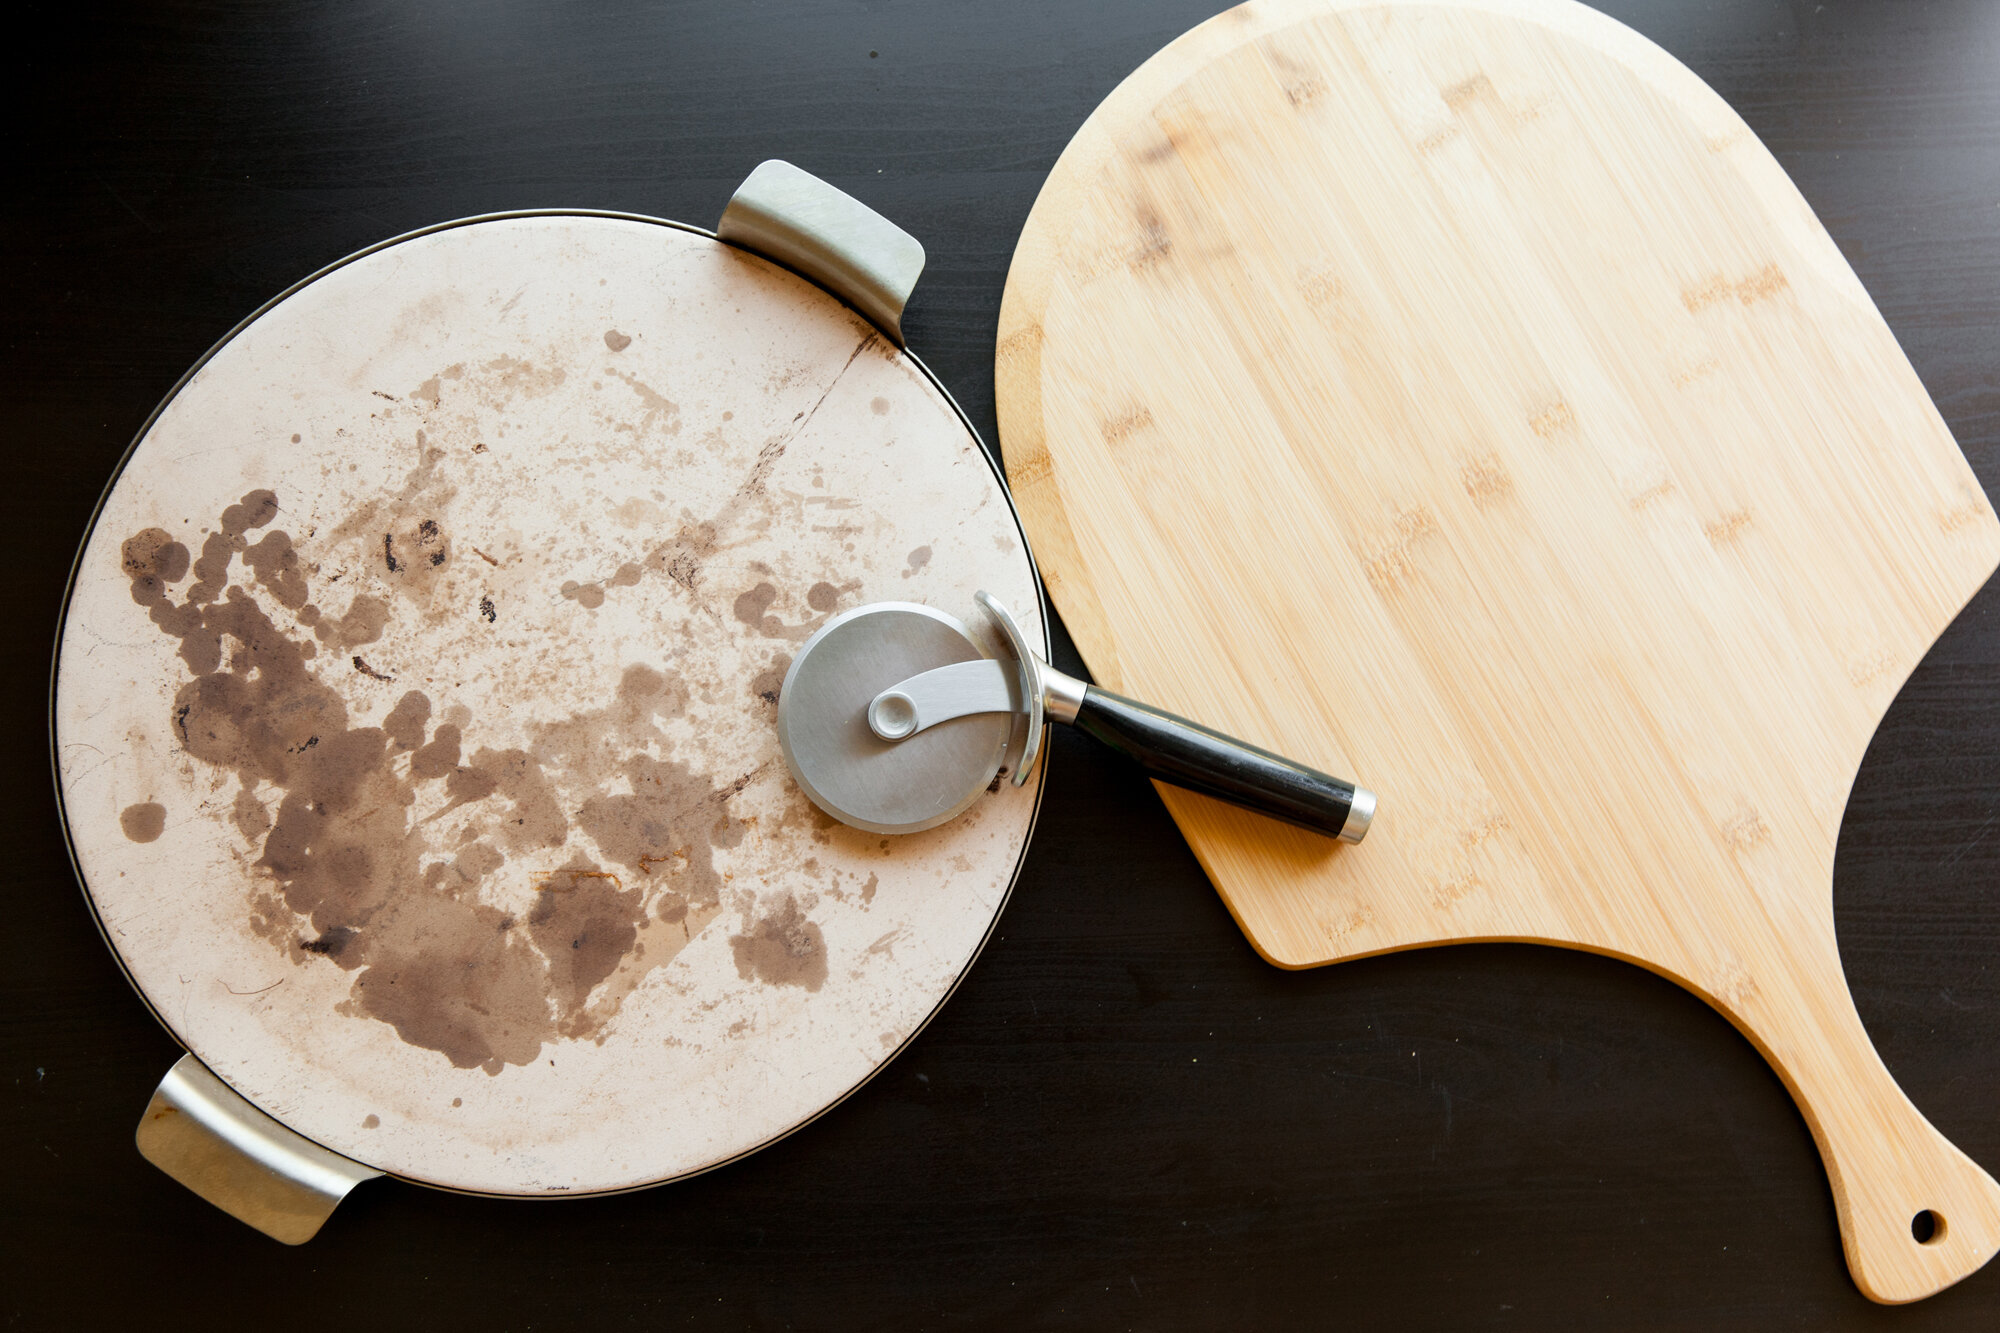
Place semolina on a pizza peel if using a pizza stone and then place the dough on top, followed by your chosen sauce and ingredients and then place it in the oven.
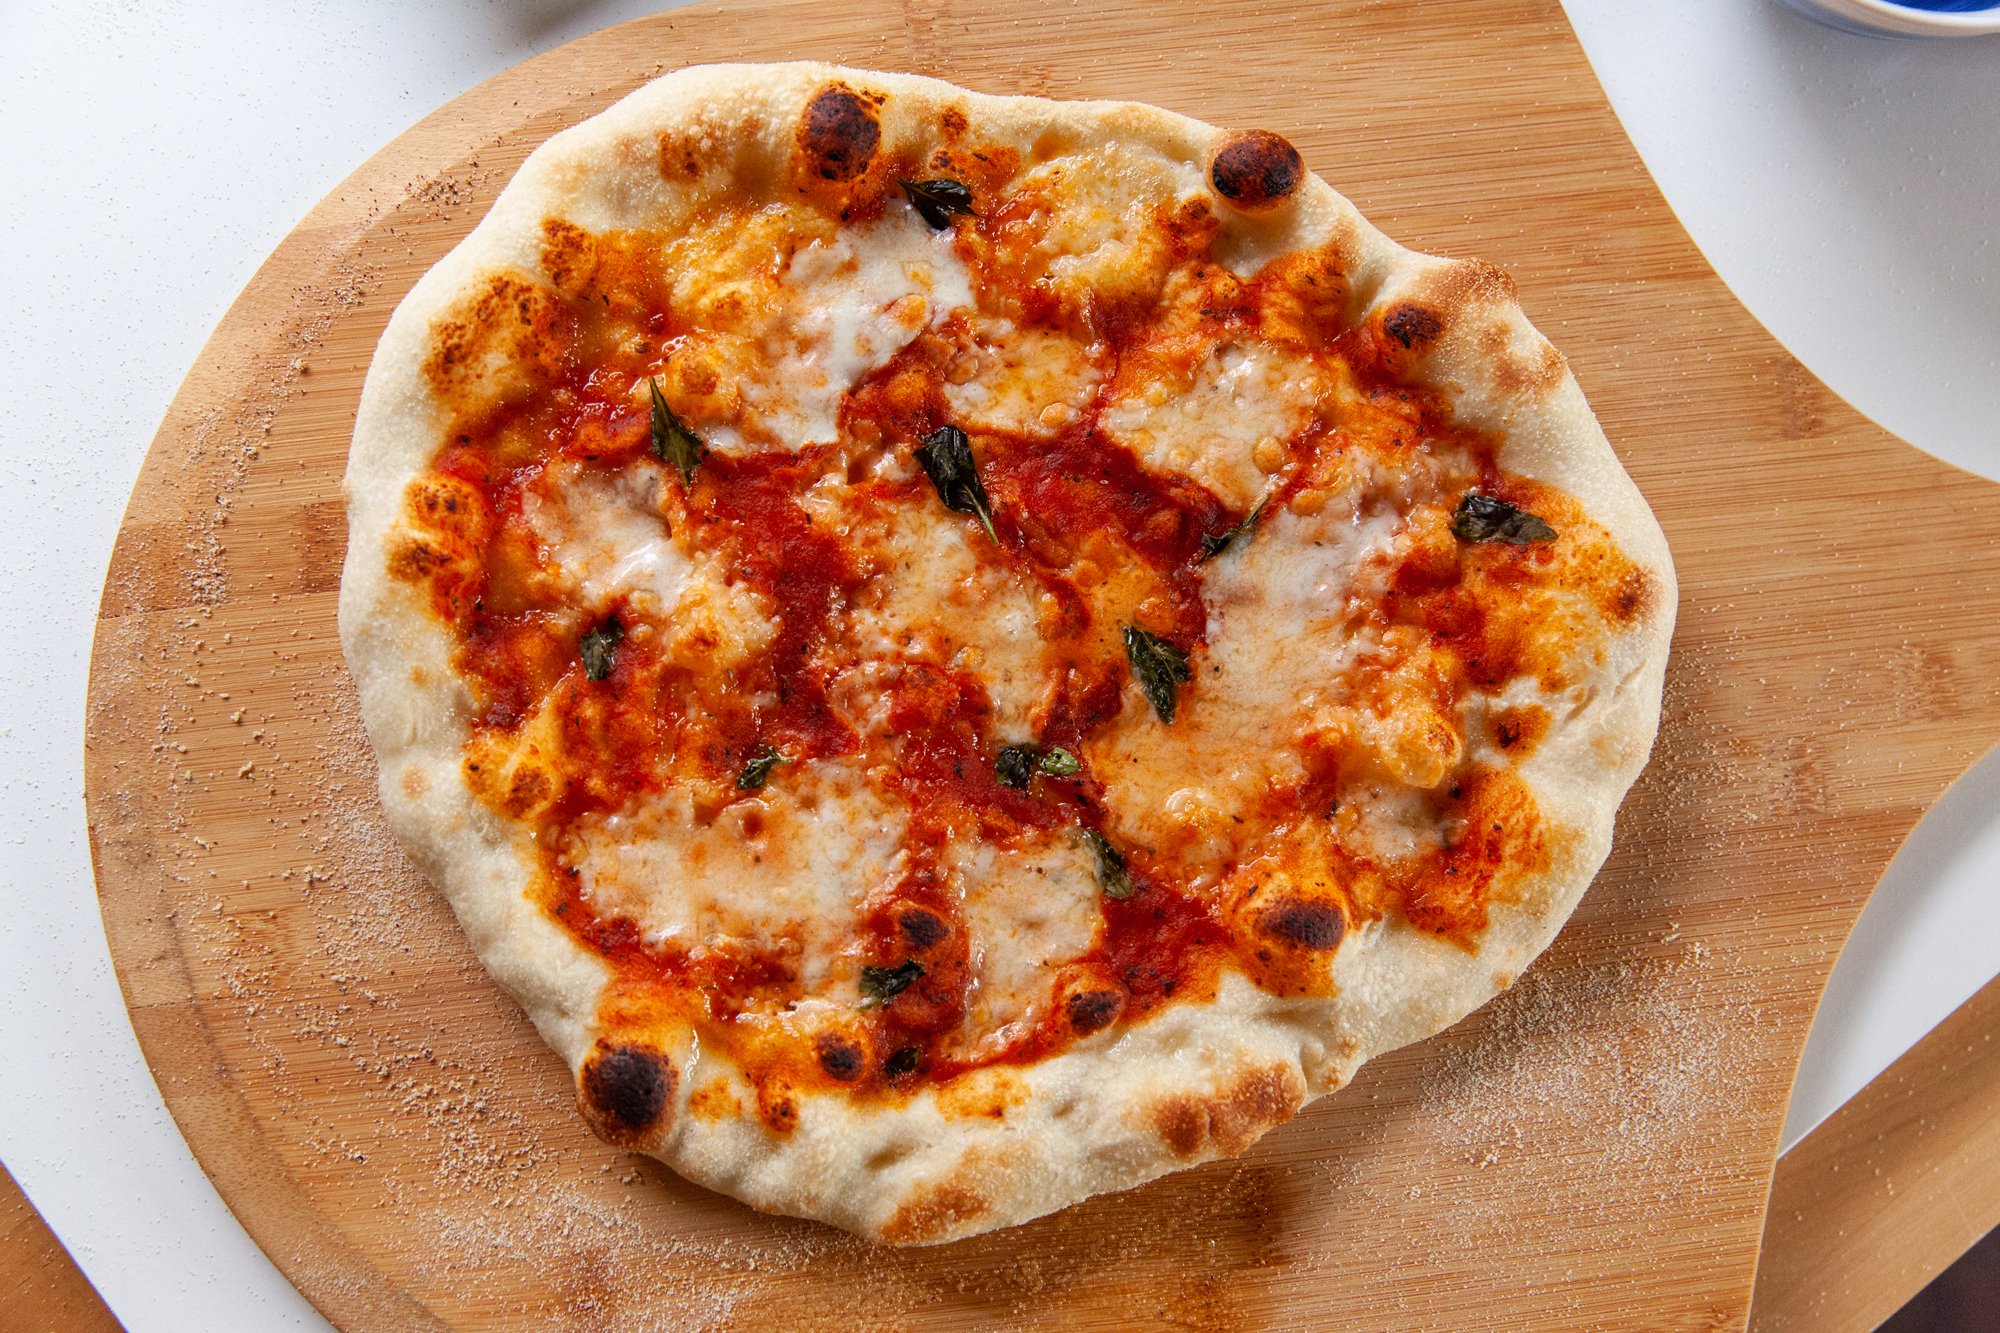
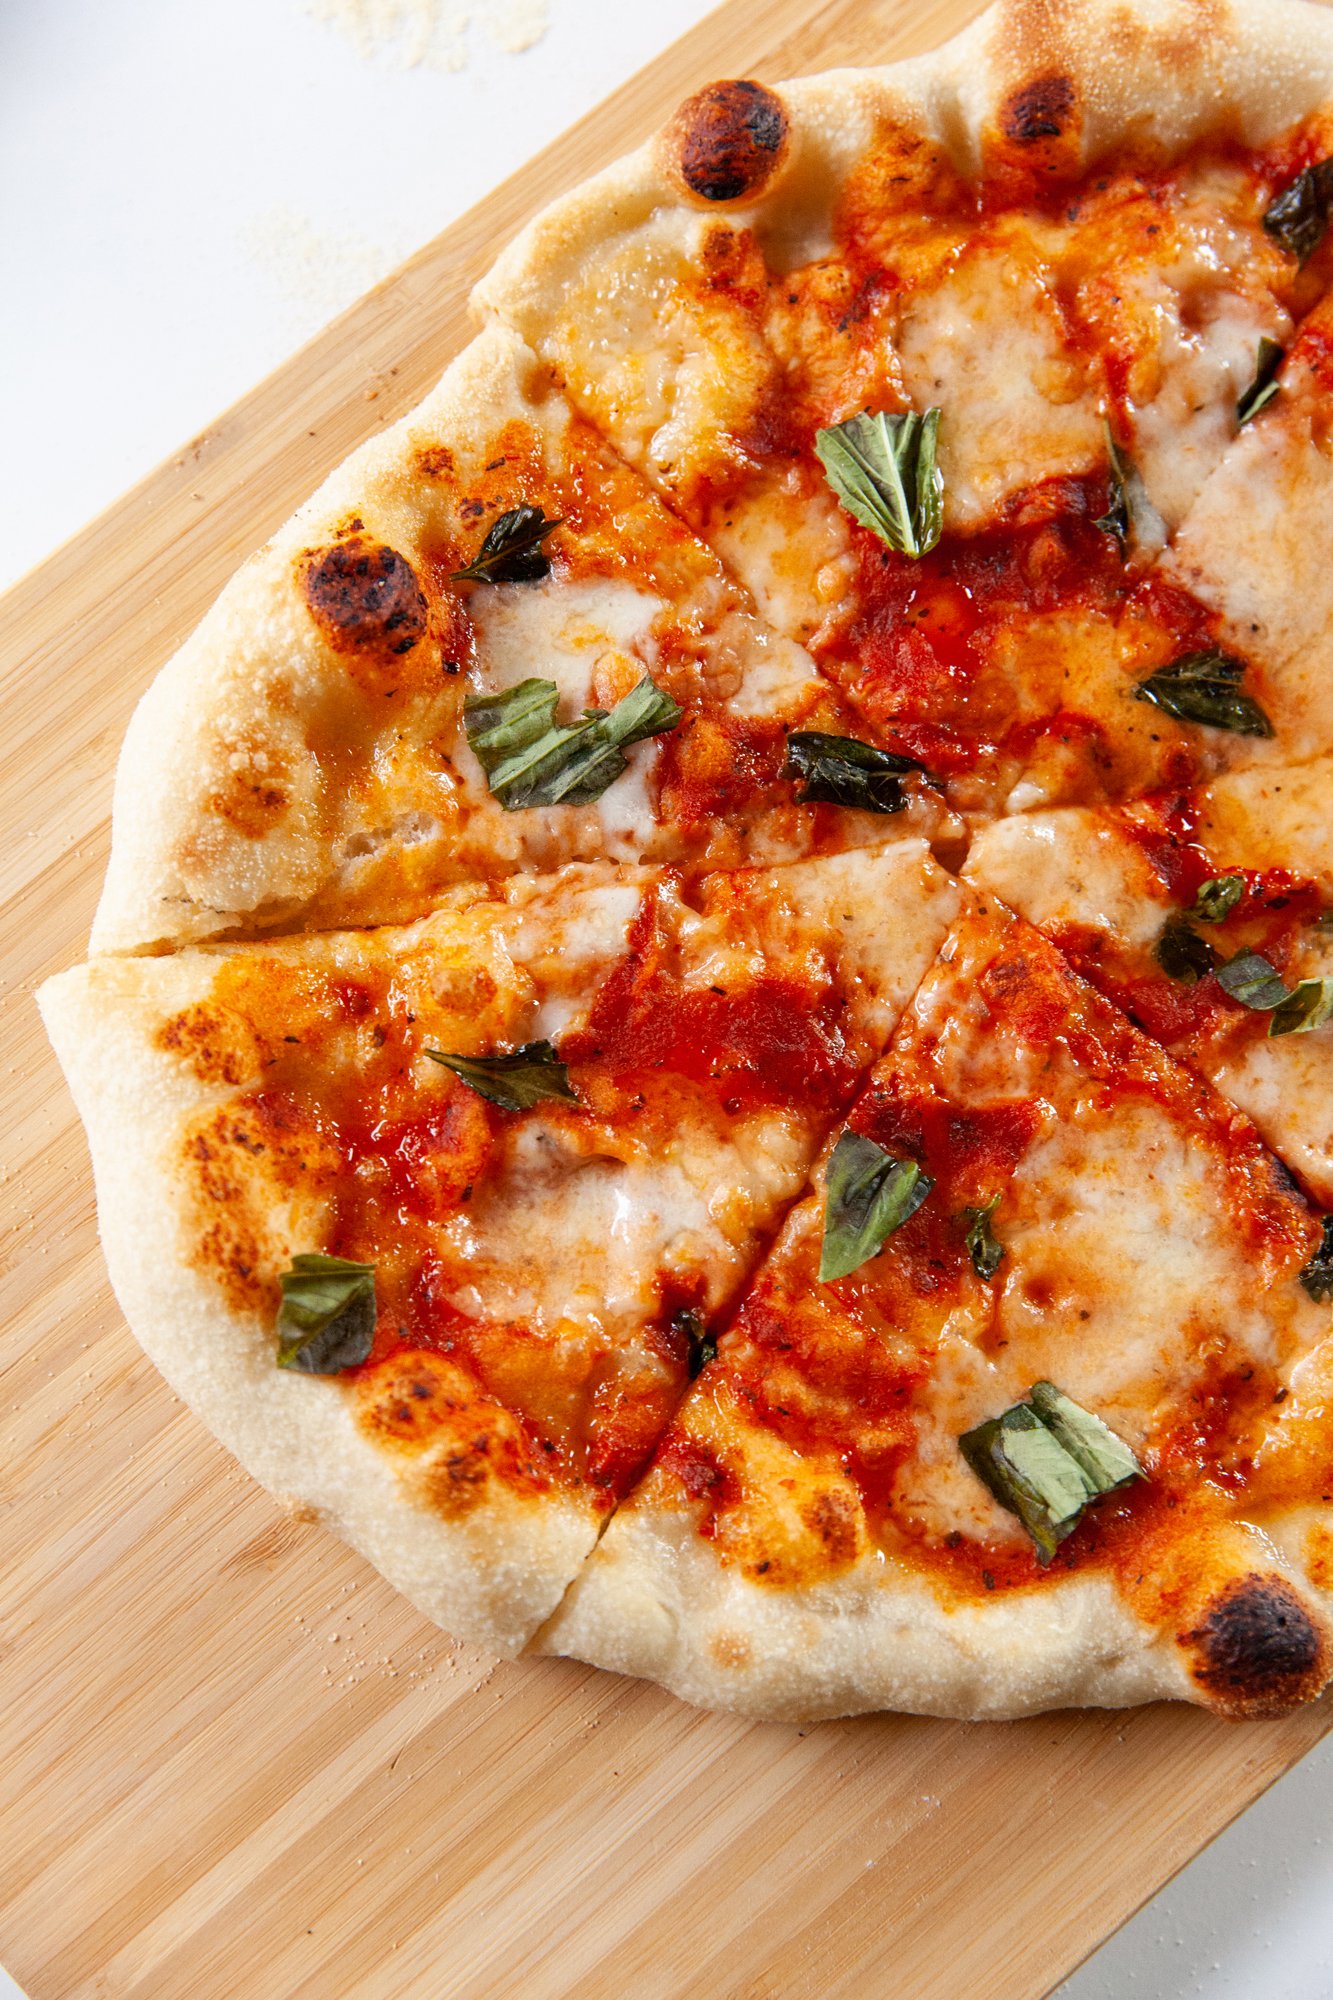
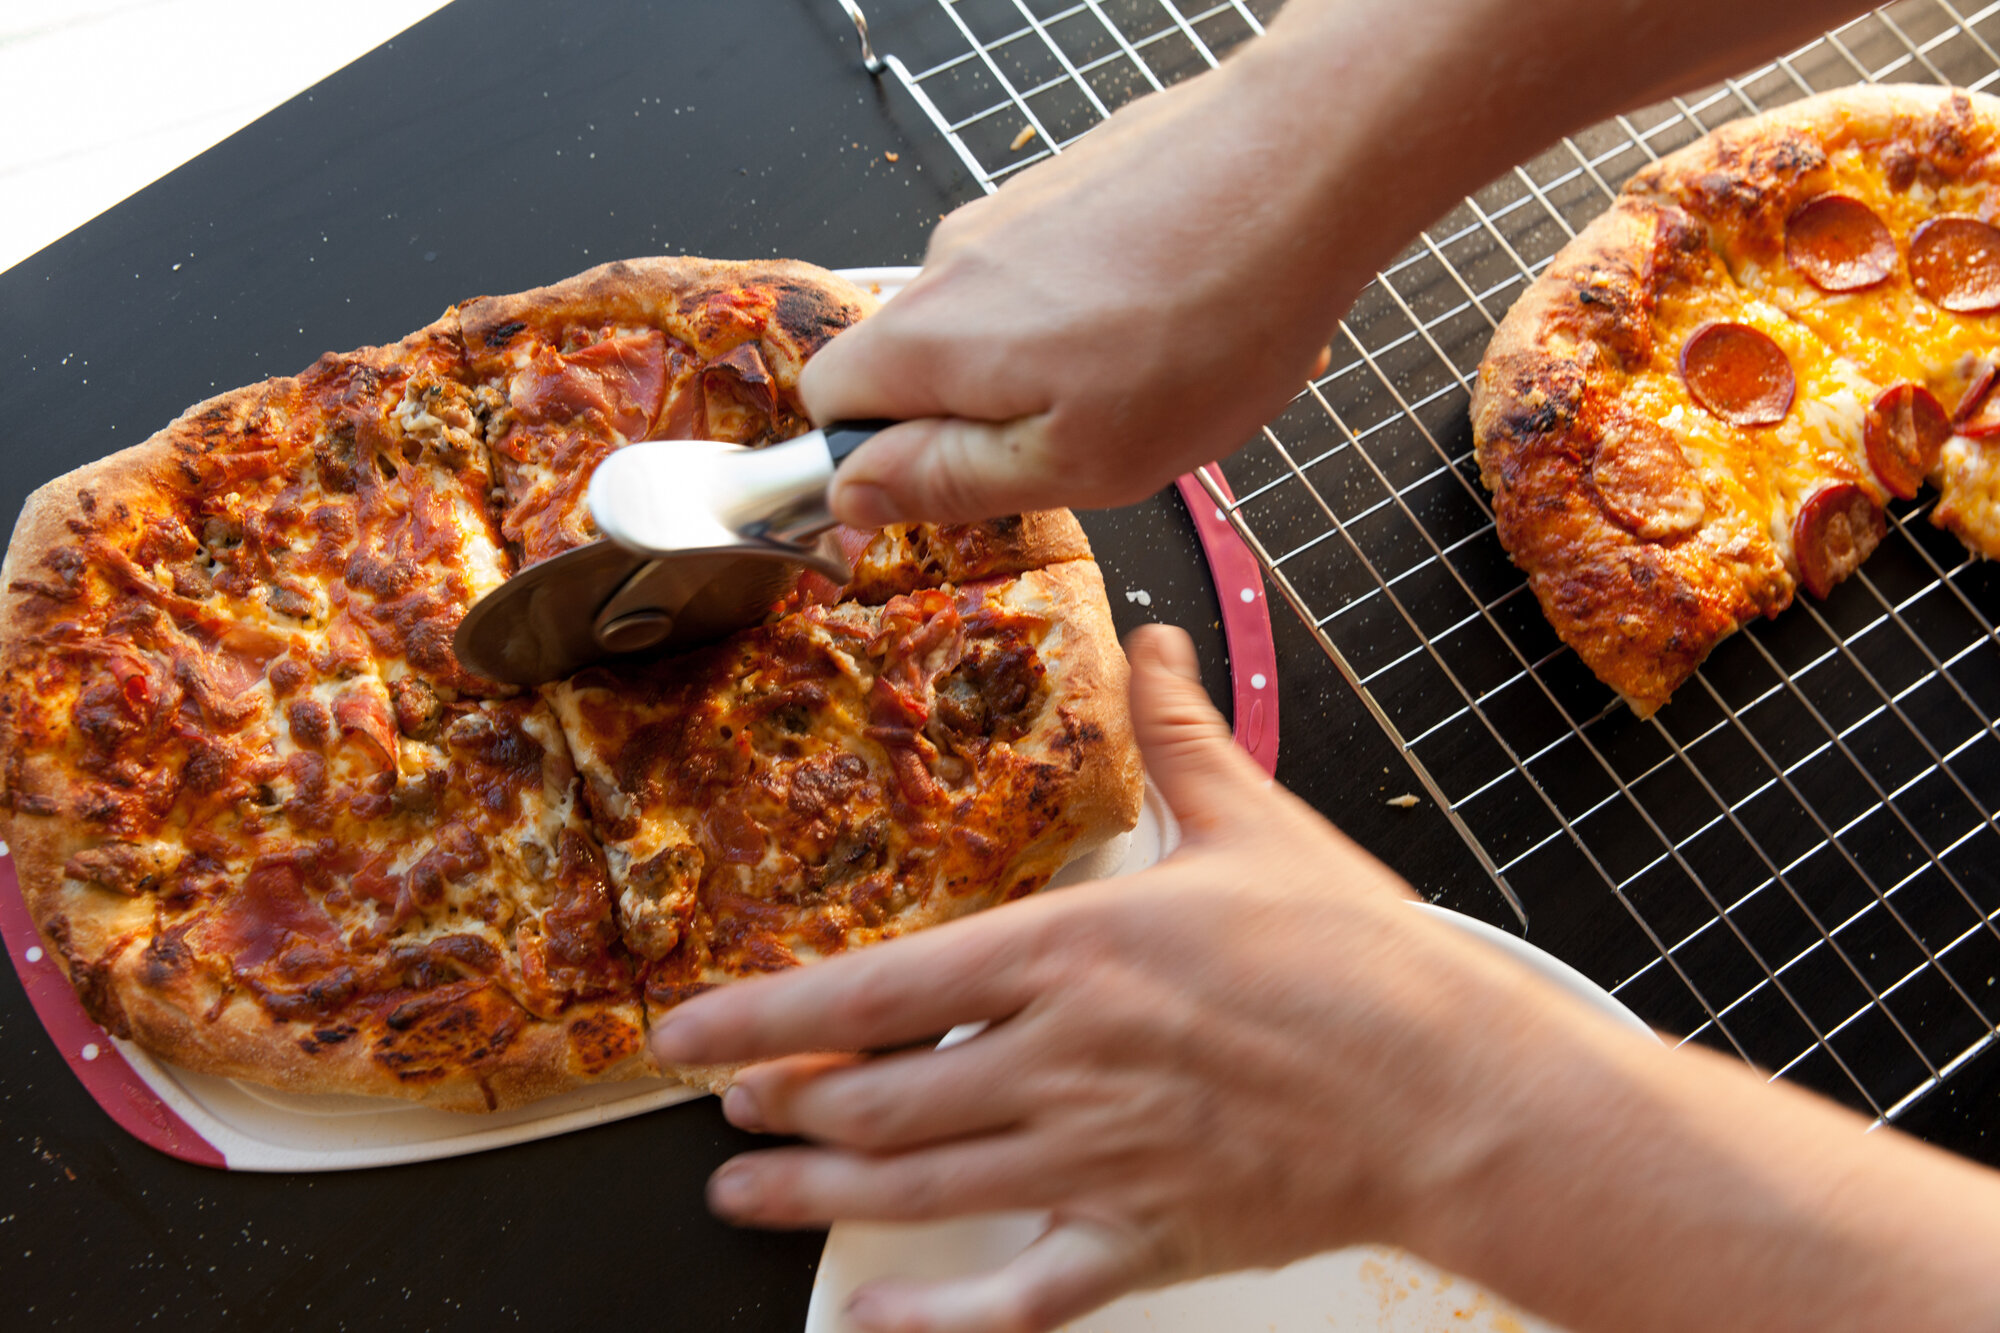
Cook the pizza at the highest temperature that your oven has, and cook for about 5 minutes (watching it the whole time) and with a few mins left after the crust has started to rise, turn the broil on to give the crust some color and cheese a bit more melt.
Every oven is different, and the time of year and your location will make for differences in rise, so write down your progress and take notes – adjusting as you go – to find your best dough and crust.
ENJOY YOUR PIZZA!
Written and Photographed for BC Living
”Five Easy Tips for Making Pizza At Home”
August 5, 2020
“You’ve perfected your banana bread and your sourdough loaves are on point. What’s your next move? Might I suggest stepping up your homemade pizza game
Making pizza at home is easy and lots of fun. Everyone can make their own personal pizza with toppings to suit their own particular tastes. Plus, it’s an engaging family activity and a creative date-night idea.
You could go the easy way and buy pre-made, pre-baked or frozen dough... and you could get the store-bought sauce off the shelf... or pre-shredded cheese and still make a good pizza. But, there are simply ways to make that pizza even more delicious and rival the in-restaurant experience.
Here are a few tips to upgrade your homemade pizza skills, and really wow your crowd (or yourself)...
1. Make your own dough
Fresh dough is something to behold and makes a huge difference in texture. You have many options here. You can use a bread-maker machine to make it easy and still end up with a great taste. Or you can make it by hand and let it rise for a while and use it that day. Or you can use a smaller amount of yeast, and let the fridge do some work for you by letting it sit overnight. This step (called cold-fermenting—kind of like what you have to do with sourdough) means you’ll have to plan your pizza night a day or two ahead, but once you try it, you won’t want to go back. Whichever route you decide to go, you’ll thank yourself when you bite into that crispy, chewy crust!
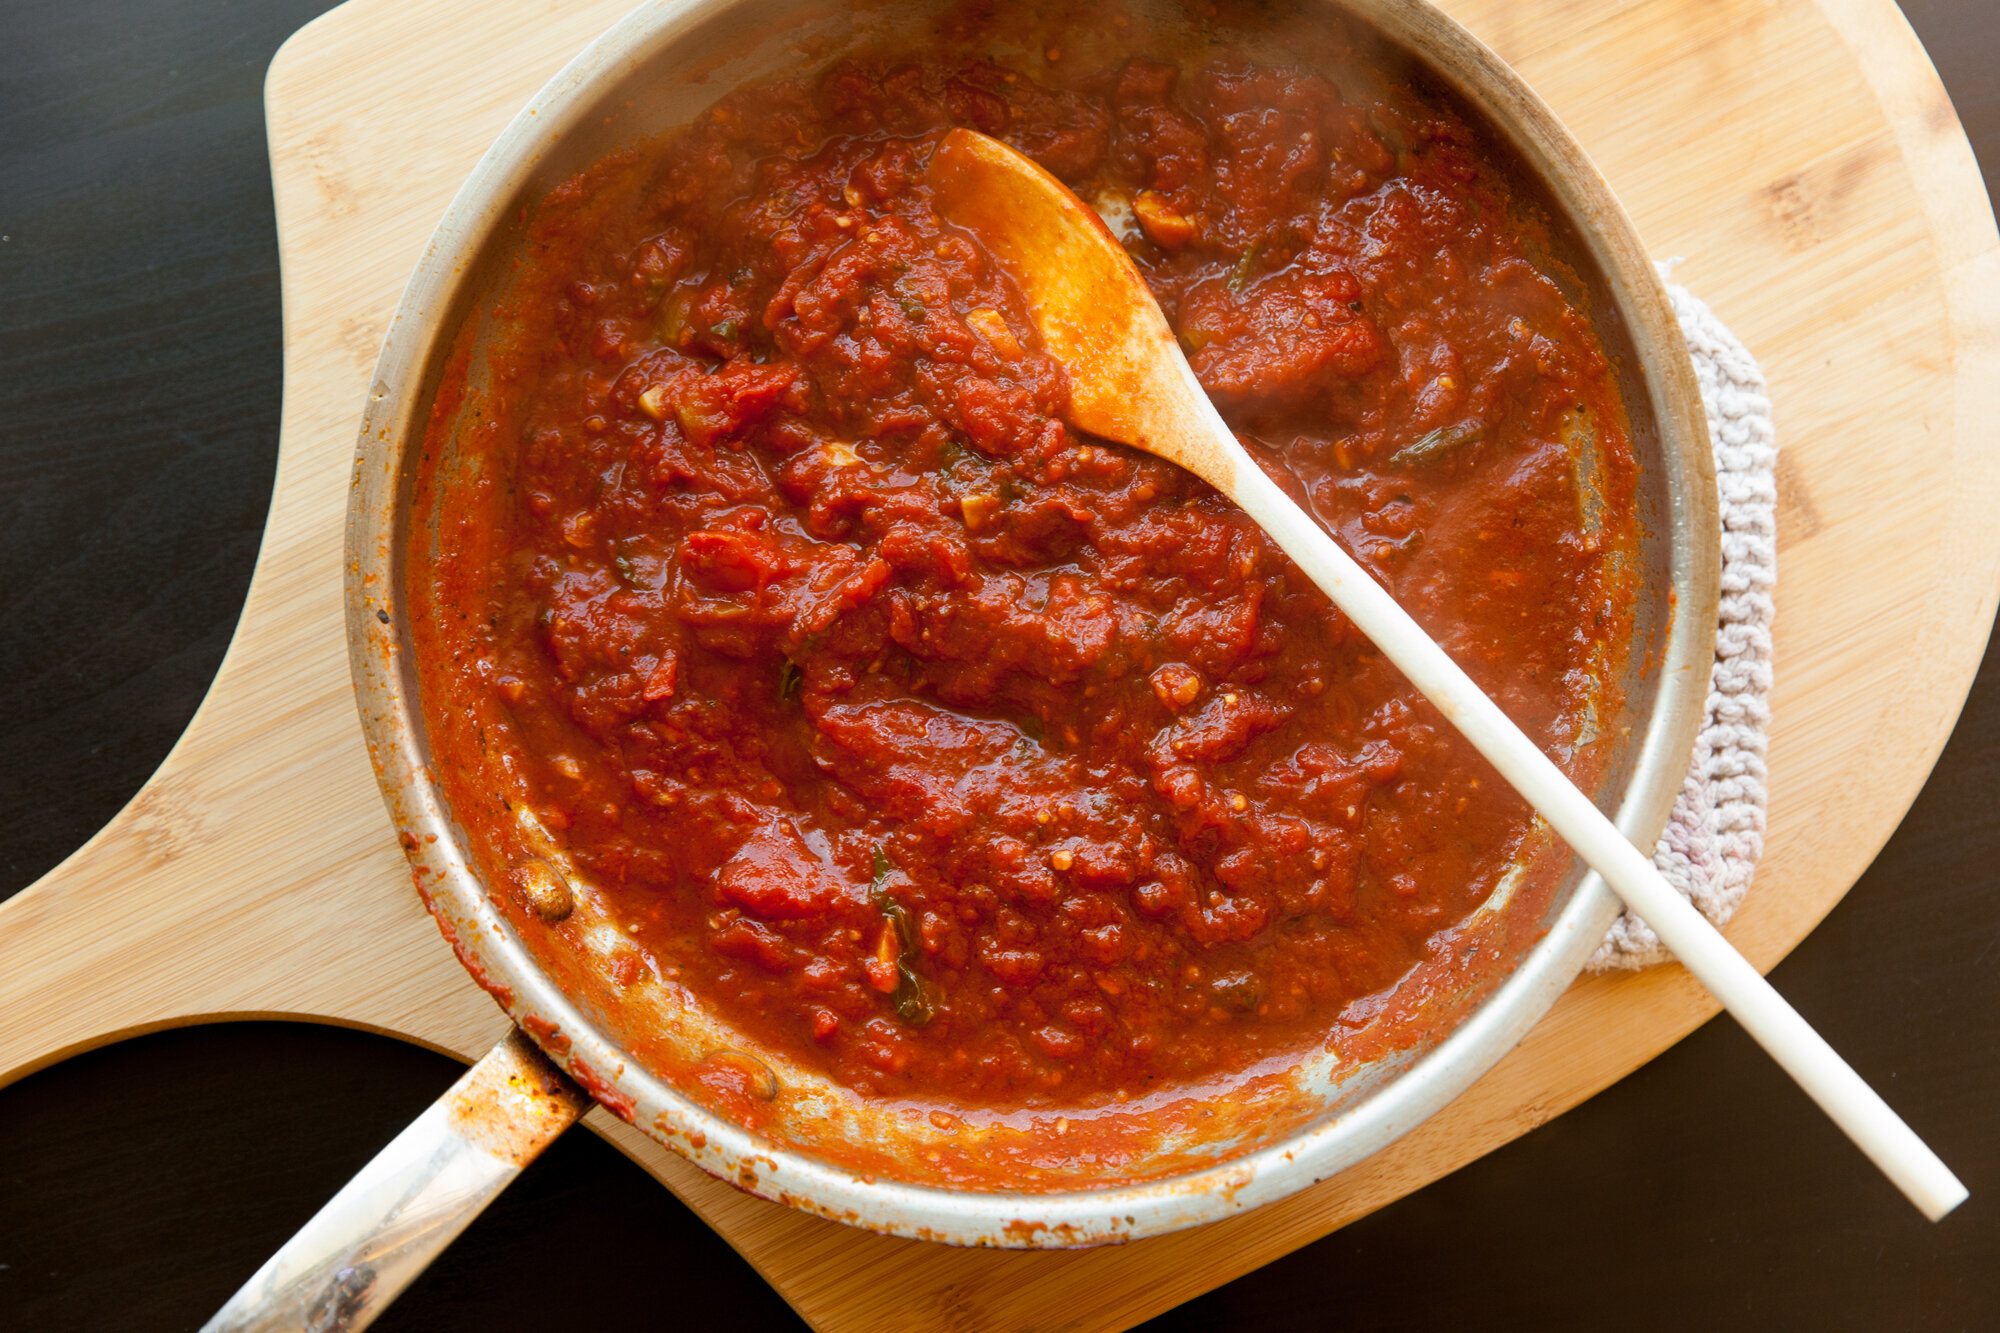
2. Making the sauce
Honestly, it’s so simple, you barely have to pay attention to it, and not only do you end up with a better base for your toppings, you avoid the overly sugary shelf-stable taste. Fresh tomatoes (especially when they’re in season, and you can make a fancy heirloom tomato sauce) work well, but if you get a good can of off-the-vine tomatoes (where that’s the only ingredient), you’re good to go year-round.
Sautée some garlic, add in the tomatoes and a bit of water, shake some spices over it (think salt and pepper, Italian seasoning or oregano), and maybe some fresh basil, and cook it down until, shocker, it’s sauce-like! (At that point you can purée it as well, if you prefer a less chunky sauce.) Make a big enough batch and you can freeze it, and save yourself the step the next time.
Oh, and if you’re feeling ambitious, or have picky eaters, you can also try a white-sauce pizza and make a Bechamel sauce. There are a few pizzas with toppings (mmm funghi with truffle oil) that go really well with a white sauce, which leads me to...
3. Toppings
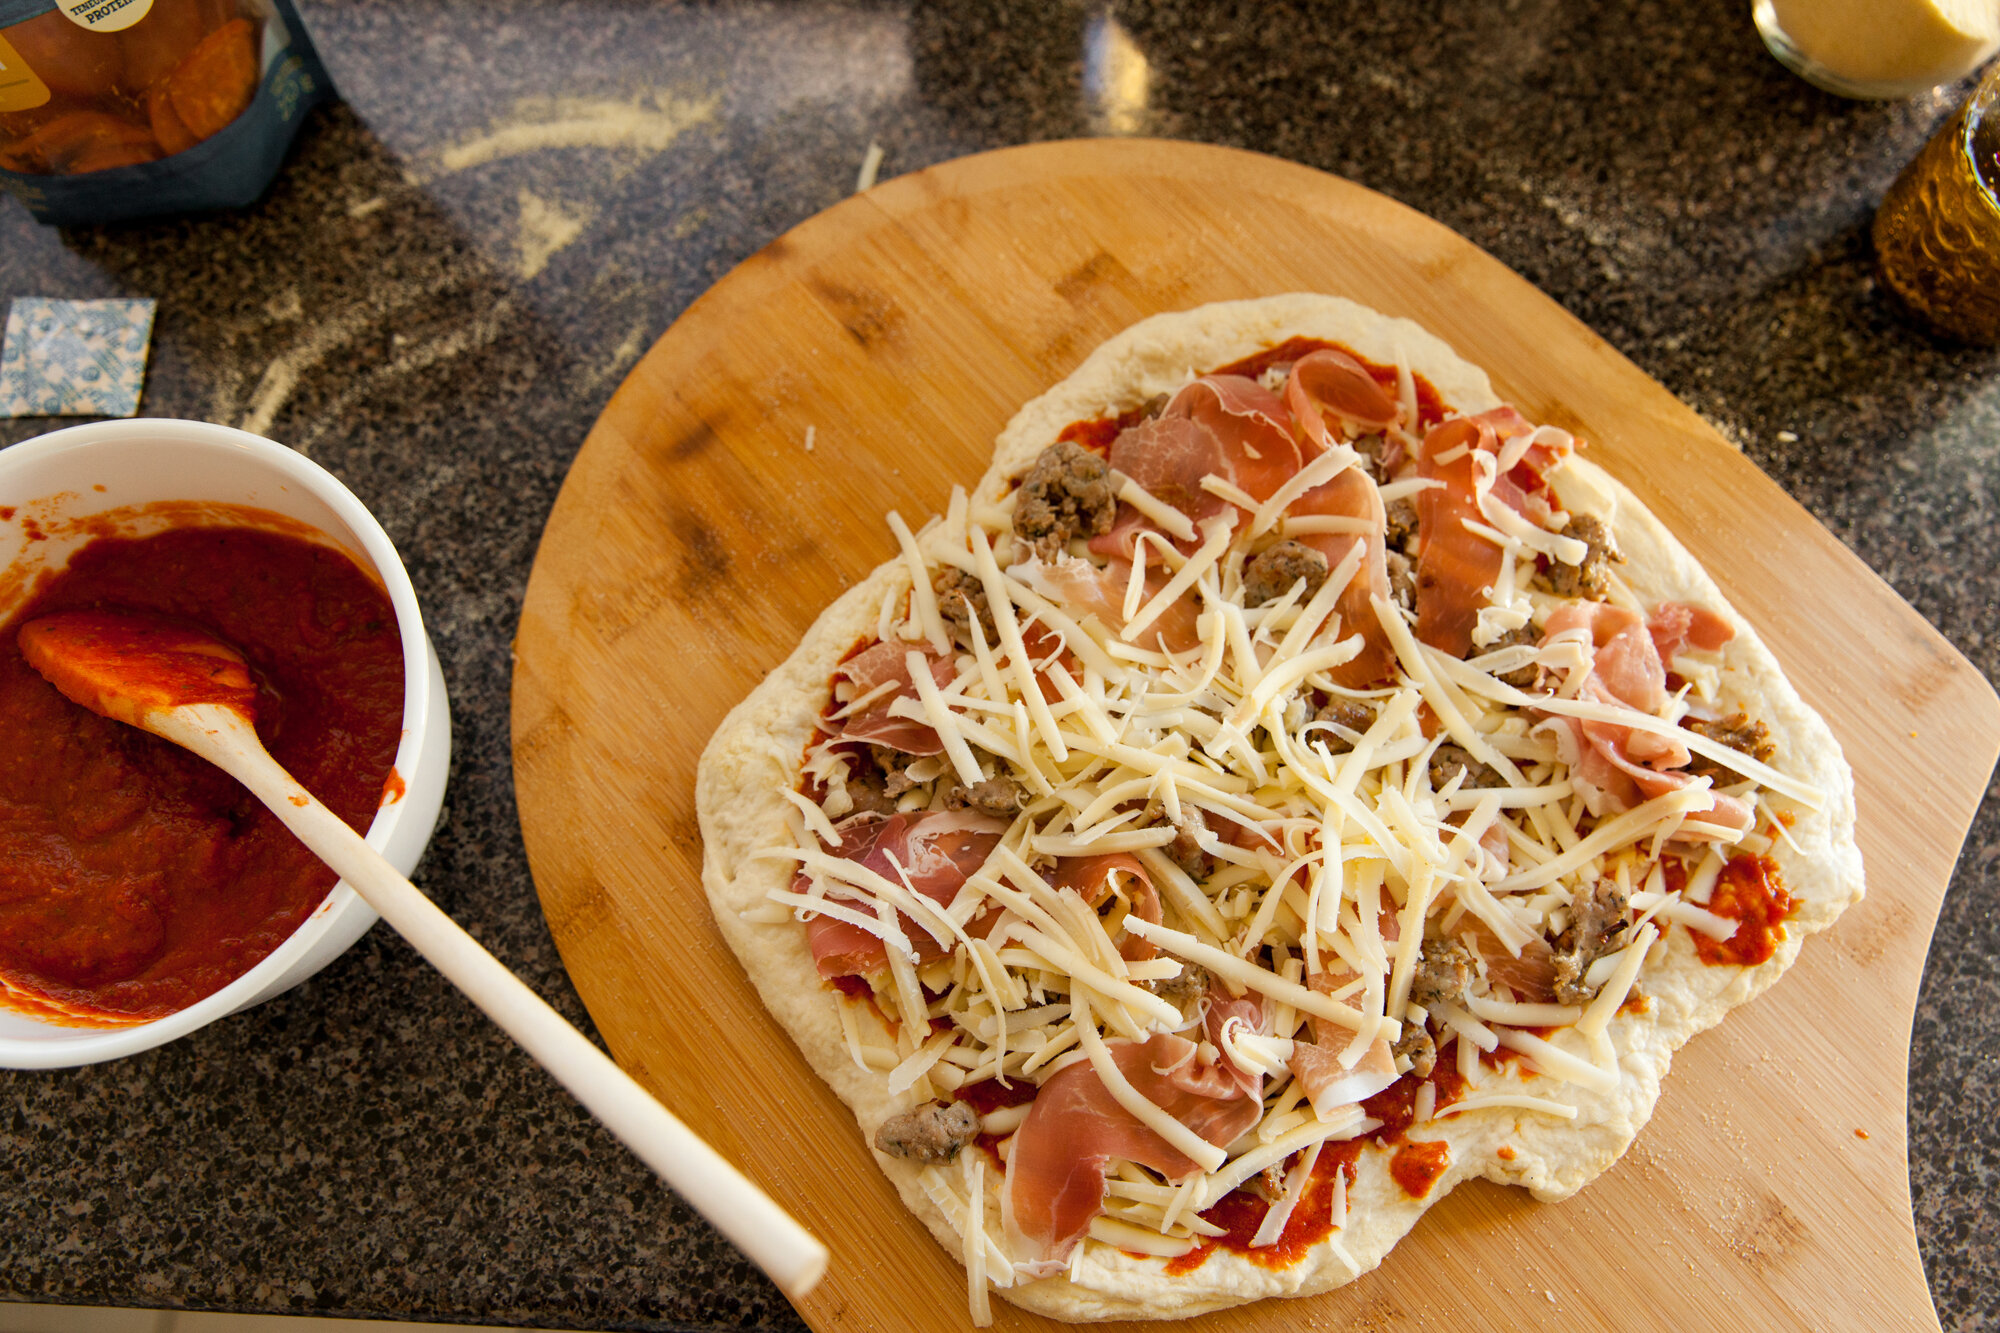
We’ll start with cheese. I know it’s tempting to get the pre-shredded cheese in a bag and save yourself some time, but the starch on them (why they don’t stick together) makes melting difficult and gummy.
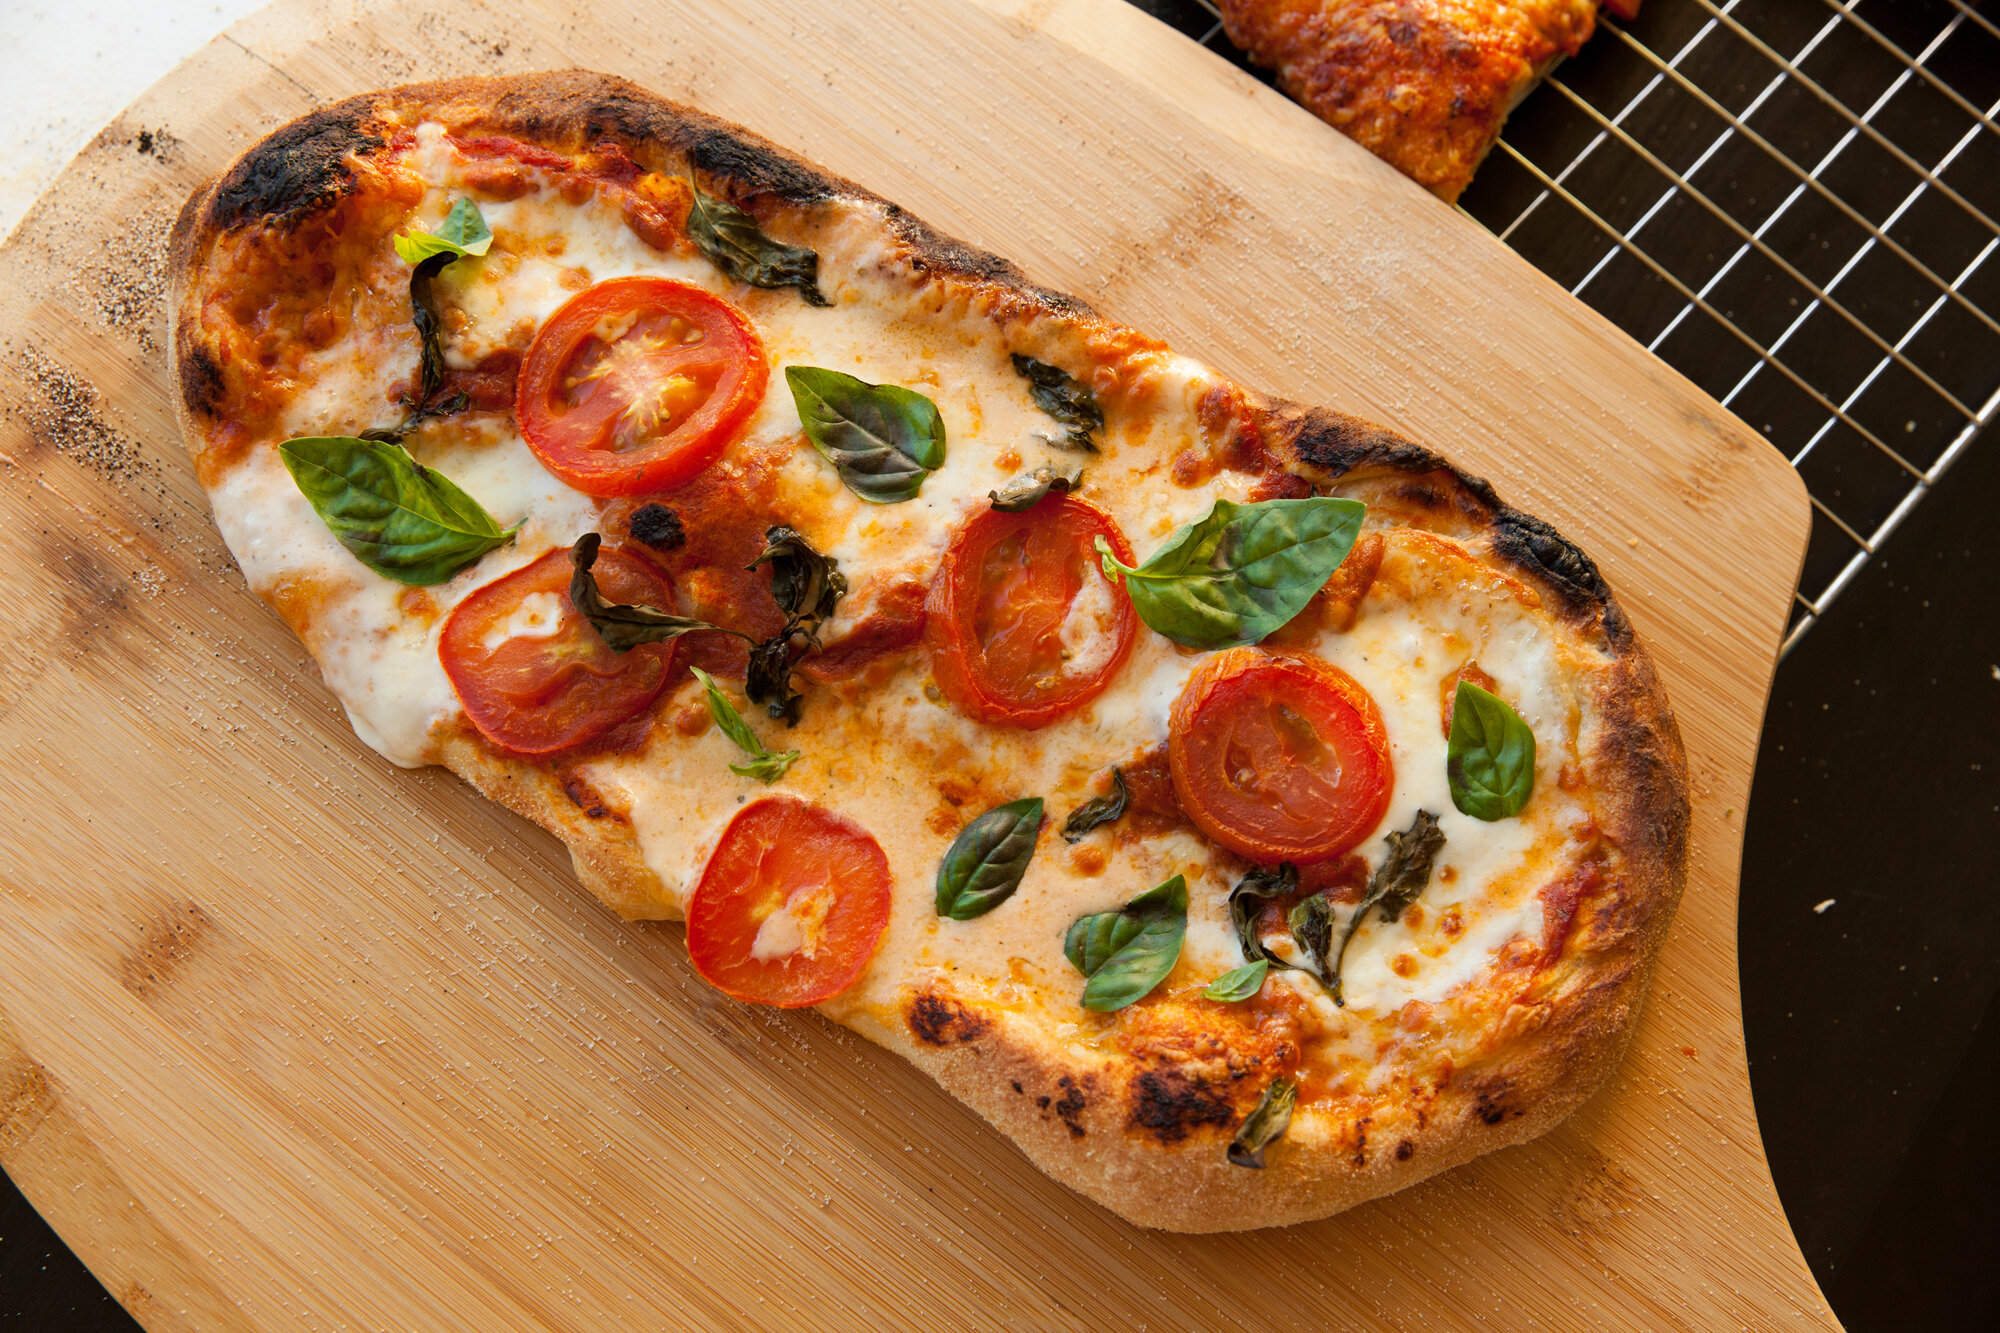
At the very least, shred your own low-moisture mozzarella, or take it a step further and do a combination of a few cheeses that melt easily (havarti and fontina, for example). And if you’re making a margherita pizza, search out fior di latte cheese (or buffalo mozzarella if you can’t find it)—it’s authentic and since the pizza is so simple to start with, you should be using the best ingredients you can find.
When it comes to toppings, many can go right on the pizza, like tomatoes and prosciutto. But throwing on things like raw mushrooms and uncooked meats is going to backfire. You want to cook the pizza at a really high heat (we’ll get into that) and there isn’t enough time for those kinds of toppings to cook thoroughly and become flavourful. Sautée vegetables with a bit of olive oil to soften and bring out juices, and always cook raw meat fully before putting it your crust. That way you’re not over-cooking the pizza to try and get the toppings finished.
4. Turn it up!
I’ve learned in the process of my pizza experiments that if you crank your oven as high as it goes, and if you’ve done everything right with your dough and toppings, it’s going to make the biggest difference. It all depends how hot you can get your oven (and if you follow one of the suggestions in tip no. 5 below), but it should only take a few minutes to cook your pizza.
I’ve worked at 500 degrees the last few times and even if the pizza is a weird shape (it happens) or even if the dough isn’t homemade, it usually turns out beautifully.
Another hot tip (get it?) is to turn the broil on for the last minute or so (you just have to keep an eye on it the whole time, which you should be doing anyway). This will give the top of the pizza a bit of extra attention and melt-time, and because we don’t all have wood-fired ovens in our kitchens or yards, it will help fully surround the pizza with heat.
Another idea is to cook it on the barbecue, as that can get even hotter than the oven, but that will require an extra tool for sure (or else the mess potential is high), which is what the next tip is all about.
5. Try a pizza stone
Seriously it’s a game changer. The stone goes in when you pre-heat the oven and absorbs the heat as it rises. It helps keep the oven temperature even, and when you slide your pizza on, it’s cooking from the bottom, top and surroundings. You can bake other items on this too (bread, quesadillas, pita), so it’s not just a one-trick kitchen toy, and helps regulate heat when you’re baking things that can’t go directly on it.
The best accessory to go with this is a pizza peel. Assemble the pizza, throw down some cornmeal or semolina flour on the peel, place it on and it will slide right off on to the stone (the same when it comes out). Then you’re not dealing with trying to handle 500-degree stones while taking your pizza out. It helps get an assembly line going when you’re making multiple pizzas as well.
For something different, toss (well, place gently) the pizza stone on the barbecue and try cooking your pizza on there. You lose the ability to broil, but because the ‘cue can usually get hotter than an oven, the cook time is about the same. Plus, it’s just a fun idea to make a barbecue pizza!
Like most things in the world of baking and cooking, it may take a few tries to get it perfect. So, start with even just one of these tips, and you’ll slowly add another skill to your repertoire—or at the very least look like it on Instagram.”
When you get strangers to hand model for you while you set up a shot…
for Vancity Credit Union
September 18, 2018

Another shot from a Dine Out Vancouver Festival meal.
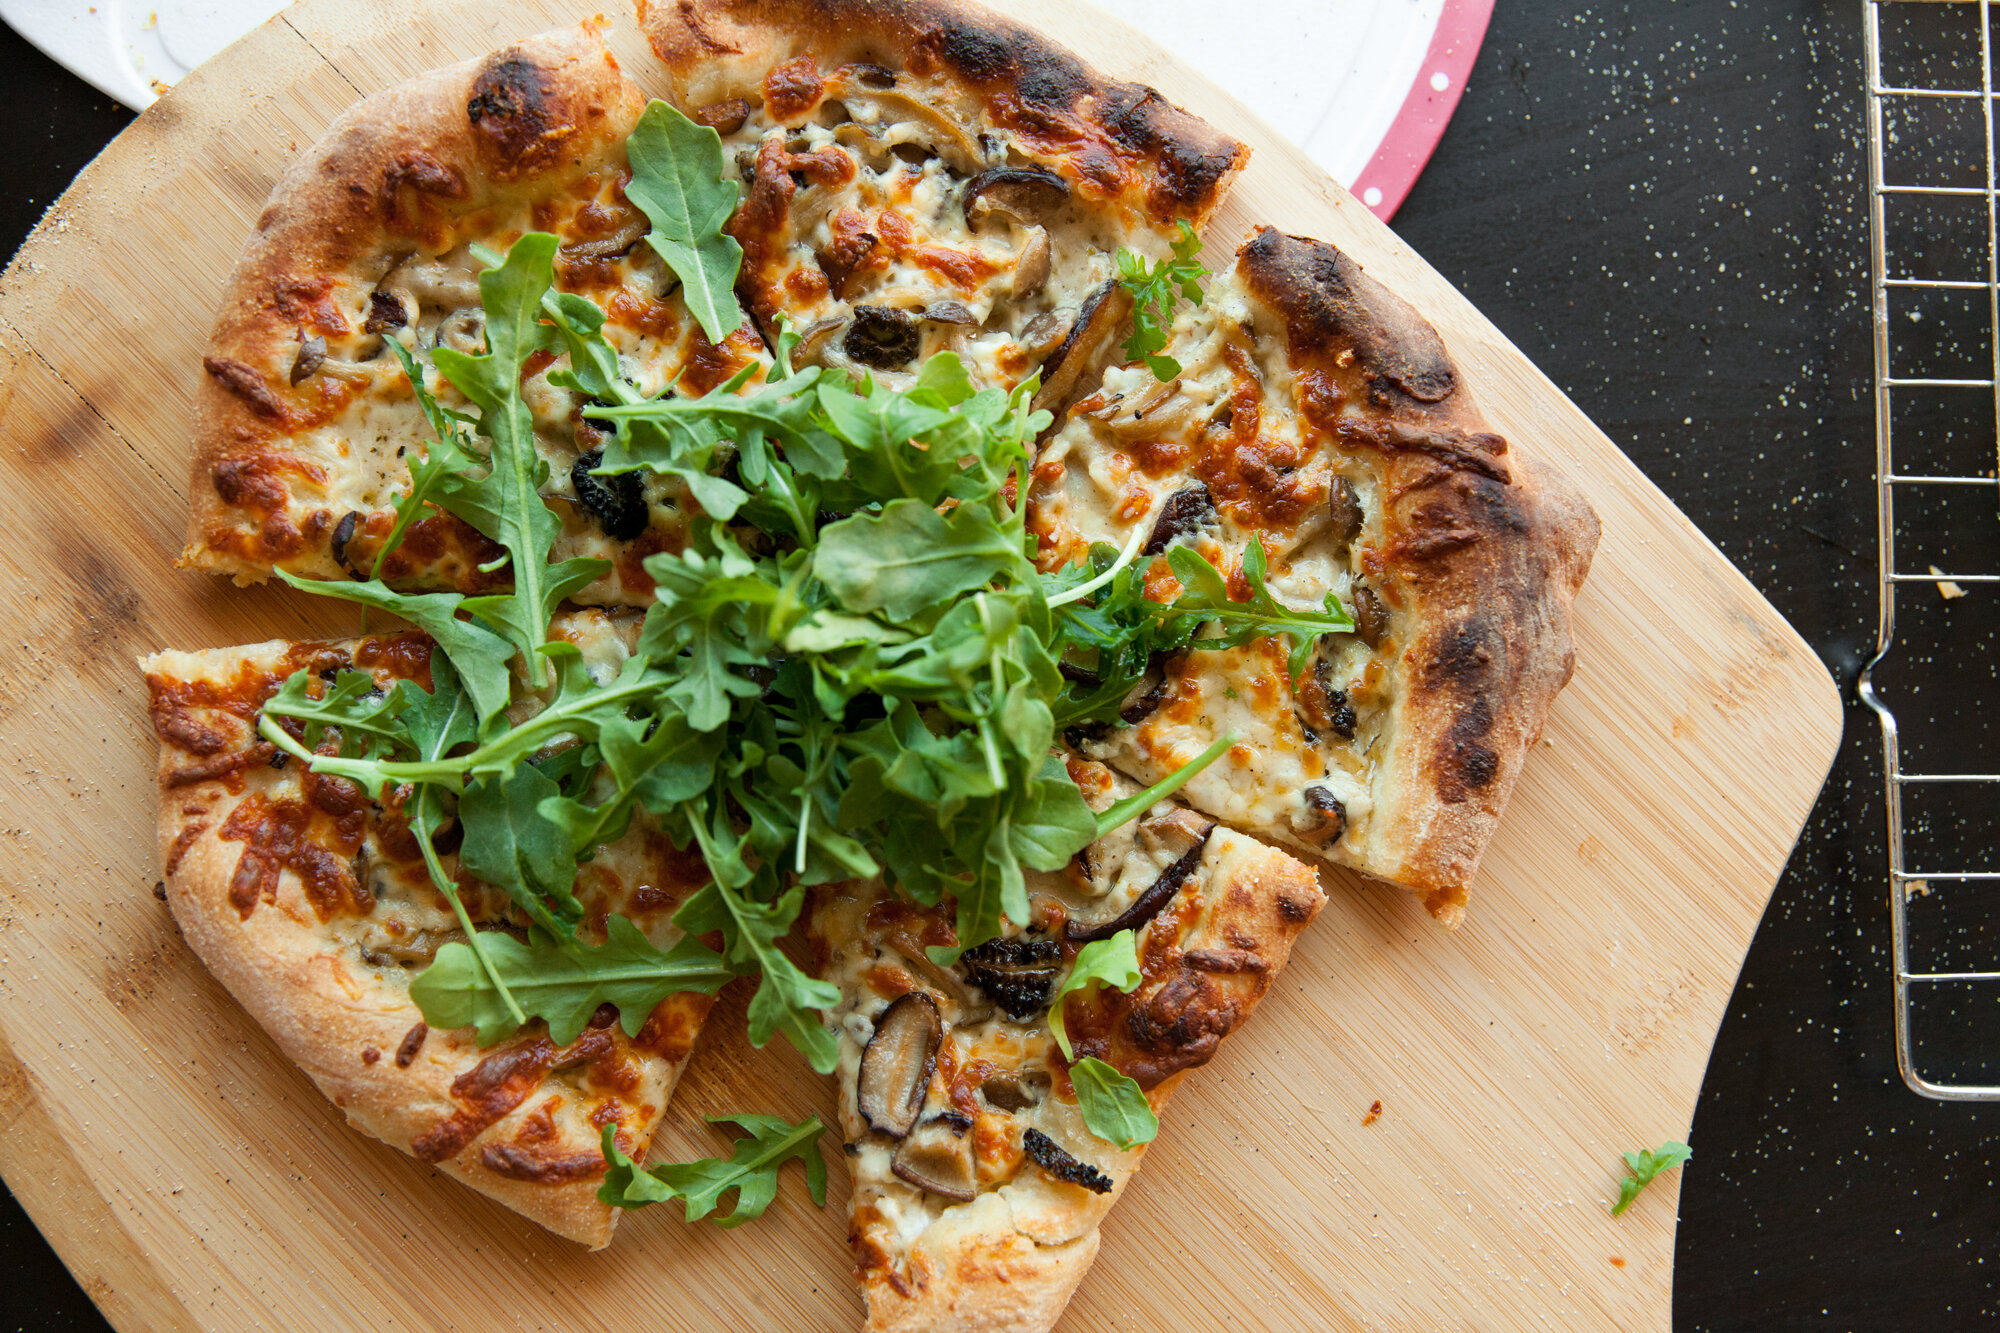
Funghi Pizza from Bufala
Click here to see the whole post/more photos on the Barre Fitness blog.
Follow me on Social Media